Showing posts with label Festival Recipes. Show all posts

Monday, January 5, 2015

Thiruvadhirai Kali - To Nutty with Love!


Today is Thiruvadhirai - a day of special celebration, worship, and feasting at all Shaivite shrines in South India; and Tamil Nadu in particular. Even though the asterism of Thiruvadhirai occurs once in every 27 days, its occurrence during the Tamil month of Maargazhi (Mid-December to Mid-January) is observed with much grandeur. It is said to be the day when Shiva answered the prayers of the saints Vyagrapaada and Patanjali, and blessed them with a vision of His cosmic dance. The grandest of these celebrations are observed at the Shrine of Chidambaram where Shiva appears as Nataraja (AKA Nutty), the Lord of Dance, housed in a hall roofed with golden tiles. The festivities begin at 2 in the early morning when the murti (idon/idol) of Nataraja (Yes, the same bronze masterpiece whose replicas are seen worldwide from the CERN campus to the humblest of homes) is bathed in fragrant powders, followed by a procession around the temple to the tune of several instruments. Several hours after being woken up at an unearthly 2AM, He is finally offered a large cauldron of something that looks like mashed Sakkarai Pongal. This is the famed Kali, that is offered just once a year to Nataraja, and like all off-the-beat temple offerings, has its own small tale.

Chendanaar was a poor but pious inhabitant of the hallowed town of Chidambaram. Like all devout Shaivas of yore, he had inculcated a practice of partaking his mid-day meal only after sharing a portion of it with another Sivanadiyaar (One who offers himself to Shiva). One year, on the day preceding Thiruvadhirai, severe rains had driven people indoors. As a result, Chendanaar's wife had no opportunity to collect the necessary resources for the meal. So, when a Sivanadiyaar showed up at their doorstep in the pouring rain, they had no choice but to serve him a quick, frugal meal of rice flour cooked in jaggery syrup. Greatly saddened by their assumed inhospitality, the couple turned up early at the shrine on the day of Thiruvadhirai. When the priest finally opened up the sanctum for worship, Nataraja stood there, dancing in bliss as always, but with a smattering of Chendanaar's Rice-Jaggery paste across His lips, while scattered Kali lay all over the floor. Chendanaar's eyes welled up at the revelation of his guest being Shiva Himself, while his wife related the incident to others amidst supressed sobs of humility, wonder, and satisfaction. Ever since, the humble Kali has become a staple offering for Nataraja not only at Chidambaram, but also at everyone's homes on Thiruvadhirai. The touching tale brings to one's mind Krishna's words in the Gita :

patram pushpam phalam tOyam, yO mE bhaktyA prayacchatI
tad aham baktyupAhrtam ashnAmi payatyAtmanah.
"If a person offers to me with love and devotion, even a leaf, a flower, a fruit or water
I accept wholeheartedly, that offering made by the pure-hearted being"

It is not the offering that is so important as the spirit in which it is made. With that small thought in mind, lets dive into the recipe.

THIRUVADHIRAI KALI (Serves 2)
Set-up Time :  10 minutes
Experiment Run-Time : 25 minutes

The Shopping List

          Set 1: For the Kali
          Raw Rice : 1/3 Cup
          Moong Dal (Dehusked Green Gram) : 1 Tbsp
          Jaggery/ Brown Sugar : 1/2 Cup, powdered
          Grated Coconut : 1/3 Cup

          Set 2: For the Drool Factor
          Cashew-nuts : about 6, broken
          Cardamom Powder : 1 tsp
          Ghee : 2 Tbsp

Methodology

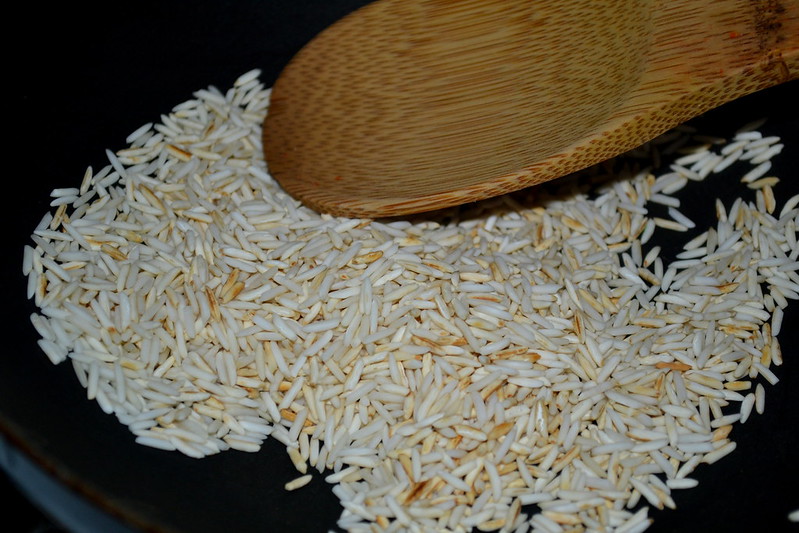
1. In a wide pan, fry the rice on a medium flame until it gives off a nutty aroma and turns a delicate shade of brown. Please, let it be a delicate shade of brown and not the much coveted chocolate brown!

DSC_1648

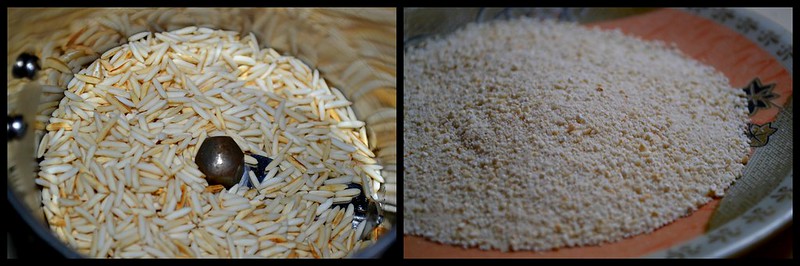
2. Cool it sufficiently (which I always lack the patience to do) and grind it a coarse powder in a blender. A few pulses are usually enough!

Thiruvaadhirai Kali

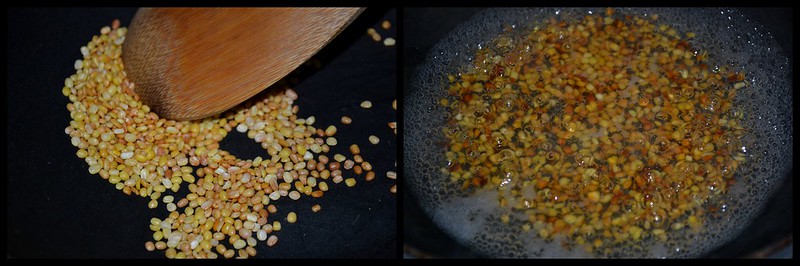
3. In the same pan, fry the Moong Dal until it too starts acquiring a golden-brown hue. Pour in a cup of cold water and watch the Dals dance merrily as it comes to a boil.

Thiruvaadhirai Kali1

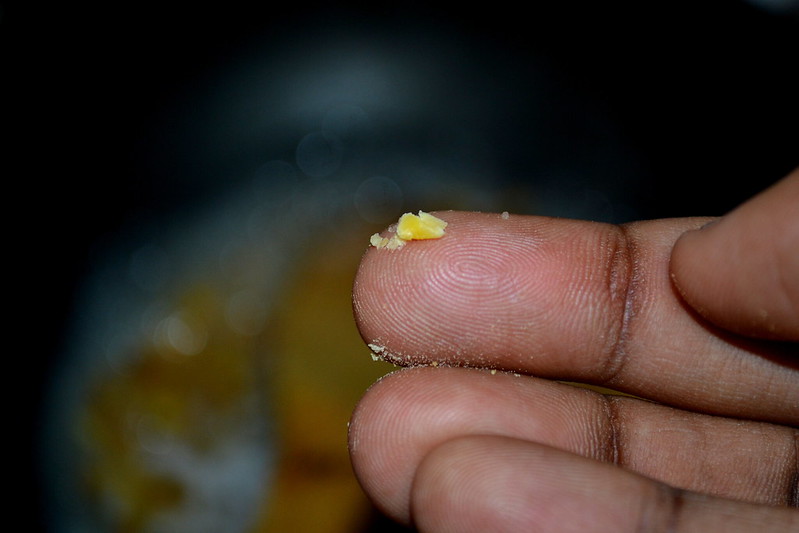
4. Check the Dal in about 10 minutes. It should almost be there. If you tried to squash one between your thumb and forefinger it should give in but with a little resistance.

DSC_1654

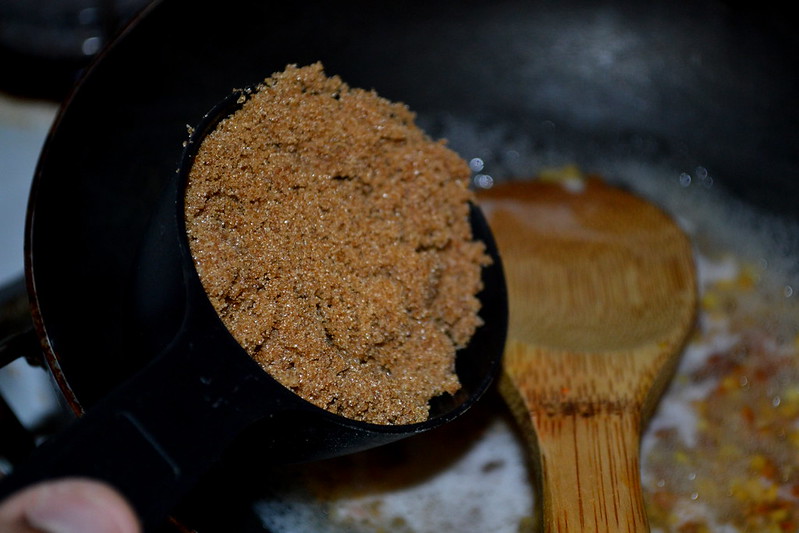
5. Once convinced about the consistency of the Dal, add the powdered Jaggery (Or brown sugars, as I sometimes tend to substitute) into the pan with about 2 cups of water. Let it come to a boil on medium flame 

(If you live within the subcontinent, it would be worth to dissolve the Jaggery in some warm water, filter it, and then proceed with the solution at hand)

DSC_1655

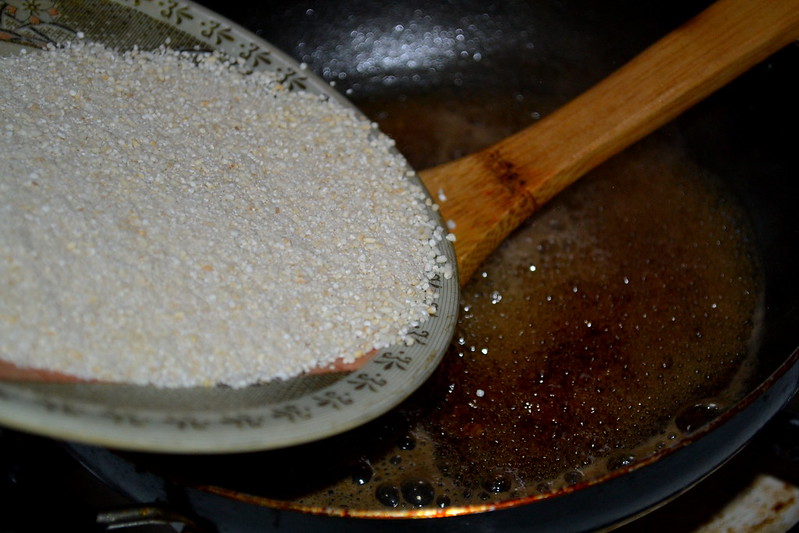
6. When the Jaggery syrup starts to boil, tip in the powdered rice and start to stir until the rice particles are mixed well into the syrup.

DSC_1661

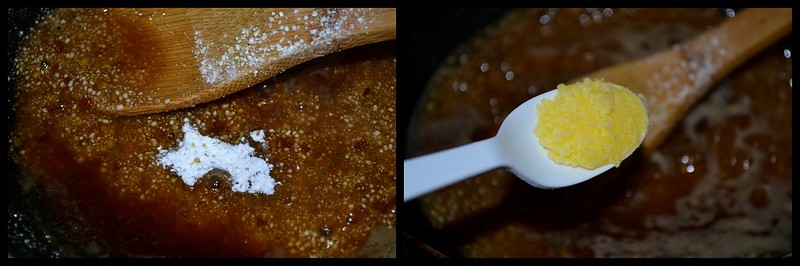
7. Add a tablespoon of ghee and some cardamom powder and watch them get absorbed by the now spluttering mass.

Thiruvaadhirai Kali2

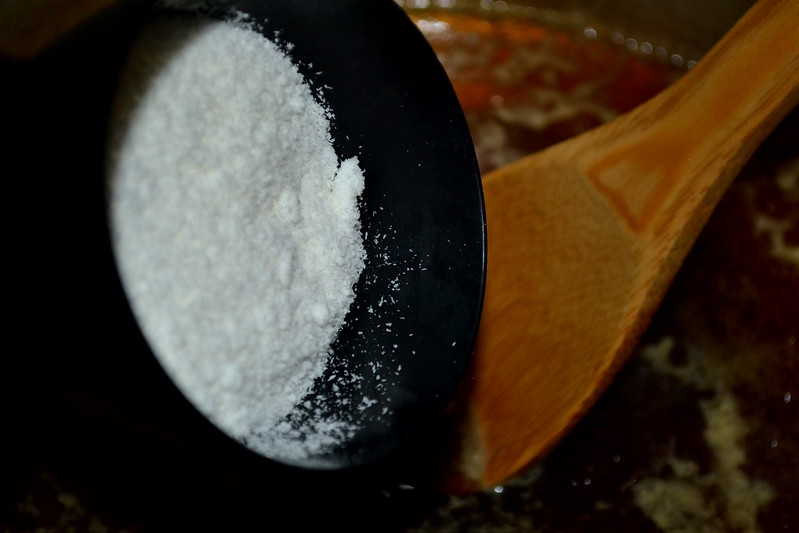
8. Finally, add the grated coconut and incorporate it into the Kali.

DSC_0189

9. In a separate pan, heat the rest of the ghee and fry the cashew-nuts to a golden shade.
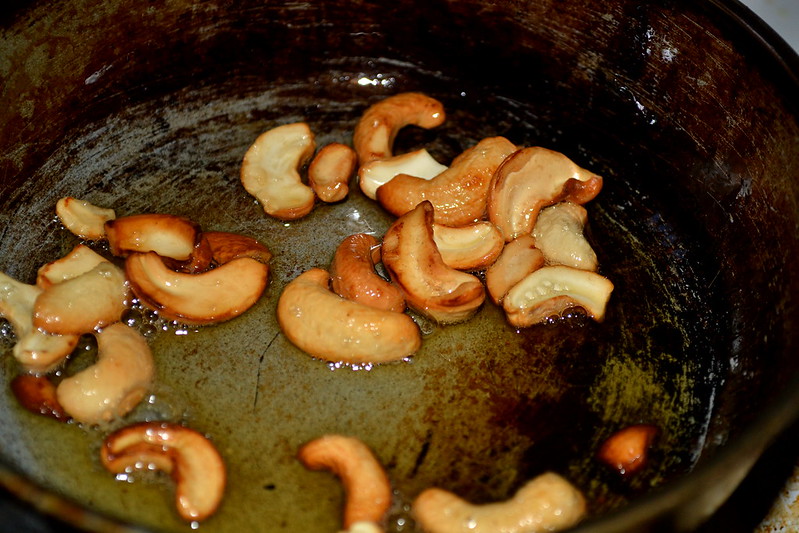

DSC_0197

10. When the nuts are done, add them to the spluttering Kali, ghee and all.
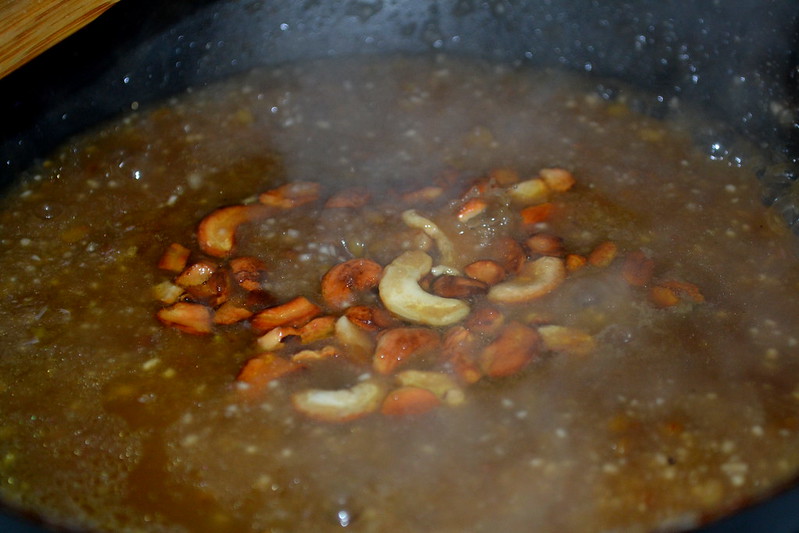

DSC_1670

11. When the paste starts to leave the sides of the pan, it is done. Scoop it all up into a bowl and proceed with either your worship or your devouring!
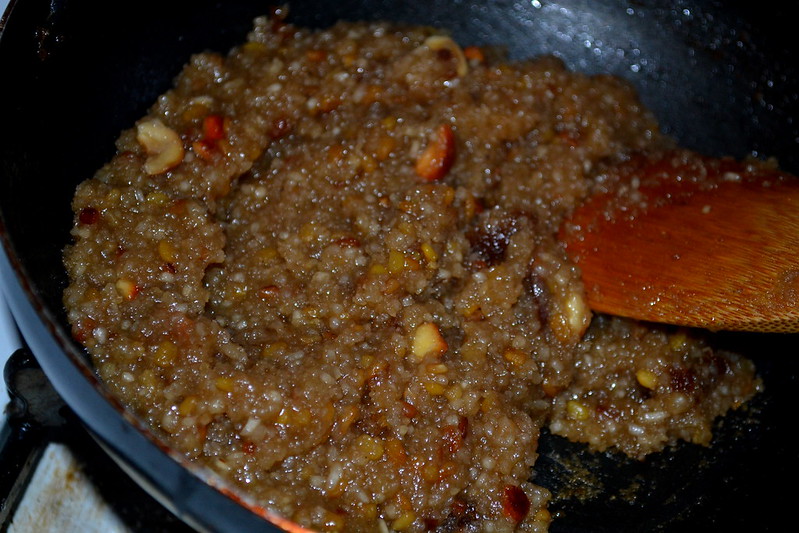
DSC_1672

Traditionally, the Kali is accompanied by an Ezhu-Kari Kootu, a yummy Sambhar like medley of seven vegetables. But, Hello! Where am I to go for Avarakkai, Yam, Colocasia, Mochai and the rest of the veggies in the middle of an Ohio winter? So the Nataraja at my home got served only the Kali sans the Kootu. It saddens me a little, but then again, let us all remember Krishna's words in the Gita and make up for the lack of Ezhu-Kari with a little more sincerity, devotion and love!
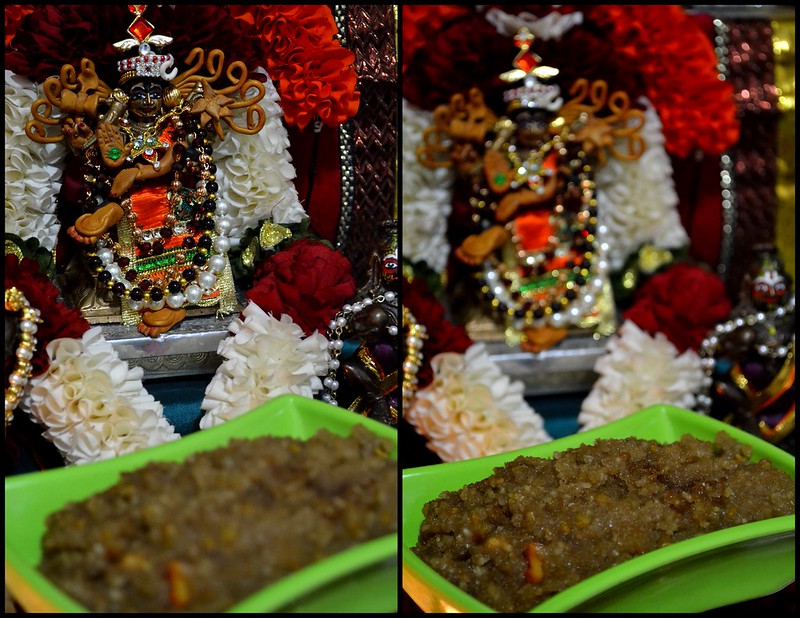
Thiruvaadhirai Kali3

Monday, March 25, 2013

Poosanikkai Morekuzhambu - True Test of Translucency


My tryst with the Morekuzhambu is almost as old as me, or so I think. I sure do have memories of my grandmother making Morekuzhambu on festival days, particularly on Amavasais (the New-Moon day), when respects were offered to one's forefather's. She used to make piping hot Vadais from fresh batter painstakingly ground at the humongous mortar-pestle and soak them in the Morekuzhambu The combination of the subtly spiced Morekuzhambu melding with the crispy-soggy Vadais created fireworks in one's mouth, forcing us to go for fifth and sixth helpings. Unfortunately, my mother, supremely talented as she is in the kitchen, however, failed to inherit this skill of making the perfect Morekuzhambu from her mother. But fortunately, the lack of expertise was only a passing cloud. Enter Jayashree Aunty, my mother's good friend from work. I believe, to this day, that she is one unconquered expert in the field of Tambrahm Cuisine. Right from the Adai's made for Kaaradayaan Nonbu to my favorite Kalyana Rasam, I fell hook, line, and sinker for her dishes. So, one day, after exchanging notes with Jayashree Aunty, my mother decided to have another go at the elusive Morekuzhambu and voilà, there was that perfect dish, close enough to my grandmom's version. There was no looking back ever since, and ever so often, we were treated to different varieties of the once-hard-to-make delicacy.

Fast-forwarding about 7 years, I was lying on a crumpled comforter at my home in the US, when a sudden desire to eat Morekuzhambu sprouted in the depths of my hopelessly-gastronomic mind (FYI, my emotional-hunger attacks are pretty adamant.) . And who else to call than Jayashree Aunty, who explained the apparently simple recipe with great patience. The result - disaster. The yogurt sold at the local supermarket was sweet, my blender was incapable of making a fine paste and I realised that jalapenos are no match for our desi-green chilies. But I learnt from my mistakes, and today, I can make one helluva Morekuzhambu, be it with Vadais or Ladies-Finger or Colocasia. The recipe below describes the simple steps leading up to one very tasty version of Morekuzhambu made with Ashgourd (Vellai Poosanikkai). Though the recipe predominantly follows Aunty's time-tested methods, I have suggested the use of Amchur powder to impart that sour edge to the buttermilk/curds, which is near impossible to achieve naturally with the weather conditions in the US. 

POOSANIKKAI MOREKUZHAMBU (Serves 4-6) 
Set-up Time : 30 minutes
Experiment Run-Time : 20 minutes

The Shopping List

          Set 1: Flavoring Paste
          Coriander Seeds : 2 Tbsp
          Cumin Seeds : 2 tsp
          Green Chilies : 6-8 depending on spice level
          Coconut Gratings : 1/2 cup
          Toor Dal : 1 Tbsp
          Rice : 1 tsp
          Thick Buttermilk/Whipped Curds : 2-3 Tbsp 
          
          Set 2: Veggies and More
          Ash Gourd : 2 cups, cut into half-inch cubes
          Thick Buttermilk/Whipped Curds : 3 Cups
          Turmeric Powder : 1 tsp
          Amchur Powder : 1 tsp
          Vegetable Oil : 2 Tbsp
          Salt : As required

          Set 3: Seasonings
          Mustard Seeds : 1 tsp
          Asafoetida : a generous pinch
          Red Chilies : 2, broken in half
          Curry Leaves : One strand
          Coconut Oil : 1 tbsp (One may use Vegetable oil too)

Methodology

1. Soak the Toor Dal and Rice from Set 1 in warm water for 20 minutes. Drain and grind to a fine paste with the rest of the ingredients in Set 1. Use buttermilk/curd instead of water to facilitate grinding. Jayashree Aunty said that this enhances the flavors from the ground paste.


Poosanikkai Morekuzhambu

2. In a heavy-bottomed pan, pour the oil and once heated, add turmeric powder, salt and the ash gourd pieces. Sauté gently, adding water at regular intervals until the ash gourd pieces are thoroughly cooked. Though additional salt is often used to quicken the process, I have always been taught that patience is one of the best virtues that one can possess in the kitchen.


Poosanikkai Morekuzhambu1

3. In a separate pot, mix the Buttermilk from Set 2 with the ground paste along with Amchur Powder and salt. Do remember that salt has already been added to the ash gourd and hence use it judiciously.

DSC_0518

4. Pour this buttermilk mixture into the pan containing the cooked vegetable and heat it slowly. The pale-green buttermilk will take on a yellow hue from the turmeric present in the ash gourd. When it shows signs of boiling, immediately remove the pan from the heat and keep it aside.

DSC_0533

5. In a smaller seasoning pan, add the coconut oil and once it heats up, add the seasonings in Set 3, one after another. When the mustard seeds begin to crackle, take the pan off the flame. Allow the seasoning mix to cool a bit before adding to the Morekuzhambu. And the dish is done! Fairly simple right?

DSC_0547
     
Morekuzhambu goes well with almost any spicy curry. I often pair it up with Potato Fry, Mango Pickle and Spinach among several other combinations. However, by Mylapore-Triplicane standards, Paruppu Usili is unarguably the best accompaniment for Morekuzhambu. The Tambrahms swear by this nearly-divine combination and many a war have been fought to decide which of the many Paruppu Usilis reign supreme as the perfect side to the Kuzhambu. 

DSC_0556
Aaah... Nectarine Bliss! Morekuzhambu Vadai
I also use a variety of other vegetables to make the dish (a few of which have been given below), but Poosanikkai remains my unchallenged favorite. As Chandrasekar said, the joy attained in picking up one piece of Poosanikkai from the Kuzhambu and holding it up against the light, only to see the rays passing through its translucent body, is unparalleled.  It is the True Test of Translucency.

Notes :

a. To make Colacasia Morekuzhambu, pressure cook the Colocasia till soft, cut into half-inch pieces and substitute it for ash gourd in the above recipe.
b. Thinly cut rounds of Ladies-Finger, seasoned with turmeric and salt, and shallow fried in oil can also be added instead of the ash gourd in the given recipe.
c. Dried Turkey Berries (Sundakkai Vatral), Chow-Chow, and Spinach are other vegetables that maybe used in lieu of ash gourd  

Monday, January 14, 2013

Ksheerannam - Heaven in every spoonful!

DSC_0273
    
So, as it happens in every grad's life, I hit the sack at 4 AM last night. A look at the cellphone through heavy eyelids, a few seconds later, showed the time to be 10:27 AM. Panic! It was Pongal and I had a class at 1:30, a meeting with my adviser at 3 (which requires a minimum two hours of self-pep talk) and I had to make Pongal and offer it to the Sun, before noon. But when I hot the shower, a minute later, my mind refused to think about the class, the assignments, my adviser or the related pep-talk. It was rather going over the various varieties of Pongals that one could make on such a short notice. "Sakkara Pongal (duh.. you made Akkaara Adisal three days ago), Ven Pongal (Add an extra 30 minutes for Sambhar!), Kalkandu Pongal (Now, where do I get sugar candy at this time?)... Paal Pongal (Ingredients : check, eligibility for pooja : check, Time : ?)

Nevertheless, 5 minutes later (yes, a bath can be THAT short!), I was pouring milk into the vessel, getting ready to make Paal Pongal, also called Ksheerannam (Rice with milk) or Paramaannam (Food of the Gods). What started out as an effort to make it to college on time, went on for 75 minutes, gave time for 30 minutes of self-pep talk, and ended with a terrific meeting with my adviser (Oh, I gave him some of the Ksheerannam too :D). But its taste just about made my day!

Ksheerannam is technically more popular in Andhra than Tamil Nadu, and is often made on festive days throughout the year. But it acquires special significance on Sankranthi. To many traditional farmers, this would be the first meal with the newly harvested rice, and their dutiful wives make sure to prepare it with a taste that lingers on their tongues all the way into the next year! Let's celebrate the spirits of these farmers, their farm animals and their aides, for providing us with the choicest of produce all year long. Happy Pongal, once again!

KSHEERANNAM (Serves 6)
Set-up Time : -
Experiment Run-Time : 75 Minutes

The Shopping List

           Raw Rice : 1/2 cup, washed and drained
           Saffron : 1 generous pinch
           Whole Milk : 6 cups
           Ghee : 1 Tbsp
           Cashews : 10, broken in half
           Condensed Milk : 3 Tbsp
           Sugar : 4 Tbsp

Methodology

1. You would need one vessel with a heavy-bottom to boil the milk without burning it. After much looking around the kitchen, I settled for a Prstige Pressure cooker. Rinse it well with soap and hot water, and place it on the stove. Once dry, pour the entire 6 cups of milk and add the saffron. Allow the milk to come to a boil.

DSC_0234

2. When the milk starts to boil, add the rice to the boiling milk. The boiling will subside for a few minutes, until it begins again with a renewed zest.

DSC_0251

3. Reduce the flame and star stirring the mixture in a gentle sweeping motion. You are going to be doing this for the next 45 minutes, continuously, without batting an eyelid. The milk will gradually start to thicken and the rice will take on a creamy appearance. Your are nearly done when the the mixture comes to a near-solid appearance. Switch off the stove.

DSC_0255

4. When the mixture is still hot, add the sugar and the condensed milk and stir well. Transfer it to the offering-dish.

5. Top it off with the cashews that have been lightly fried in ghee. It's all yours now to dig in!

DSC_0259
Naivedhya!
If desired, one may refrain from adding the saffron, cashews, sugar and condensed milk, and add salt instead. Also called Paal Pongal/ Uppu Pongal, this is what is made in many Tamil farmer households, further south, on Pongal day. They eat it with a spicy gravy called Kanu Koottu and the combination is known to be on par with the sweet version.    

Ksheerannam is equally delightful when served hot or cold. I offered it at pooja (No, I didn't go out in the -4 degree weather to offer it to Surya! I just asked Him to come inside and have some) and finished off my share in the blink of an eye (time was running), when it was still steaming hot. UN-BEL-IEVABLE!

Sunday, January 13, 2013

Akkaara Adisal - நெய் பெய்து முழங்கை வழிவார!

DSC_0337-001
    
Happy Pongal everyone! With hearty wishes for this year to be as bountiful and blessed as the last one, atleast on the food front, else, I might as well shut-down this blog!

First things first - for those of you who fail to get the title of the post, and I am sure that there is a sizeable population : worry not (or rather, worry more). Akkaara Adisal is a special dish akin to to the famous Sarkkarai Pongal, except that it is a lot richer, fattier and hence tastier than the latter. 'How much fattier?' is of course a very expected question, given the present state of dieting for some of us, but are you ready for the answer? If we were to pay heed to the words of Aandaal, the only lady Aazhwar (remember the Bhakthi movement?), I am confident that most of us would not even risk a glance at this delicacy. She says, in the 27th verse of her famed Thiruppaavai "பாற் சோறு மூட நெய் பெய்து முழங்கை வழிவார கூடி இருந்து குளிர்ந்தேலோர் எம்பாவாய்" (We will enjoy this delicacy, of rice cooked in milk and covered with sufficient ghee that when eating, it drips down along our hands right to the elbows.). And that is no translation error! This is the way it is supposed to be cooked. This is the way it is prepared, to this day, at the temple of Thirumaaliruncholai (Azhagar kovil), where Raamanujar is said to have offered a 100 pots of Akkaara Adisal and a 100 pots of butter on behalf of Aandaal. One mouthful of that Akkaara Adisal, and for a few seconds you might as well be in Vaikunda.

For the brave souls who are still interested, Akkaara Adisal literally translates to rice cooked to a near-mash consistency (Adisal) with sugar (Akkaarai). It is cooked with great care and devotion at Sri Vaishnava households on several festive occasions throughout the year, but it is especially prepared on Koodaaravalli, the 27th day of Margazhi, and offered to Aandaal and the Lord, as a mark of completion of the month long Paavai Nonbu (a vow undertaken by devotees). So when Koodaaravalli happened a few days ago, I decided to try my hand at preparing this delicacy. I did make some sacrifices from the time and calories perspective, but still, this is no mean feat. It requires patience, strength, determination to see the end of it, and an ability to focus unflinchingly on the gently boiling rice!

AKKAARA ADISAL (Serves 4)
Set-up Time : -
Experiment Run-Time : 45-60 Minutes 

The Shopping List

          Raw Rice : 3/4 cup
          Moong Dal : 1/4 cup
          Powdered Jaggery : 1.5 cups
          Saffron : 1 pinch
          Whole Milk : 6 cups
          Ghee : 1/2 cup and more if you are willing to!
          Nuts (Cashews, Almonds, Pistachios) : 1/4 cup
          Raising :1/4 cup (I didn't use, but recommended)
          Cardamom Powder : 1 tsp
          Edible Camphor : a pinch (again, I didn't have this)

Methodology

1. Take a clean, and I mean a CLEAN frying pan and heat it on a medium flame. Place the rice and moong dal into the pan and roast them slowly until the rice starts to white out and the moong dal is ever-so-lightly browned.

DSC_0298

2. Transfer the rice and dal to a wide, deep vessel and pour in 4 cups of milk. Heat the vessel carefully and bring the milk to a boil. Your work starts now. Since milk burns quickly, you need to stir the contents continuously while the rice and dal continue to cook on a low flame.

3. Once the rice, and more importantly, the dal have been cooked thoroughly and have been reduced to a near mash (Go ahead, take out a grain of rice/dal and press it between your thumb and index finger- it should give no resistance whatsoever), stop heating it any further, add the saffron, and keep it aside.

4. In a pan, melt the jaggery with half a cup of water and filter the syrup to remove any sediments that maybe present.Heat the filtered syrup until it it begins to boil. Allow it to boil for like ten seconds and remove it from the heat.

DSC_0289

5. Now place the cooked rice/dal mixture on the stove and heat it up once again. Pour in the jaggery syrup and start to stir with vigor (remember bicep curls?). As the mixture thickens, add milk, little at a time, until you have exhausted the remaining two cups. 

DSC_0306

6. Just before removing the vessel from the stove, pour in the generous amount of ghee suggested and give a quick stir. You should right now be looking at a glistening mass of brown pudding.

7. Fry up the nuts and raisins in a tablespoon of ghee and add it to the Akkaara Adisal along with the edible camphor and cardamom powder. Once again, give a good stir to evenly distribute the nuts and raisins. The artery-choker is now ready for some action.

DSC_0311
     
Traditionally, Akkaara Adisal is served hot on a banana leaf, after offering it to the Lord, and one is supposed to eat it off their hands. No dilly-dallying with spoons and napkins please. Once again, tradition demands that we keep our minds at peace while preparing any food, but the elders emphasize it all the more in the case of the Akkaara Adisal. Hence, no panicking, no shouting for help and no dancing around to dubstep, should be made the kitchen norms for the day. (The importance of one's mental state during food preparation is still researched upon by some nutritionists, psychologists and other related experts). With a final word of advice, I will allow you to go and try this out in your kitchens this Sankraanthi : Hit the treadmill!

Wednesday, January 9, 2013

Tutti-Frutti Kesari - A ten-minute wonder!

DSC_0897
   
Kesari or Sojji, as we call it back home, was an indispensable part of any festival menu, from the grand ones like Janmashtami to the monthly Pournami-Amaavasai poojas. I think, once, we even planned to make various versions of Kesari through the nine days of Navarathri (Thankfully, it remained a plan). But even years and years of tasting the same orange, slightly gooey dessert, each time brimming with enough ghee to solve Chennai's energy crisis, will never make me say "No, Thank you" to the next person who offers it to me. There is some unknown magic that binds me to it and I am not very keen to discover that either.

Named so because of it's bright orange hue, similar to that of saffron (kesar), the Kesari has come far from its humble beginnings. Today, it is not rare to see a yellow-colored pineapple Kesari with juicy chunks of pineapple embedded in it, Semiya Kesari made with vermicelli, or a vibrantly pink strawberry Kesari. Once, I even had the fortune of sampling Kesari made with mango pulp, and for a whole hour, I was 5 feet off the ground! And so, as a humble offering to the divine-science of Kesari-ology, I devised up yet another simple-to-make version of this globe-trotting sweet - Tutti-Frutti Kesari. Of course there are dedications to make on this successful achievement : To Tootie, Frootie, and Shori, for reasons unknown!

Now, the recipe is so very simple that you can prepare it in a jiffy, even in the middle of the worst possible three-day long night-out, that one may undertake to submit the next draft to that prestigious journal. And don't forget to save some for your adviser when you meet him for corrections in the morning. It may end up being your only saving grace!

TUTTI-FRUTTI KESARI (Serves 6)
Set-up Time : -
Experiment Run-Time : 10 Minutes

The Shopping List

          Coarse Rava (Semolina) : 1 cup
          Sugar : 1 cup 
          Tutti-Frutti : 1/2 cup
          Nuts : A handful
          (Mixture of Walnuts, Cashews, Pistachios and Almond)
          Ghee : 2-3 Tbsp (Gasp!)
          Cardamom Powder : 1 tsp 
          (4 cardamoms blended with a little sugar in a blender)
          Water : 3 cups  
          
Methodology

1. Place the water in a deep pan, with a handle, and heat it on a low-medium flame in the back-burner. Forget about it for now. It will be ready when it is needed.

DSC_0868

2. Take another frying pan and drop in a tablespoon of ghee. Once it has melted and heated up, tip in the Rava and roast it on a medium flame until the raw-smell is replaced with a rich ghee-laden aroma. The Rava should have browned ever so lightly by now. Quickly remove the Rava onto a plate and allow it to cool. A delay of even a few seconds may burn the Rava, so keep the plate ready-at-hand.

3. In the same frying pan, add the rest of the ghee (the more the better), and when it heats up, fry the nuts in it until they are golden brown.

DSC_0876

4. Once again, empty the Rava into the frying pan and mix it well with the ghee and the nuts. Gradually blend in the sugar and keep stirring until the mixture starts sticking to the sides.

5. If your timing is perfect, and it is really important that it is indeed so, the water that we safely left on the back-burner would be boiling away. Take the pan by its handle (Ah, now you get it!) and carefully pour the hot water into the Rava. Keep stirring, else you may end up with nasty lumps of uncooked Rava.

6. The Rava will expand on cooking, and the mixture will begin to thicken. Continue pouring the water until the Rava is completely cooked*. (The water measurement given is usually sufficient for the other given ingredients, but sometimes, if the Rava is too fine, lesser water maybe sufficient).

7. When the mixture is still in a semi-solid state**, stir in the cardamom powder, the Tutti-Frutti and an additional tablespoon of ghee if desired. Continue heating until all the water has been absorbed and the Kesari takes on a shine from all the ghee that has been generously added. Ambrosia is served!

* One way to check if the Rava is cooked or not is to look for white specks in the Kesari. When a Rava is not cooked through, it's inside is more opaque than the cooked outer shell. The presence of white specks indicates that the Rava is still partially cooked and is a cue for you to keep adding water. 

** A word of warning here. When the Kesari is in its thick viscous state, it tends to boil and splatter around. Take utmost care when reaching out to stir the mixture lest you may end up with a scalding hot splat on your hand!

DSC_0896
     
Kesari tastes best when it is served hot, right off the stove, but given the poojas and offering protocol, you rarely get to eat it this way on the festival days. Nevertheless, it tastes really good when cold too, and disappears equally fast. This Tutt-Frutti Kesari went along amazingly well with vanilla icecream and I just couldn't stop at one cup. So, ready to make your own desert for dinner tomorrow?