Monday, April 28, 2014

Gobhi Achaari - Cauliflower in Pickled Goodness!


It has been quite a hiatus. Some even thought that the blog was dead. Even I was close to believing that this page would not see daylight again. With PhD coursework, different groups of friends, research, exams, papers, frustratingly-refusing-to-work experiments and scheduled cooking times, little time trickles down for leisure activities, and that time too goes away in gossips, mind-numbing TV series marathons and unconscious internet browsing. But, no! Today, I decided that I should give this another try. A few things CAN be put on the back-burner for sometime, literally and otherwise. So when I found that the gym was closed for the evening, I came running back to this baby of mine.

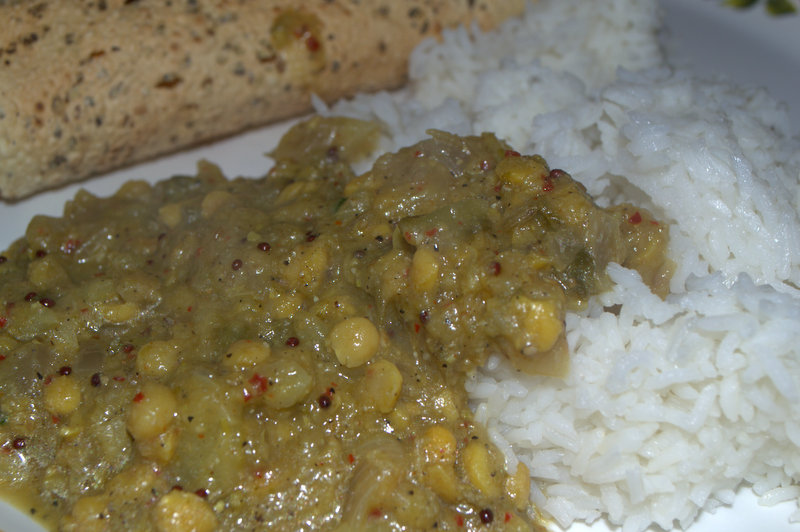
This dish that we are going to deal with today was born when I was frantically looking for vegetarian replacements for my chicken-demanding stomach during a period of Vratha. Achaari Murgh is a specialty of Uttar Pradesh, with bite sized chicken pieces cooked in a gravy flavored with spices that usually go into the making of many pickles (Achaar). Hence the name. Being Murgh-restricted for the time-being, I decided to substitute it with cauliflower florets and Tadaaaa... Out came this dish. I must say that I have made it only once, not because it was not great tasting, which it was. It has more to do with the fact that I have never let myself to the level of being this murgh-restricted ever since. But if the right conditions present themselves again, I would not hesitate to whip out this recipe, which is why it goes on this blog of mine. Now, onto the dish.

GOBHI ACHAARI (Serves 3-4) 
Set-up Time : 15 minutes
Experiment Run-Time : 30 minutes

The Shopping List

          Set 1: At the Chopping Board
          Onion : 1 medium, finely chopped
          Cauliflower : I medium-large, separated into florets
          Ginger : 1 1/2 inch, finely chopped
          Garlic : 5-6 pods, minced
          Green Chilies : 2, cut


          Set 2: For the Special Touch
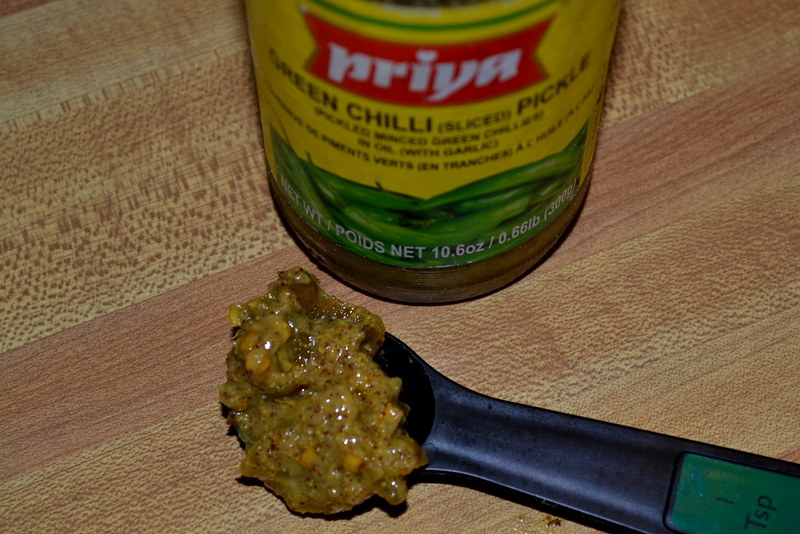
          Priya Green Chili Pickle : 1 Tbsp (Any brand for that fact)
          Thick Yogurt : 1/2 Cup
          Fresh Coriander Leaves : For Garnishing
DSC_0617
Priya Chili Pickle
          Set 3: Seasoning
          Mustard Seeds : 1 tsp
          Cumin Seeds : 1 tsp
          Fenugreek Seeds : 1/2 tsp
          Nigella (onion) seeds : 1 tsp
          Fennel Seeds : 1 tsp
          Asafoetida : a generous pinch
          Mustard Oil : 1 Tbsp
          Salt : As required

          Set 4: Powders Galore
          Chili Powder : 1 tsp
          Coriander Powder : 1 1/2 tsp
          Turmeric Powder : 1/4 tsp

Methodology

1. Once the Cauliflower is separated into pieces, place the florets into a pot of water with a little turmeric powder and salt. Bring the water to a gentle boil and continue until the florets are slightly cooked (about a quarter done). This kills any worms that cauliflowers are notorious for. Rinse the florets under cold water and keep aside.

You may obviously skip this step if using frozen florets.  Just make sure to thaw them in advance.
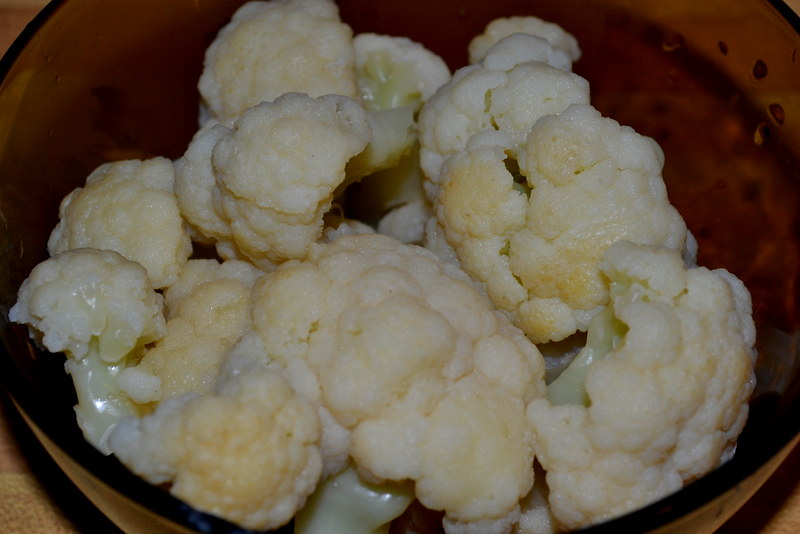
DSC_0607

2. In a frying pan, heat the mustard oil and tip in all the ingredients given in Set 3, saving the salt. These are the spices that make an Achaar what it is. Let the mustard start crackling and soon the other seeds will follow suit.
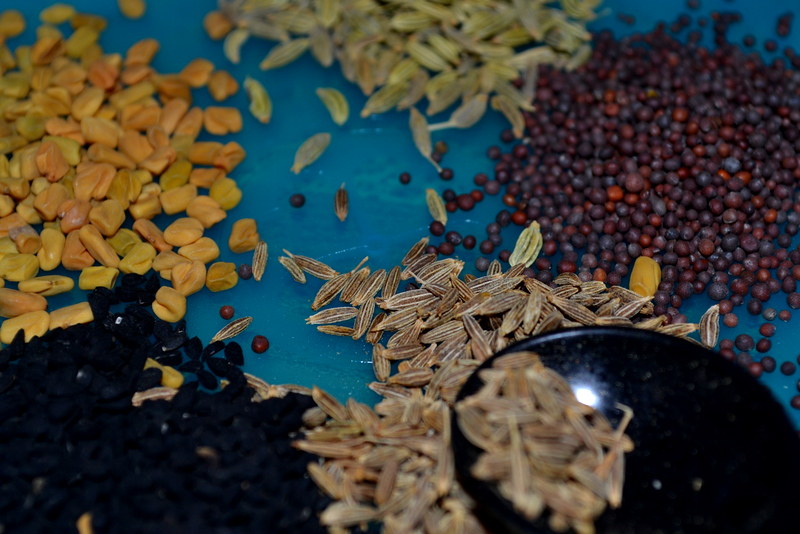
DSC_0604

3. Throw in the onions and continue to sauté them until they become translucent. Follow them up with the garlic, ginger and green chilies. Once you get a whiff of the heady aroma, add the chili powder, coriander powder, salt and the cauliflower florets. You may pour in a little water to help with the cooking of the cauliflower. Cover and let the veggies cook on a low flame.
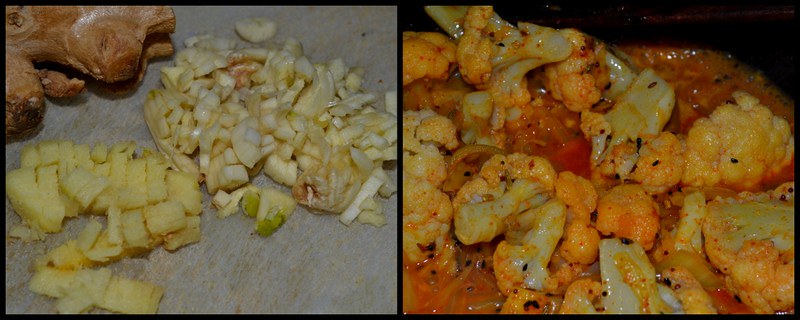

Aachari Gobhi1

4. After about five minutes, the florets must be nearly done. It is time to add the yogurt and the tablespoon of chili pickle. Toss well to incorporate the ingredients. Once again cover the vessel and cook until the florets are tender when pierced with a fork. 
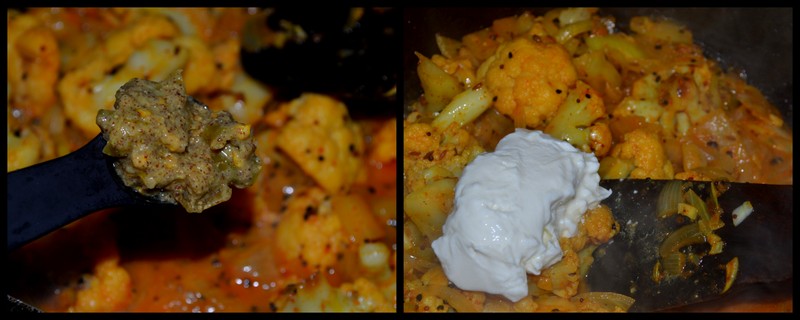

Aachari Gobhi

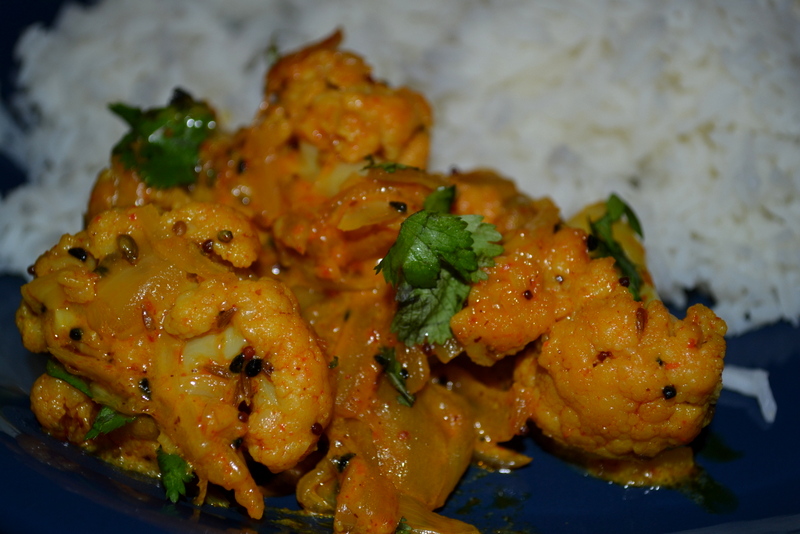
5. Transfer into a serving bowl and garnish with fresh coriander leaves. Serve it with some hot steamed rice and you will not regret the hard-work (or was it not that hard?)

DSC_0648
     
The Gobhi Achaari makes an excellent stuffing for rotis and tortilla wraps with some lettuce and tomatoes. The tart flavor imparted by the pickle is just what makes this dish stand out as a wrap condiment. The idea of adding the pickle really came out of nowhere - "Why not add some Achaar, we are making Achaari anyways?". And like always, I never have regretted listening to my otherwise-crazy-mind in the kitchen. A little twist here and a little fleck there, that's what makes cooking interesting and exciting. As for the crazy idea of caramelizing chicken in jaggery, I will keep it for some other time!

Tuesday, July 30, 2013

Keerai Payattham Kootu - Just like at Saravana Bhavan!


At the very onset, I must say that I am way overdue with this post. Intended to be a part of Blogging Marathon #28 hosted by Srivalli, my trip back home in May-June and the random academic rigor of a PhD have delayed this post by nearly two months. Nevertheless, Srivalli has graciously accepted my apologies and has encouraged me to go on with the Marathon and see it to it's completion. So here comes the final recipe that I had saved up for the first phase of BM#28 - Keerai Payattham Kootu (BTW, for refreshment's sake, we were doing Kootus for the Marathon). The Keerai Payattham Kootu was one of the best discoveries that we (my roomies and I) made during the early days of my PhD, apart from the non-culinary academic stuff that is. Through a rare stroke of good fortune, we were able to obtain "fresh" spinach at the grocery store that day. Having cooked with frozen-chopped-preprocessed spinach all my graduate life, we were dumb-struck as to how to proceed with the 'edibilization' of this bunch of spinach, which by the way, reminded me of all the Agatthi-Keerai that I had fed to every willing cow that I had come across. We bought the spinach nevertheless, and some quick fridge-googling threw up this recipe, which was one of the first that went down in my shiny-new recipe-notebook, with an impeccable handwriting and exact measurements. Here, I shall share the recipe for that Kootu, which is ridiculously simple by the way, just as it was written down nearly two years ago. It is a dish that I have made several times over since that day and yet, it manages to cling onto its simple charm.

KEERAI PAYATTHAM KOOTU (Serves 3-4)
Set-up Time : 15 minutes
Experiment Run-Time : 30 minutes

The Shopping List

          Set 1: At the Chopping Board
          Spinach : 2 bunches (fresh) or a 12 oz frozen packet
          Onion : 1 small, finely chopped 
          
          Set 2: For the Mixie
          Grated Coconut : 3/4 cup
          Rice Flour : 1 Tbsp
          Dried Red Chilies : 6

          Set 3: Protein Base and Seasoning
          Dehusked Green-Gram Dal/ Moong Dal : 1 Cup
          Sambhar Powder : 2 Tbsp (I used MTR)
          Turmeric Powder : 1/2 tsp
          Mustard Seeds : 1 tsp
          Asafoetida : a generous pinch
          Dried Red Chilies : 1, broken
          Curry Leaves : 1 strand
          Vegetable Oil : 1 Tbsp
          Salt : As required

Methodology

1. Pressure cook the Moong Dal with 2 cups of water, turmeric powder and salt, for upto four whistles. Moong Dal cooks easily, and you should be left with a near-paste consistency of bright yellow Dal, when you open up the cooker.


DSC_0534

2. Clean the fresh spinach with running cold-water and cut-off any abnormally thick stalks and stems from the leaves. Place a large pot of water on the stove and bring it to boil. Add the cleaned spinach and a pinch of salt into the boiling water. When the leafs just begin to wilt, remove them with the help of a filter. 

You may retain the water for further use in the recipe. (All this becomes much simpler if you have a packet of frozen spinach. You just need to dump the spinach into a microwave safe-bowl, add 5 tablespoons of water and microwave on high for 3-4 minutes)


DSC_0549

3. Grind together the ingredients given under Set 2, with as little water as possible. The goal is to achieve a very-thick paste that is pinkish-orange in colour.


Keerai Kootu

4. Take the boiled-mashed Dal in a large vessel and heat it up gradually until the dal begins to splatter. Add the cooked spinach to the bubbling Dal and stir it in completely. 


DSC_0551

5. When the spinach-Dal begins to bubble, empty the ground paste into the vessel followed by the Sambhar Powder, and sufficient salt. Mix thoroughly. You may use some of the preserved water from the Step 2, to bring the Kootu to the desired consistency. 

Let the Kootu cook on a low-flame for 5 more minutes, before taking it off the stove and transferring it to a serving bowl.


DSC_0552

6. In a separate pan, heat up the oil and add the rest of the ingredients given under Set 3. Once the mustard splutters, and the red chili crackles, throw in the finely chopped onion and continue to sauté until the onion turns light-brown.


DSC_0554

7.  Empty the entire seasoning-mix on top of the Kootu in the serving bowl and mix it in just prior to serving.

DSC_0572
And there is the result of 20 minutes of  'hard' work!
Today, every person who eats this Kootu asks for its recipe, to the extent that I have sent photos of the hand-written recipe, on Whatsapp, to a couple of ardent fans. To this day, A.V., one of the four roomies, who relished the results of the first attempt, calls it the "Saravana Bhavan Kootu". According to her, it is a near-perfect match with the Kootu that you get with your meals at SB. And that is saying something!

Saturday, May 4, 2013

ThakkaliKai Poricha Kootu - a new discovery!


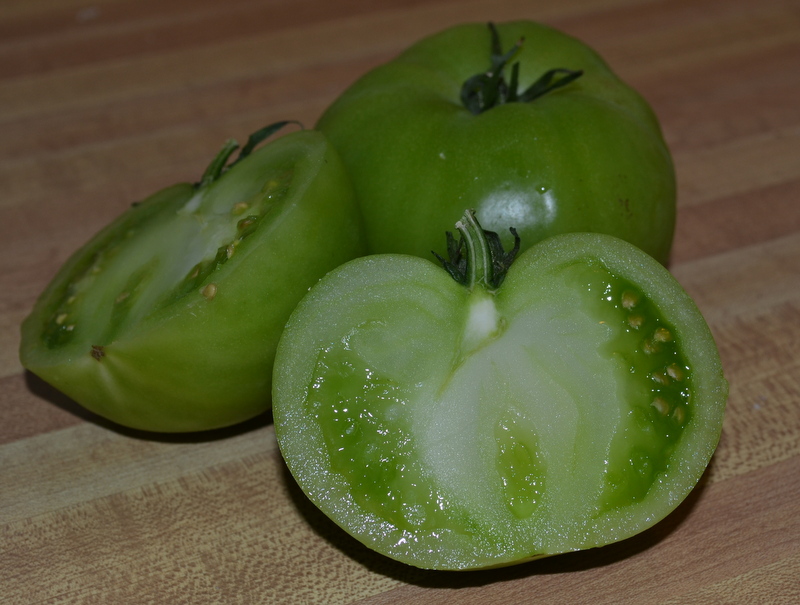
We are still on the second day of Blogging Marathon #28, hosted by Srivalli, and I am back with the second recipe for my theme for this week : Kootus made in Tamil households. When planning for this theme, I pored over several previous recipes of mine and several more on the internet, but for some reason, I was not able to narrow down specific recipes that I could try out. However, two days back, I was at the local supermarket, when something caught my eye in the tomato-section. Something green, and shiny, and very tomato-like, except that it was green. Green Tomatoes, $1.99/lb, the board said. My mind did a flash-back of all the recipes that I had read in the past weeks. Yes, there was one which was made with raw-tomatoes, ThakkaliKai Kootu. I had dismissed it without a second glance, as I was skeptical about the availability of raw-tomatoes in my city. I was still doubtful, because the board said 'Green' Tomatoes and not 'Raw' Tomatoes, because where I live, it could probably be a genetically-modified version of the regular tomatoes. However, I still shelled out $2.38 for two gigantic green tomatoes and decided to try my luck with them. Well, obviously my risky-decision paid off, or I wouldn't be ranting on about this new-found vegetable on this blog. So, here goes my next entry for the BM#28, ThakkaliKai (Raw Tomato) Poricha Kootu.

Untitled
   
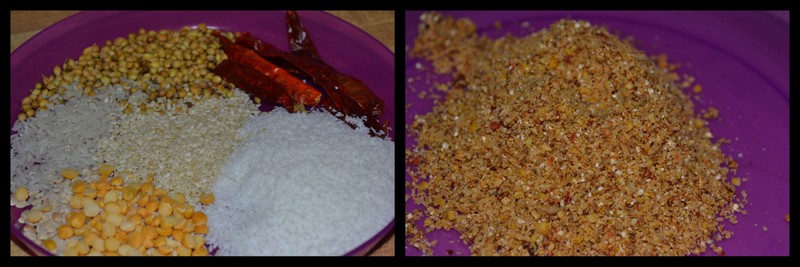
Poricha Kootus are called so because the masala powder is made by roasting (Tamil : பொறிக்கறது porikkarthu) Urad Dal, Chana Dal and a number of selected spices and grinding them together. I have taken the freedom to use two ingredients that are not traditionally used in Poricha Kootu Masala : Sesame Seeds and Raw Rice, the former for imparting a nutty flavor and the latter for thickening purposes. They both added beautifully to the already flavorsome Kootu, which I ended up having with Curd Rice at 12 in the night. Yeah, Grad-School and timely dinners don't exactly go hand-in-hand.

THAKKALI-KAI PORICHA KOOTU (Serves 3-4)
Set-up Time : 15 minutes
Experiment Run-Time : 30 minutes

The Shopping List

          Set 1: At the Chopping Board
         Green/Raw Tomato : 2 medium, cut into cubes
          
          Set 2: Poricha Podi
          Grated Coconut : 1/3 cup
          Raw Rice : 1/2 Tbsp
          Coriander Seeds : 1.5 Tbsp
          White Sesame Seeds : 1 Tbsp
          Dried Red Chilies : 4 or 5
          Urad Dal : 1 Tbsp
          Chana Dal : 1/2 Tbsp

          Set 3: Protein Base and Seasoning
          Split Pigeon Peas/Toor Dal : 1/3 Cup
          Mustard Seeds : 1 tsp
          Turmeric Powder : 1/2 Tsp
          Asafeotida : a generous pinch
          Dried Red Chilies : 1, broken
          Curry Leaves : 1 strand
          Sesame Oil : 1 Tbsp
          Salt : As required

Methodology

1. Place the Toor Dal in a pressure cooker along with 1 cup of water, turmeric powder and sufficient salt. Pressure cook the dal for up to 3 whistles. Open the cooker and mash the Dal haphazardly, with the help of a sturdy churning rod and set it aside.

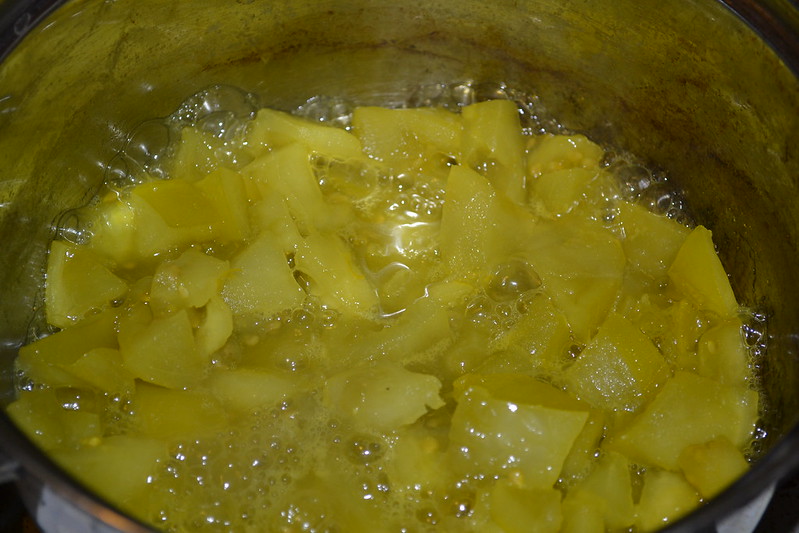
2. In a pan, place the raw tomatoes, salt and little turmeric. Add sufficient water to just cover the tomato pieces. Boil for 10-15 minutes until the tomato pieces are thoroughly cooked.

Untitled

3. In the mean time, dry roast each of the first five ingredients given in Set 2, individually. Also, gently fry the dals together in a teaspoon of oil until the Urad Dal turns reddish-brown. Cool and grind them all together into a dry powder.

Untitled

4. Add the cooked dal from step one to the cooked raw tomatoes and continue to boil the tomatoes in the dal. Water maybe added to adjust the consistency, if desired.

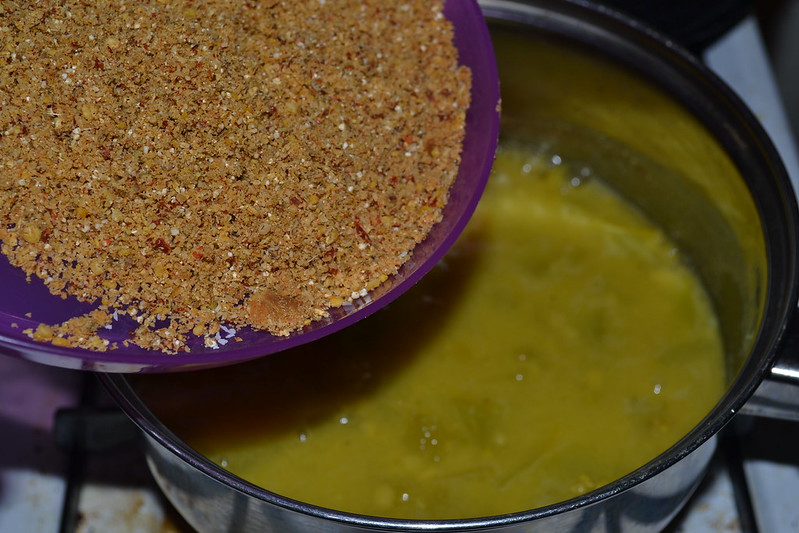
5. Finally, add the Poricha Podi into the boiling Kootu. Close with a lid and cook for 5 more minutes on a medium flame. You may cook more if it is too watery, but the raw rice should thicken it up nicely anyways.

Untitled

6. Heat the sesame oil in a seasoning pan and throw in the mustard seeds, asafoetida, red chilies and curry leaves. Using sesame oil would help in enhancing the nutty flavor that would be imparted by the sesame seeds in the podi. Other oils may underplay this effect and the full flavor of the podi maybe supressed. Pour the seasoning over the Kootu and serve immediately, while the aroma of the sesame oil is still in the air.

Untitled
     
The Kootu was unbelievable and I am listing ThakkaliKai as "My Culinary Find of the Month". I plan to experiment more with it and see how well it holds up. Like I said, I had it with curd rice and some really spicy Avakkaya. HEAVEN. And that is probably what has kept me going for the past hour and half or so, as I finished cleaning up and wrote this post. Right now, it is past 3 am, and I have loads of Kootu stored away in the refrigerator for a sumptuous lunch tomorrow, and I am going to catch a good night's sleep before I get to tackle it all over again!  

Friday, May 3, 2013

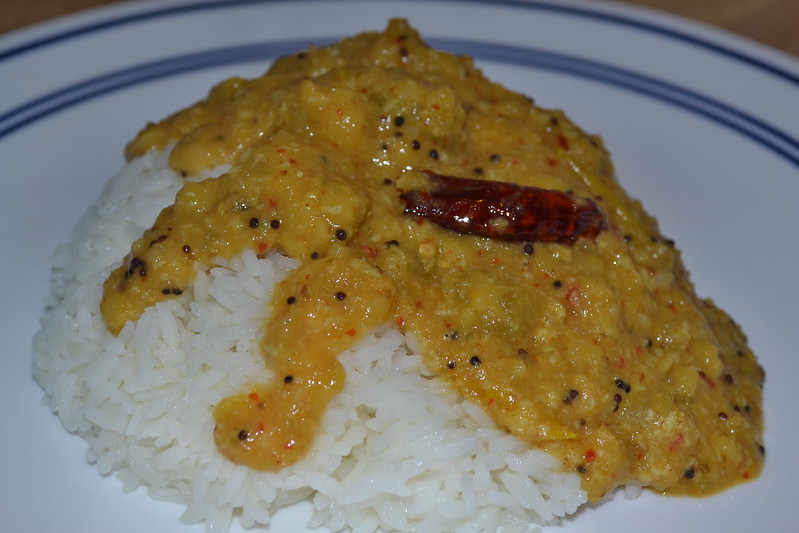
Muttaikos Araichuvitta Kootu - Straight from Mylapore!


No ceremonial Tamil meal is ever complete without Kootu. For that matter, no ceremonial Tamil meal in the past was complete without two-dozen dishes placed at their respective locations on a huge Thalavaazhailai (Banana Leaf), freshly cut from the backyard and glistening with droplets of water. Today, we lack the Vaazhailai and the backyard and have to be content with distant dreams from the past. However, the dishes have lived on, twisted and tested according to personal tastes, handed down in families, only to make appearances at festive occasions and celebrations.

Kootu is one such dish, that is inherently Dravidian in its origins. Literally meaning 'to add', Kootus are delightful lentil-vegetable combinations, subtly spiced with the choicest of ingredients. They are thicker than Sambhars and are either eaten with just hot white rice or are aptly paired with Kaara Kuzhambu, Puli Kuzhambu or Vatral kuzhambu and rice. Our ancestors, who were expert nutritionists apart from a zillion other things, encouraged the latter combination, as  the Kuzhambus and rice provided the vitamins, minerals, carbohydrates and fats, while the lentils in the Kootus served as an excellent source of proteins that are often found to be lacking in vegetarian diets. The combinations of lentils and vegetables are virtually uncountable, but hitting the "made-in-the-heaven mix-match" of the two ingredients, to make the many salivating Kootus that we know today, is a feat that must be duly attributed to our brilliant ancestors. Perhaps that's why the Kootus always find a place on our Wedding Menus.

The recipe for Muttaikos Arachuvitta Kootu that we are going to drool over today is my submission for my first-ever Blogging Marathon. My theme for this week happens to be 'Kootus prepared in Tamil Households'. Hosted by Srivalli of Spice Your Life, the Blogging Marathon has seen 27 successful editions and I am pleasantly excited to be a part of Blogging Marathon #28. Here's to many more successful marathons by me and other participants alike. Now onto the recipe.

MUTTAIKOS ARAICHUVITTA KOOTU (Serves 3-4)
Set-up Time : 15 minutes
Experiment Run-Time : 30 minutes

The Shopping List

          Set 1: At the Chopping Board
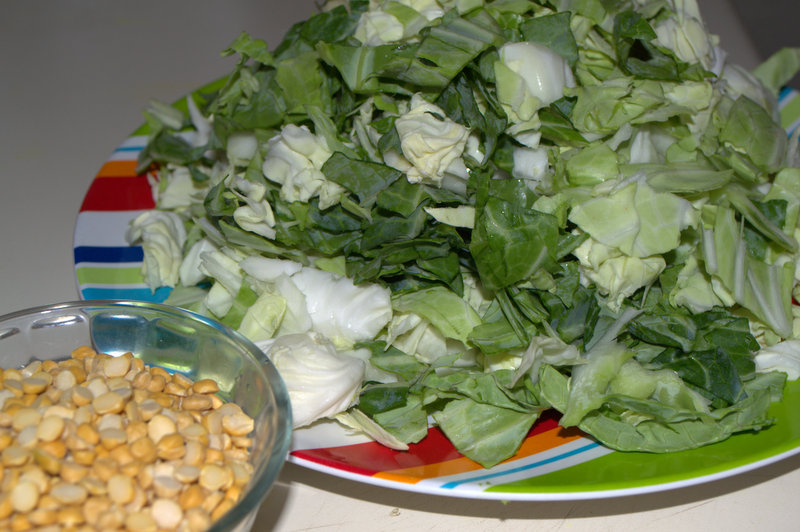
          Cabbage : 1 medium, shredded
          Onion : 1 Large, sliced thinly
          
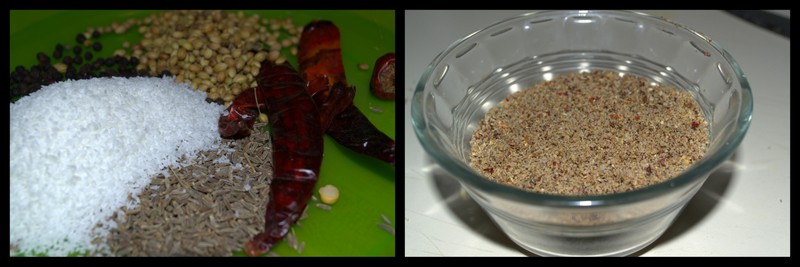
          Set 2: Kootu Podi
          Grated Coconut : 1/2 cup
          Cumin Seeds : 1 Tbsp
          Coriander Seeds : 2 Tbsp
          Whole Peppercorns : 1 Tbsp
          Dried Red Chilies : 4 or 5

          Set 3: Protein Base and Seasoning
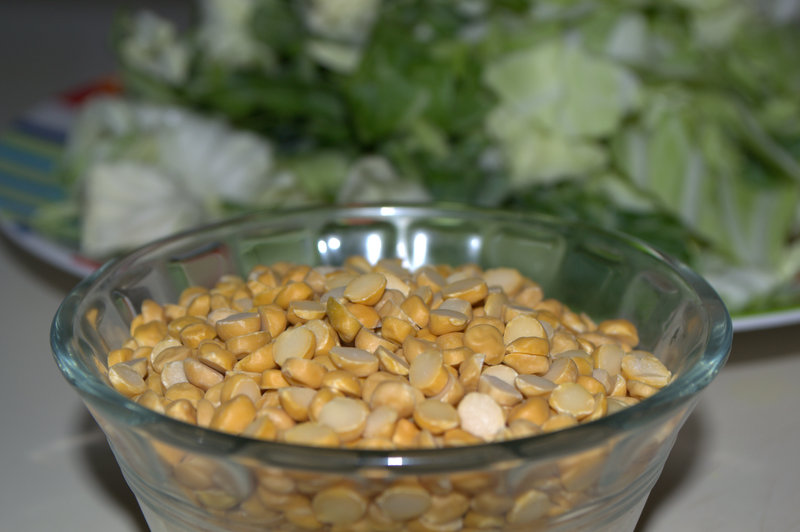
          Bengal Gram Dal/Chana Dal : 3/4 Cup
          Mustard Seeds : 1 tsp
          Turmeric Powder : 1/2 Tsp
          Asafotida : a generous pinch
          Dried Red Chilies : 1, broken
          Curry Leaves : 1 strand
          Vegetable Oil : 1 Tbsp
          Fresh Coriander Leaves : For garnishing
          Salt : As required

Methodology

1. Place the Chana Dal in a pressure cooker along with 2.5 cups of water, turmeric powder and sufficient salt. Pressure cook the dal for up to 5 whistles. Chana Dal takes longer to cook compared to other dals and may prove to be one hard nut to crack, if not fully done. 

Once the pressure is relieved, open the cooker and mash the Dal haphazardly, with the help of a sturdy churning rod. Keep the Dal aside.

Untitled

2. In a separate pan, dry roast all the ingredients given under Set 2, adding the grated coconut at the very end. Once the coconut is slightly roasted, remove the pan from heat. Grind the spices, on cooling, to obtain  the fragrant Kootu Podi (powder). This powder can be made in advance and stored for up to a few weeks. 

Untitled

3. Now, add the shredded cabbage and salt to the same pan and gently sauté the leaves. Cabbage gives off water when it cooks, so there is no need to add any additional water for cooking. 

After about 6-7 minutes, tip in the mashed Dal into the cabbage and allow the mixture to come to a boil. A little water maybe added to adjust to the desired consistency.

Untitled

4. When the Dal-Cabbage mixture is on the verge of boiling, add the Kootu podi and mix well. Allow the mixture to boil for an additional 3-4 minutes and turn the heat off.

5. In a smaller pan, heat some oil and add all the seasonings one by one, starting with asafoetida, mustard seeds, red chilies, and curry leaves. Once the cracking subsides, add the onions and sauté until they turn translucent. Quickly pour the seasonings over the Kootu and give one final mix. Garnish with some fresh coriander leaves and serve hot with white rice, ghee, and spicy Kaara Kuzhambu. 

Untitled
   
The specialty of an Araichuvitta Kootu is the very fact that the masala is freshly ground prior to its preparation. The aroma and fragrance imparted by the freshly ground masala are on a different plane altogether, in comparison with the store-bought Sambhar and Rasam Podis, that are invariably stacked up on our shelves. I love to eat this Kootu with papad and rice. Sometimes, I increase the spice-level by several notches with the addition of extra-doses of peppercorns and dried red chilies. The resultant Kootu forms a heavenly combination with curd-rice. I am so fond of it, that my brain no longer registers the ingredient measurements for the regular Kootu, and my friends are often left gasping for water, when they mix it with Kaara Kuzhambu. Hilarious! But rest assured, the portions given above yield a perfectly mild-spice Kootu. One that I am sure you can enjoy with both Kuzhambu and Thacchu Mammam alike.

Sunday, April 7, 2013

Paella de Picante Verduras - A Spanish feat!


Maybe it is something to do with Katrina's appreciation of Hrithik cooking Paella on their holiday in Valencia, in the movie Zindagi Na Milegi Dubaara. But it is odd that every time someone mentions Spain, all that my mind can think of is a pan of steaming hot Paella, served beautifully by one of Valencia's famous beaches. No thoughts of bull-fights. No visions of La Sagrada Familia. And definitely not even a flash of Real Madrid. Only Paella... and the beaches.

Paella is a rice dish, akin to our Biriyani, that has its origins in the Valencian region of southeastern Spain. Often mistakenly viewed as Spain's national dish by outsiders (Given its apparent popularity, I wouldn't blame the Non-Spaniards), it is prepared in a myriad number of ways, the most common ones being the Valencian Paella, the Seafood Paella, and the Mixed Paella. The dish derives it's name from the French word paelle (or the Spanish word paellera), meaning 'pan'; in reference to the special shallow pans that are used in its preparation. Traditionally, the dish is served directly from the paellera, and guests enjoy it with a number of side offerings. The use of these paelleras ensures that the bottom layer of rice is subtly toasted in the cooking process. This layer of semi-burnt toasted rice, locally called socarrat, is considered be a delicacy in it's own right and is essential for a good Paella. It reminds me of the days when we used to fight  for the burnt-rice leftover at the bottom of the Biriyani pan. Deliciousness! 

A special ingredient required for Paella is the short grained Spanish Bomba rice; something that I have not been able to find in the aisles of my local supermarket. However, last Friday, a friend had taken me to Trader Joe's and I could hardly contain my joy when I saw a packet of Arborio on their shelves. While Arborio is technically Italian and is not the traditional rice used for making Paella, it is known to be an excellent substitute. And more importantly, since I did not want to put off the making of the dish any more, citing lack of ingredients as an excuse, I came home armed with some fine virgin olive oil, a pack of Arborio, and lots of vegetables, fully prepared for the culinary-experiment the next day. In the recipe for Spicy Vegetable Paella that follows, I have replaced the meat used in traditional Paella with vegetables and also added some additional spices to take it a notch higher on the zestiness index. And of course it was awesome. Está delicioso!

PAELLA dE PICANTE VERDURAS (Serves 3)
Set-up Time : 20 minutes
Experiment Run-Time : 45 minutes

The Shopping List

          Set 1: At the Chopping Board
          Onion : 1 Large, sliced thinly
          Red Pepper : 1, sliced into thick strips
          Mushrooms : 4-5, cut along its length
          Green Chilies : 3 slit along its length
          Garlic : 2 cloves, minced
          Carrots : 1, julienned
          Tomato : 1 Large, finely chopped
          Frozen Peas : 1/2 cup
          Frozen Broccoli : 1/2 cup 
          
          Set 2: From the Spice Rack
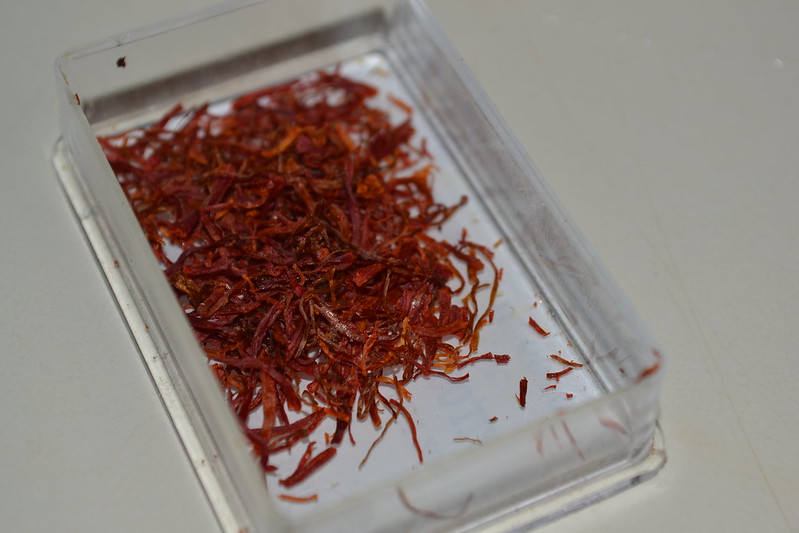
          Saffron : 1tsp, crushed
          Crushed Red Pepper : 1 Tbsp
          Salt : as required
          Pepper : 1 tsp

          Set 3: Everything Else
          Arborio/Bomba/Calasparra : 1 Cup
          Vegetable stock : 2 cups
          Warm water : 1 cup
          Virgin Olive Oil : 1 Tbsp

          Equipments
          A shallow pan, preferably heavy

Methodology

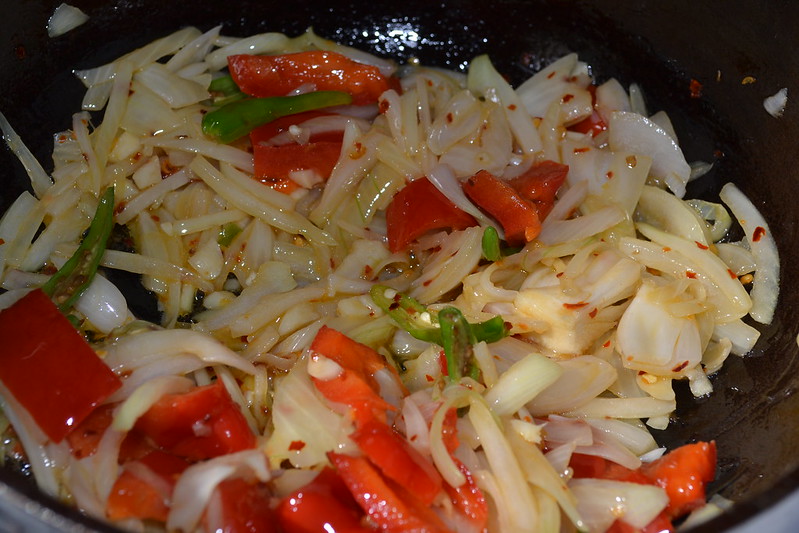
1. Heat the olive oil in the pan, and add the onions, minced garlic, green chilies and the sliced red peppers from Set 1. Sauté the vegetables with a pinch of salt and the crushed red peppers from Set 3, until the onions begin to turn brown in caramelization.


Untitled

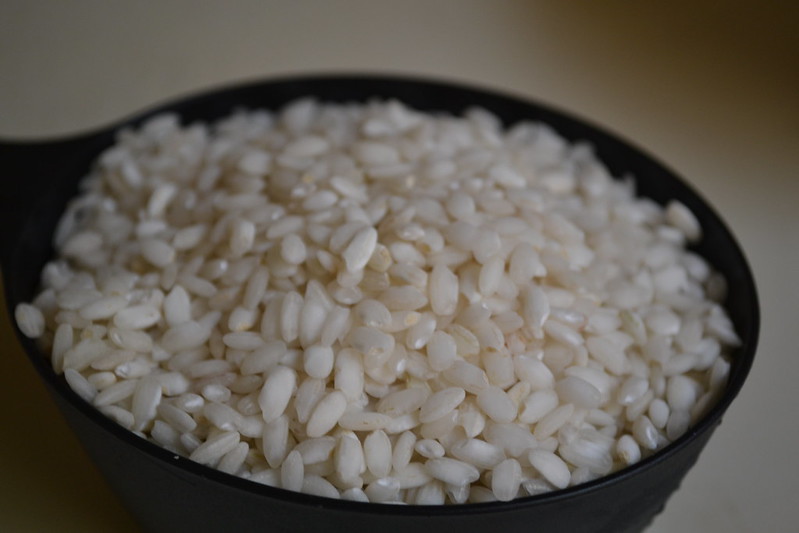
2. Add a cup of the chosen rice to the sautéd vegetables and coat the vegetables with the rice grains.

Untitled

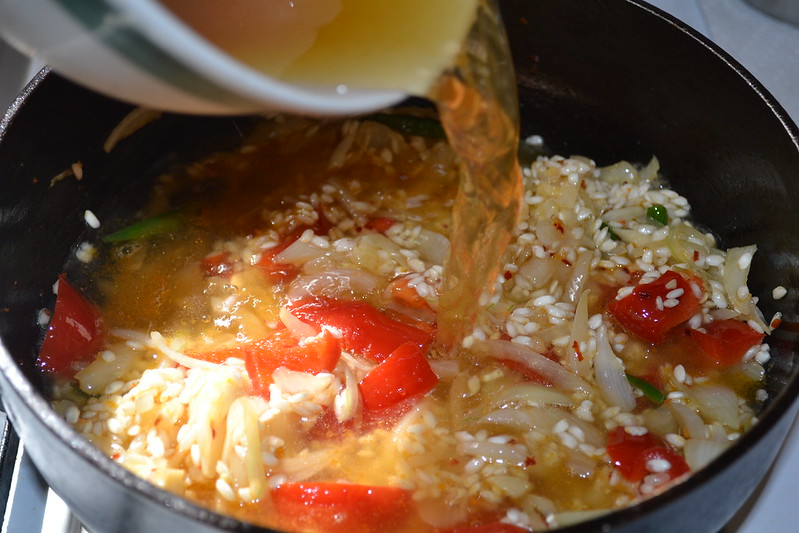
3. Add the vegetable stock from Set 3, along with a cup of warm water, the mushrooms, and the chopped tomatoes, to the rice-vegetable mixture.

Untitled

4. When the stock comes to a gentle boil, crush the saffron strands between your fingers and add it to the merrily boiling dish. This is also where you add any additional salt. Depending on the sodium content in the stock, it maybe necessary to adjust the salt to your tastes. Cover the pan with a lid and let the rice cook for about 25 minutes.

Untitled

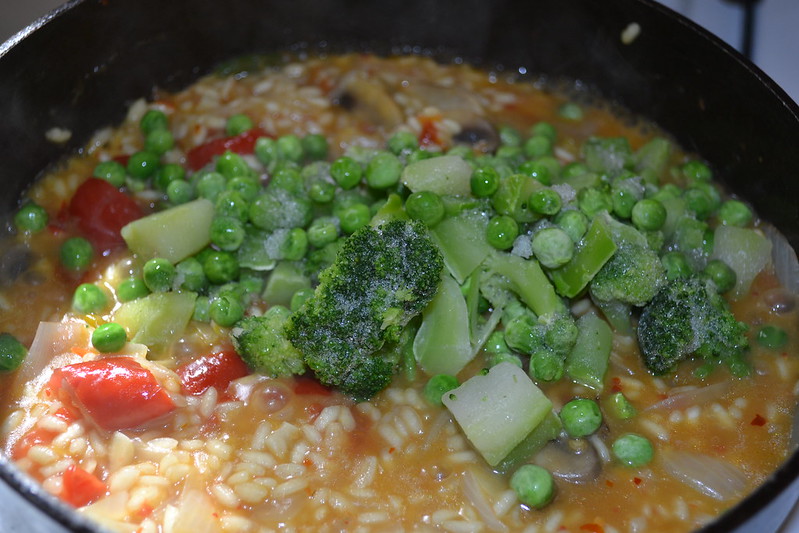
5. Open the pan and add the carrots, broccoli, and peas to the nearly-cooked rice. Also add half-a-cup of water if the rice looks dry. Cover the pan once again and allow the added vegetables to cook for an additional 10-15 minutes.

Untitled

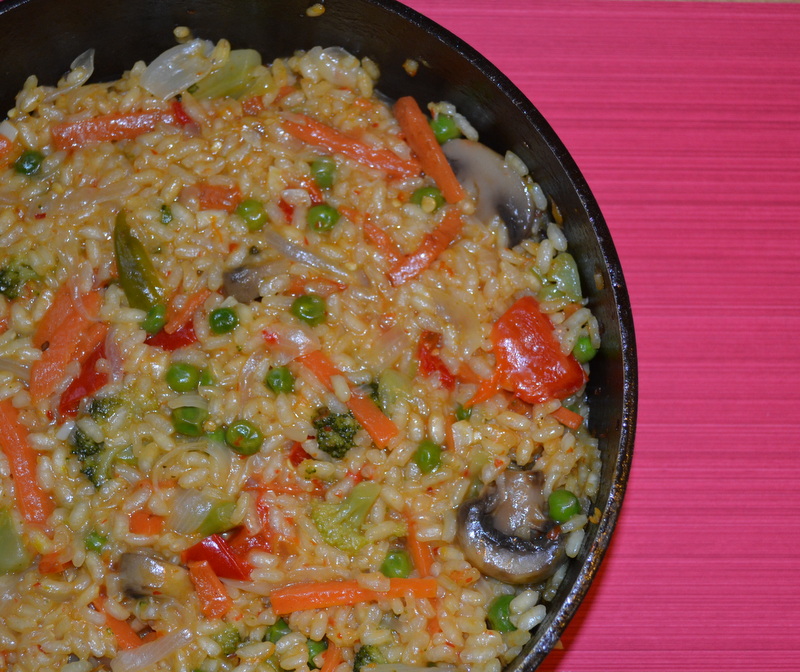
6. Open the pan one last time to check if the rice is done. Do not stir the rice, as it may dislodge the layer of socarrat at the bottom. If done to satisfaction, take the pan off the heat and allow to sit covered for about 20 minutes. This provides ample time for the rice to absorb any of the remaining broth and adds additional flavor to the rice. 

7. Serve directly from the pan. You may also sprinkle a little pepper onto individual servings for an added zest. 

Untitled
     
Paella is usually served with a simple tossed salad and a dash of olive oil and pepper on top. I had it plain, in all its original glory. In the beginning it tasted like a starchy version of our pulao, but with every spoon, I realized the uniqueness of the dish; from the slightly chewy rice grains and a strong saffron flavor to the additional taste of the vegetable stock and the little socarrat that I was lucky to get. And the best part was that I liked more when it had gone cold from all the time that I had taken for the photo-session. I am so inspired that I have already planned to try the Seafood Paella with the rest of the Arborio rice. Here's to the Spaniards for some kick-ass contribution to Gastronomy. Viva La Paella! 

Monday, March 25, 2013

Poosanikkai Morekuzhambu - True Test of Translucency


My tryst with the Morekuzhambu is almost as old as me, or so I think. I sure do have memories of my grandmother making Morekuzhambu on festival days, particularly on Amavasais (the New-Moon day), when respects were offered to one's forefather's. She used to make piping hot Vadais from fresh batter painstakingly ground at the humongous mortar-pestle and soak them in the Morekuzhambu The combination of the subtly spiced Morekuzhambu melding with the crispy-soggy Vadais created fireworks in one's mouth, forcing us to go for fifth and sixth helpings. Unfortunately, my mother, supremely talented as she is in the kitchen, however, failed to inherit this skill of making the perfect Morekuzhambu from her mother. But fortunately, the lack of expertise was only a passing cloud. Enter Jayashree Aunty, my mother's good friend from work. I believe, to this day, that she is one unconquered expert in the field of Tambrahm Cuisine. Right from the Adai's made for Kaaradayaan Nonbu to my favorite Kalyana Rasam, I fell hook, line, and sinker for her dishes. So, one day, after exchanging notes with Jayashree Aunty, my mother decided to have another go at the elusive Morekuzhambu and voilà, there was that perfect dish, close enough to my grandmom's version. There was no looking back ever since, and ever so often, we were treated to different varieties of the once-hard-to-make delicacy.

Fast-forwarding about 7 years, I was lying on a crumpled comforter at my home in the US, when a sudden desire to eat Morekuzhambu sprouted in the depths of my hopelessly-gastronomic mind (FYI, my emotional-hunger attacks are pretty adamant.) . And who else to call than Jayashree Aunty, who explained the apparently simple recipe with great patience. The result - disaster. The yogurt sold at the local supermarket was sweet, my blender was incapable of making a fine paste and I realised that jalapenos are no match for our desi-green chilies. But I learnt from my mistakes, and today, I can make one helluva Morekuzhambu, be it with Vadais or Ladies-Finger or Colocasia. The recipe below describes the simple steps leading up to one very tasty version of Morekuzhambu made with Ashgourd (Vellai Poosanikkai). Though the recipe predominantly follows Aunty's time-tested methods, I have suggested the use of Amchur powder to impart that sour edge to the buttermilk/curds, which is near impossible to achieve naturally with the weather conditions in the US. 

POOSANIKKAI MOREKUZHAMBU (Serves 4-6) 
Set-up Time : 30 minutes
Experiment Run-Time : 20 minutes

The Shopping List

          Set 1: Flavoring Paste
          Coriander Seeds : 2 Tbsp
          Cumin Seeds : 2 tsp
          Green Chilies : 6-8 depending on spice level
          Coconut Gratings : 1/2 cup
          Toor Dal : 1 Tbsp
          Rice : 1 tsp
          Thick Buttermilk/Whipped Curds : 2-3 Tbsp 
          
          Set 2: Veggies and More
          Ash Gourd : 2 cups, cut into half-inch cubes
          Thick Buttermilk/Whipped Curds : 3 Cups
          Turmeric Powder : 1 tsp
          Amchur Powder : 1 tsp
          Vegetable Oil : 2 Tbsp
          Salt : As required

          Set 3: Seasonings
          Mustard Seeds : 1 tsp
          Asafoetida : a generous pinch
          Red Chilies : 2, broken in half
          Curry Leaves : One strand
          Coconut Oil : 1 tbsp (One may use Vegetable oil too)

Methodology

1. Soak the Toor Dal and Rice from Set 1 in warm water for 20 minutes. Drain and grind to a fine paste with the rest of the ingredients in Set 1. Use buttermilk/curd instead of water to facilitate grinding. Jayashree Aunty said that this enhances the flavors from the ground paste.


Poosanikkai Morekuzhambu

2. In a heavy-bottomed pan, pour the oil and once heated, add turmeric powder, salt and the ash gourd pieces. Sauté gently, adding water at regular intervals until the ash gourd pieces are thoroughly cooked. Though additional salt is often used to quicken the process, I have always been taught that patience is one of the best virtues that one can possess in the kitchen.


Poosanikkai Morekuzhambu1

3. In a separate pot, mix the Buttermilk from Set 2 with the ground paste along with Amchur Powder and salt. Do remember that salt has already been added to the ash gourd and hence use it judiciously.

DSC_0518

4. Pour this buttermilk mixture into the pan containing the cooked vegetable and heat it slowly. The pale-green buttermilk will take on a yellow hue from the turmeric present in the ash gourd. When it shows signs of boiling, immediately remove the pan from the heat and keep it aside.

DSC_0533

5. In a smaller seasoning pan, add the coconut oil and once it heats up, add the seasonings in Set 3, one after another. When the mustard seeds begin to crackle, take the pan off the flame. Allow the seasoning mix to cool a bit before adding to the Morekuzhambu. And the dish is done! Fairly simple right?

DSC_0547
     
Morekuzhambu goes well with almost any spicy curry. I often pair it up with Potato Fry, Mango Pickle and Spinach among several other combinations. However, by Mylapore-Triplicane standards, Paruppu Usili is unarguably the best accompaniment for Morekuzhambu. The Tambrahms swear by this nearly-divine combination and many a war have been fought to decide which of the many Paruppu Usilis reign supreme as the perfect side to the Kuzhambu. 

DSC_0556
Aaah... Nectarine Bliss! Morekuzhambu Vadai
I also use a variety of other vegetables to make the dish (a few of which have been given below), but Poosanikkai remains my unchallenged favorite. As Chandrasekar said, the joy attained in picking up one piece of Poosanikkai from the Kuzhambu and holding it up against the light, only to see the rays passing through its translucent body, is unparalleled.  It is the True Test of Translucency.

Notes :

a. To make Colacasia Morekuzhambu, pressure cook the Colocasia till soft, cut into half-inch pieces and substitute it for ash gourd in the above recipe.
b. Thinly cut rounds of Ladies-Finger, seasoned with turmeric and salt, and shallow fried in oil can also be added instead of the ash gourd in the given recipe.
c. Dried Turkey Berries (Sundakkai Vatral), Chow-Chow, and Spinach are other vegetables that maybe used in lieu of ash gourd  

Sunday, March 17, 2013

Aloo Murghir Jhol - From Vanga, with love


The Bengalis know how to eat king-size. PERIOD. Be it their poshtos, or their jhols, their chats, and most importantly, their sweets, everything is labelled with one obvious trait common to these people from the land blessed with one of the largest river deltas in the world - an unquenchable love for food. Delicate and rich, sweet and spicy, and loaded with fish, the Bengali cuisine is as unique as every other cuisine spread across the country. And do I even need to start about their sweet tooth? They have given a whole new life to Paneer in their Sandesh, the Cham-Chams, and the ubiquitous Rosogollas. When we had some Bengalis as our neighbours back home, our maid used to talk in awe of their ability to go straight from their beds, every morning, to the kitchen, where they plopped an entire Rosogolla down their mouths before going about their daily chores. Like I said - love for food.

Back in school, I had a Bengali friend, whose mom used to make some seriously delicious stuff that I had neither seen nor heard of in Chennai. Shrimps fried in a sweet batter, some of the best aloo curries, and a select few yummy chicken dishes were enough for me to badger my mother endlessly with the enviable cooking abilities of 'Aunty'. Years later, I landed in Cincinnati to discover that it had a sizable Bengali community among the student population. The Durga Pujos and Basant Panchamis were celebrated with much verve, colour and of course, food. But alas, my only Bengali friend's love for food was totally overcome by her hatred for the kitchen and I rarely got to taste some homemade Bong food, until her mom came along for a visit! Bhegun Bhaja, Aloo-Gobhi curry floating in Mustard oil, Chenaar Payesh, Chicken with Green Papayas - I had one of the best dinners in a long time. All of a sudden, Mishti Dois, Jhols, Hilish, and Khajur-Gud (Date-derived Jaggery) were the only things that I ever wanted to eat, and much to the irritation of my roommate, mustard oil became the only oil fit for our consumption. Though this phase eventually died out, that spark of love for Bong food was unextinguished. So, last week, when the existence of excess chicken in the freezer and frigid weather coincided with a snow-day of class cancellation from the University, what else is to be expected from the kitchen of a bong-food-starved-tamil guy but  some awesome Aloo Murghir Jhol.

ALOO MURGHIR JHOL (Serves 4)
Set-up Time : 4 Hours Marination + 15 Minutes Chop-Work
Experiment Run-Time : 30 Minutes

The Shopping List

          Set 1: Soak-Shop
          Chicken : 500 gms
          (I used the breast, but chicken-on-the-bone is the best)
          Fresh Thick Curd : 2 Tbsp
          Tomatoes : 1 small, chopped
          Green Chili Paste : Made with 4-5 Chilies
          Ginger-Garlic Paste: From 1 inch ginger and 4 garlic cloves
          (or) Ginger-Garlic Paste:1 Tbsp of off-the-shelf paste
          Red Chili Powder : 1 Tsp
          Mustard Oil : About 1.5 Tbsp
          Salt : A deemed fit
          
          Set 2: Jhol-Jhol
          Potatoes : 2 medium, cut into sixths or eighths
          Onions : 1 Big, sliced thinly
          Ginger-Garlic Paste: From 1 inch ginger and 4 garlic cloves
          (or) Ginger-Garlic Paste:1 Tbsp of off-the-shelf paste
          Red Chili Powder : 1/2 Tbsp 
          Turmeric Powder : 1/4 tsp
          Garam Masala : 1/2 tsp 
          Mustard Oil : 4-6 Tbsp
          Salt : as per taste
          Sugar : 1/2 tsp (Oh yes, they add this)
          
          Set 3: The Spices
          Cloves : 2-3
          Whole Green Cardamom : 2
          Cinnamon : 1/2" stick
          Whole Black Pepper : 7-8
           Bay Leaves : 2

Methodology

1. Gently rub all the ingredients of the marinade in Set 1 into the chicken pieces (I cut the chicken breast into generous 2-bite sized pieces) and allow the flavours to soak into the meat for about 3-4 hours. I didn't feel the need to refrigerate it as the kitchen was already at a shivering 4 degrees.


DSC_0837

2. Rub a little salt, Chili Powder and Turmeric Powder into the potato pieces, and shallow fry them in sufficient mustard oil until you start seeing brown spots on the potatoes. Carefully drain on a paper towel and keep them aside.


DSC_0845

3. In the same pan, add the remaining oil and once it heats up to its smoking point, season it with the spices given in Set 3. 


DSC_0843

4. When the spices start sputtering, add the sliced onions and the sugar. Sauté the onions until they turn pink. You may add a little sugar for quick caramelization.


DSC_0851

5. Now, add the ginger-garlic paste, the turmeric powder, the chili powder and salt. Fry on a low-flame until the raw smell of the spice-powders and the GG paste disappears.

6. Finally, empty the contents of the marinade bowl - chicken, curd, and spices, along with the fried potatoes into the vessel and stir gently to mix the contents. Now starts the slow process of browning the meat (Kashano) on a low heat. The chicken needs to be stirred patiently, until the oil starts to separate at  the sides. Usually, it takes anywhere between 15-20 minutes.


DSC_0855

7. Once the oil is glistening on the sides of the pan, add water to bring the Jhol to the desired consistency. Since I wanted it to be more on the watery side, I added close to a cup and half of warm water. 

8. When the water comes to a boil, turn the heat down, sprinkle some Garam Masala and serve immediately, with an equally hot bowl of steamed white rice.


DSC_0868
     
The warmth and comfort of this delicacy on the above mentioned frigid day is near-incomparable. The chicken pieces fell apart at my slightest touch and the potatoes added further joy to the pot. All that was missing was some Mishti-Doi and the right people for the lunch-time debates that Bengalis are famous for. Else it was খুব সুস্বাদু (Absolutely Yummy)!