Monday, January 5, 2015

Thiruvadhirai Kali - To Nutty with Love!


Today is Thiruvadhirai - a day of special celebration, worship, and feasting at all Shaivite shrines in South India; and Tamil Nadu in particular. Even though the asterism of Thiruvadhirai occurs once in every 27 days, its occurrence during the Tamil month of Maargazhi (Mid-December to Mid-January) is observed with much grandeur. It is said to be the day when Shiva answered the prayers of the saints Vyagrapaada and Patanjali, and blessed them with a vision of His cosmic dance. The grandest of these celebrations are observed at the Shrine of Chidambaram where Shiva appears as Nataraja (AKA Nutty), the Lord of Dance, housed in a hall roofed with golden tiles. The festivities begin at 2 in the early morning when the murti (idon/idol) of Nataraja (Yes, the same bronze masterpiece whose replicas are seen worldwide from the CERN campus to the humblest of homes) is bathed in fragrant powders, followed by a procession around the temple to the tune of several instruments. Several hours after being woken up at an unearthly 2AM, He is finally offered a large cauldron of something that looks like mashed Sakkarai Pongal. This is the famed Kali, that is offered just once a year to Nataraja, and like all off-the-beat temple offerings, has its own small tale.

Chendanaar was a poor but pious inhabitant of the hallowed town of Chidambaram. Like all devout Shaivas of yore, he had inculcated a practice of partaking his mid-day meal only after sharing a portion of it with another Sivanadiyaar (One who offers himself to Shiva). One year, on the day preceding Thiruvadhirai, severe rains had driven people indoors. As a result, Chendanaar's wife had no opportunity to collect the necessary resources for the meal. So, when a Sivanadiyaar showed up at their doorstep in the pouring rain, they had no choice but to serve him a quick, frugal meal of rice flour cooked in jaggery syrup. Greatly saddened by their assumed inhospitality, the couple turned up early at the shrine on the day of Thiruvadhirai. When the priest finally opened up the sanctum for worship, Nataraja stood there, dancing in bliss as always, but with a smattering of Chendanaar's Rice-Jaggery paste across His lips, while scattered Kali lay all over the floor. Chendanaar's eyes welled up at the revelation of his guest being Shiva Himself, while his wife related the incident to others amidst supressed sobs of humility, wonder, and satisfaction. Ever since, the humble Kali has become a staple offering for Nataraja not only at Chidambaram, but also at everyone's homes on Thiruvadhirai. The touching tale brings to one's mind Krishna's words in the Gita :

patram pushpam phalam tOyam, yO mE bhaktyA prayacchatI
tad aham baktyupAhrtam ashnAmi payatyAtmanah.
"If a person offers to me with love and devotion, even a leaf, a flower, a fruit or water
I accept wholeheartedly, that offering made by the pure-hearted being"

It is not the offering that is so important as the spirit in which it is made. With that small thought in mind, lets dive into the recipe.

THIRUVADHIRAI KALI (Serves 2)
Set-up Time :  10 minutes
Experiment Run-Time : 25 minutes

The Shopping List

          Set 1: For the Kali
          Raw Rice : 1/3 Cup
          Moong Dal (Dehusked Green Gram) : 1 Tbsp
          Jaggery/ Brown Sugar : 1/2 Cup, powdered
          Grated Coconut : 1/3 Cup

          Set 2: For the Drool Factor
          Cashew-nuts : about 6, broken
          Cardamom Powder : 1 tsp
          Ghee : 2 Tbsp

Methodology

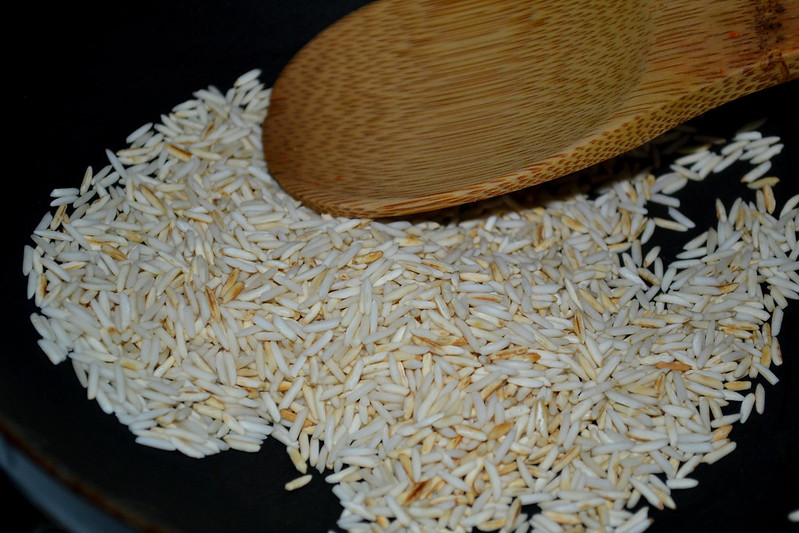
1. In a wide pan, fry the rice on a medium flame until it gives off a nutty aroma and turns a delicate shade of brown. Please, let it be a delicate shade of brown and not the much coveted chocolate brown!

DSC_1648

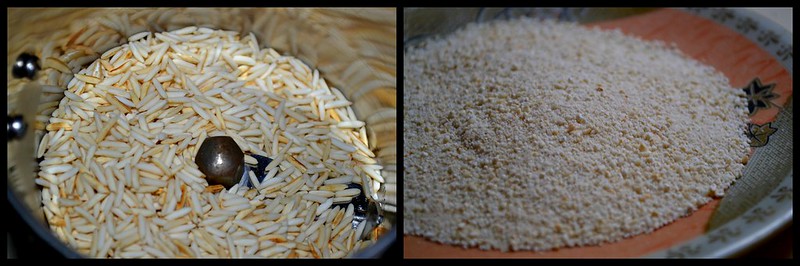
2. Cool it sufficiently (which I always lack the patience to do) and grind it a coarse powder in a blender. A few pulses are usually enough!

Thiruvaadhirai Kali

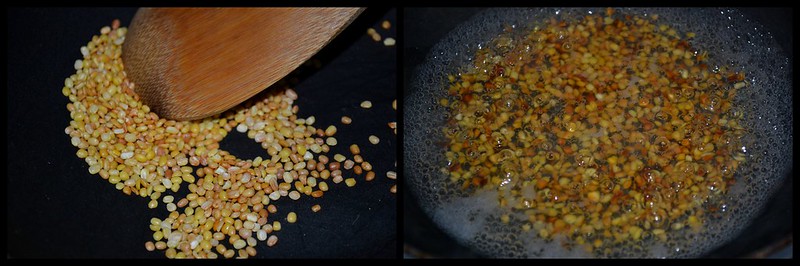
3. In the same pan, fry the Moong Dal until it too starts acquiring a golden-brown hue. Pour in a cup of cold water and watch the Dals dance merrily as it comes to a boil.

Thiruvaadhirai Kali1

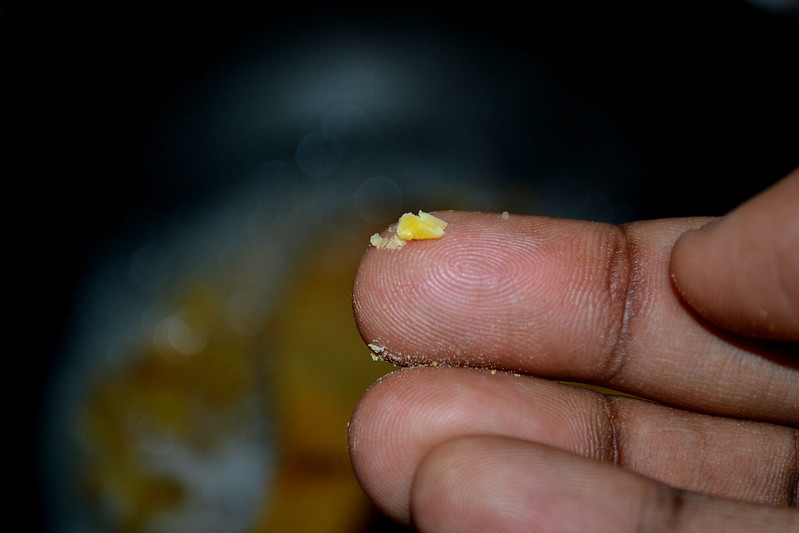
4. Check the Dal in about 10 minutes. It should almost be there. If you tried to squash one between your thumb and forefinger it should give in but with a little resistance.

DSC_1654

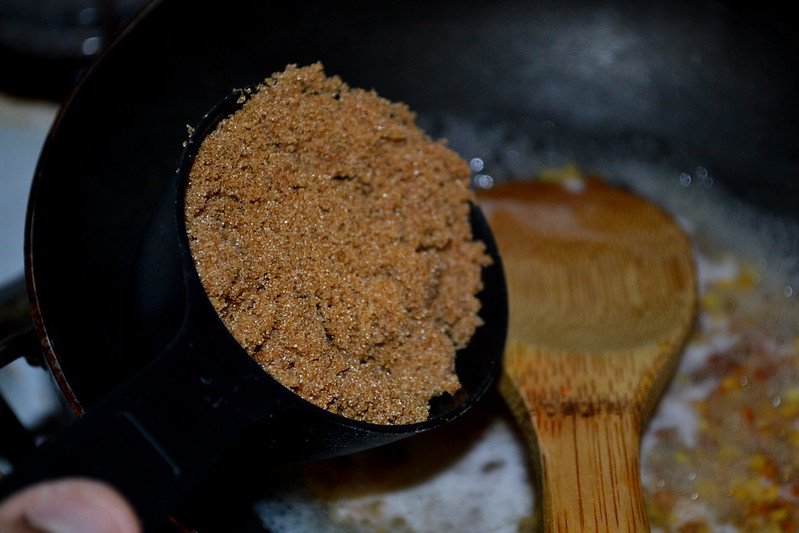
5. Once convinced about the consistency of the Dal, add the powdered Jaggery (Or brown sugars, as I sometimes tend to substitute) into the pan with about 2 cups of water. Let it come to a boil on medium flame 

(If you live within the subcontinent, it would be worth to dissolve the Jaggery in some warm water, filter it, and then proceed with the solution at hand)

DSC_1655

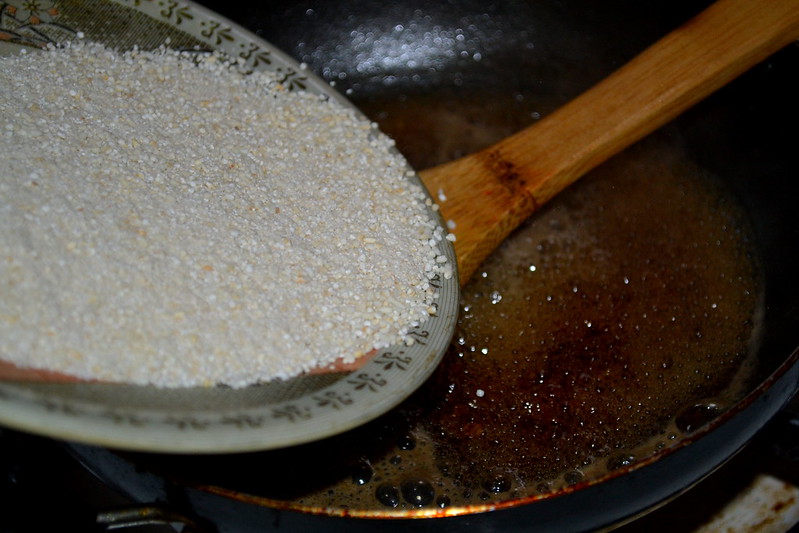
6. When the Jaggery syrup starts to boil, tip in the powdered rice and start to stir until the rice particles are mixed well into the syrup.

DSC_1661

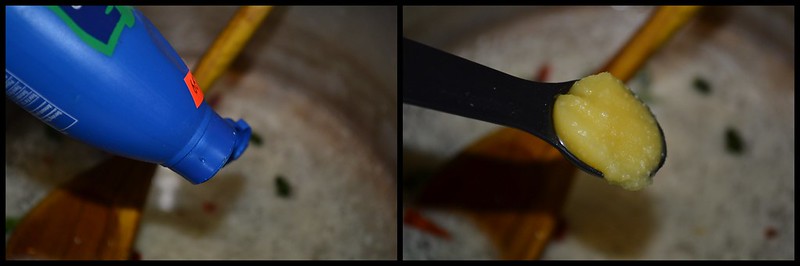
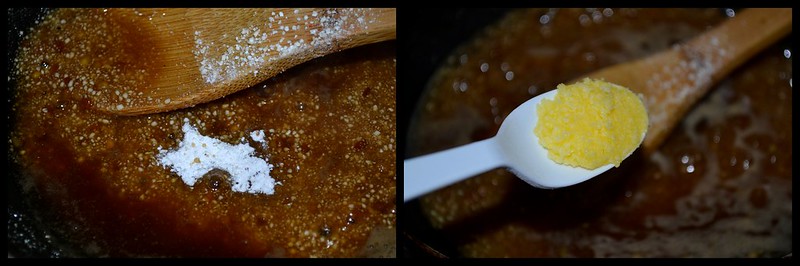
7. Add a tablespoon of ghee and some cardamom powder and watch them get absorbed by the now spluttering mass.

Thiruvaadhirai Kali2

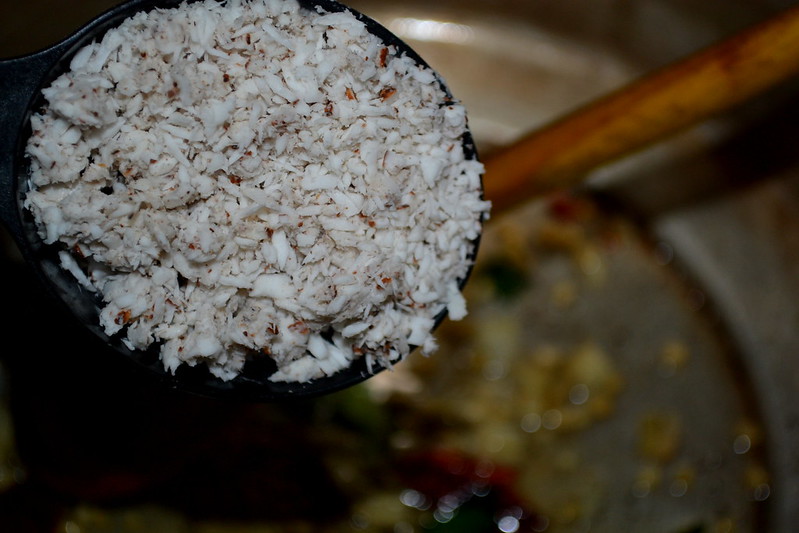
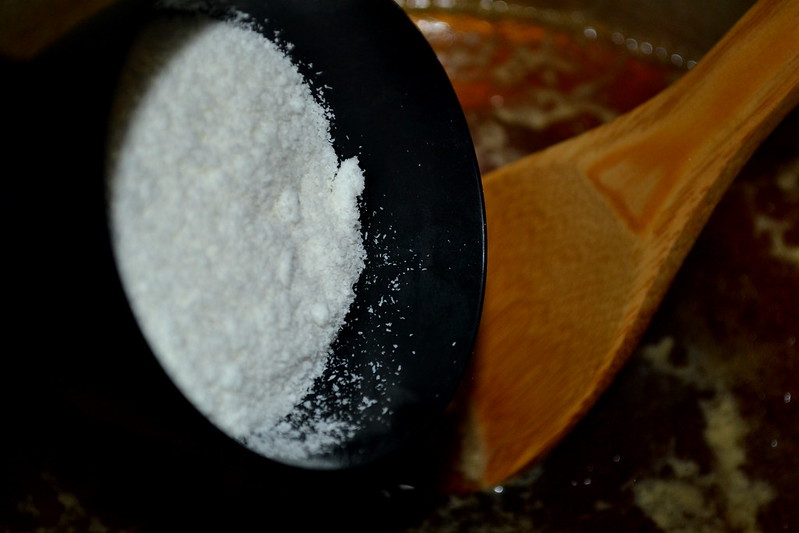
8. Finally, add the grated coconut and incorporate it into the Kali.

DSC_0189

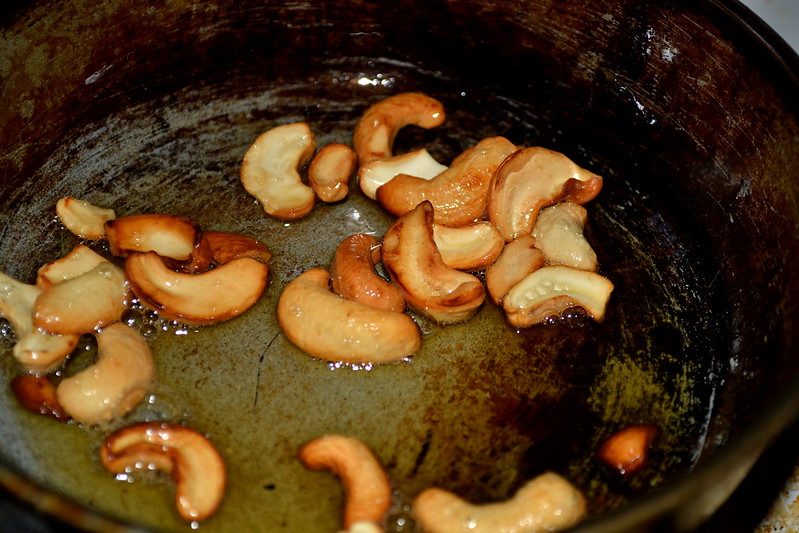
9. In a separate pan, heat the rest of the ghee and fry the cashew-nuts to a golden shade.

DSC_0197

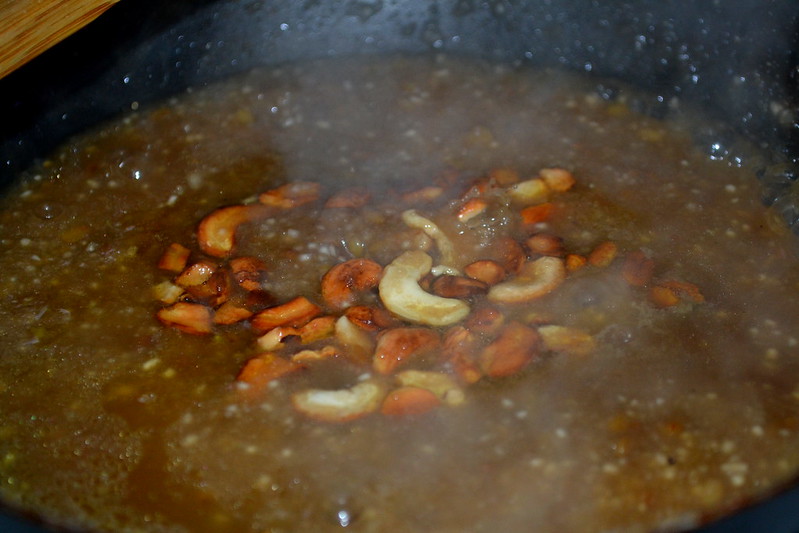
10. When the nuts are done, add them to the spluttering Kali, ghee and all.

DSC_1670

11. When the paste starts to leave the sides of the pan, it is done. Scoop it all up into a bowl and proceed with either your worship or your devouring!
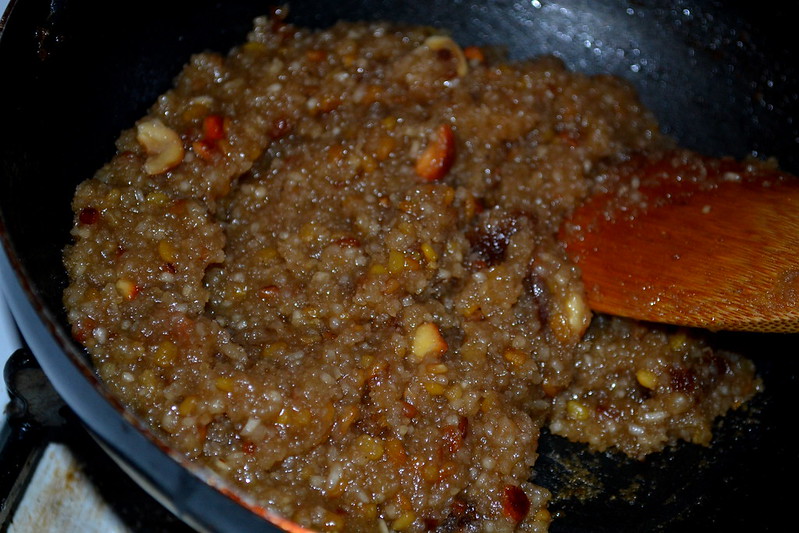
DSC_1672

Traditionally, the Kali is accompanied by an Ezhu-Kari Kootu, a yummy Sambhar like medley of seven vegetables. But, Hello! Where am I to go for Avarakkai, Yam, Colocasia, Mochai and the rest of the veggies in the middle of an Ohio winter? So the Nataraja at my home got served only the Kali sans the Kootu. It saddens me a little, but then again, let us all remember Krishna's words in the Gita and make up for the lack of Ezhu-Kari with a little more sincerity, devotion and love!
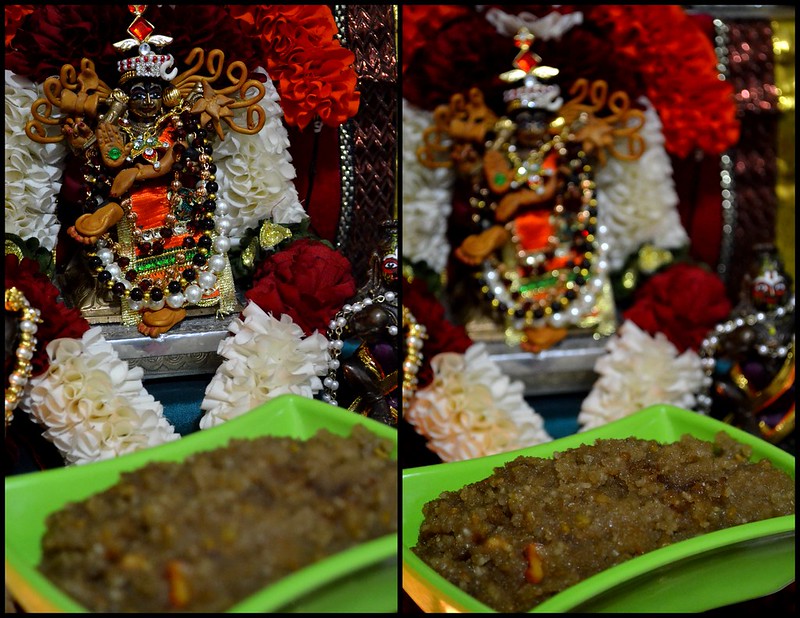
Thiruvaadhirai Kali3

Sunday, January 4, 2015

Milagai Thokku - Hostel-Life Nostalgia


Did I ever tell you that long ago, like around a decade ago, I joined Mepco Schlenk Engineering College, AKA "The Jail" for my Undergraduate College and ended up spending 4 years of my life there? It was the strictest place I had seen since birth. The professors were strict and tight-lipped about anything beyond the subjects, the wardens were strict about your sleeping-walking-talking-peeing habits, the janitors were strict about your hygiene, the watchmen were strict about your non-IST punctuality... honestly the list is never ending. But to be fair, I enjoyed ALMOST every bit of it. Almost, because, the hostel residents were subjected to three boring/ half-cooked/ tasteless meals every single day in a weekly cycle. The hostel mess was a place where metaphorical rock-idlies, rubber-rotis, noodle-glue and handkerchief-dosas ceased being metaphors and posed severe post-digestive nightmares instead. 

To me, almost every meal was my tongue's funeral. Again, almost because, there was the lunch menu on Tuesdays which somehow managed to jolt your gustatory organs from their coma-state. There was dal (with ghee), rice, some brilliant spinach kootu, more-milagai (fried-buttermilk-soaked-green-chilies) and this whacking milagai thokku! The thokku alone provided enough willpower to make it to the next Tuesday lunch.

The thokku was so awesome that it was the first item I missed after getting out of that place. My mom had no idea about the recipe, and at that time I didn't even know it was called milagai thokku. It was only three years ago, when I was flipping through a random Tamil magazine that I came across a photo of the very familiar dish (and learnt its name in the process). The recipe we are going to see today is what I noted down from that magazine (which I abandoned the next second as I dashed towards the kitchen!)


MILAGAI THOKKU (Serves 4 It's a pickle I say)
Set-up Time :  10 minutes
Experiment Run-Time : 20 minutes

The Shopping List

          Set 1: Spice Base
          Onion : 1 Small, finely chopped
          Tamarind Paste : 1 Tbsp, mixed with 1/2 cup of water
          Spicy Green Chilies : 10-12, slit length-wise

          Set 2: Seasonings
          Asafoetida : 1/4 tsp
          Mustard seeds : 1 tsp
          Curry Leaves : 4-5 leaves (optional)
          Chana Dal (Split ChickPeas) : 2 Tbsp
          Sesame Oil : 3-4 Tbsp (Don't cringe)
          Salt : To Taste

Methodology

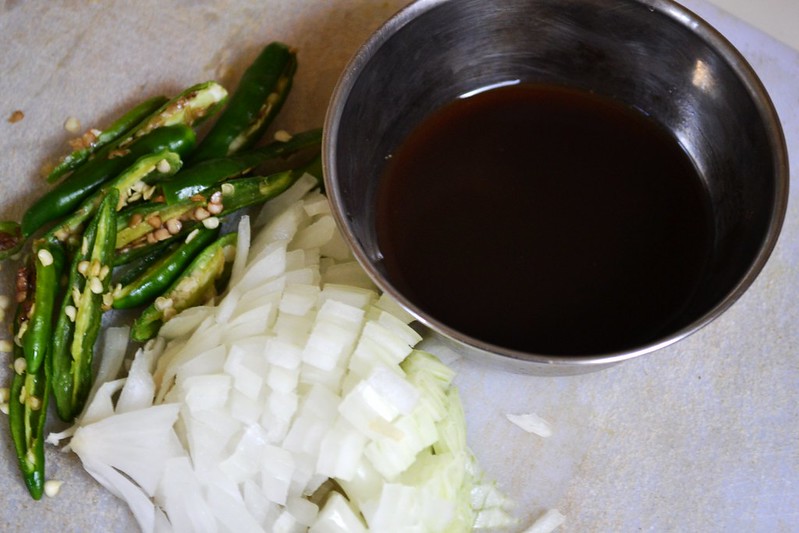
1. Slit the chilies as said - along the length. You may deseed the chilies if you believe that you may have trouble sitting down tomorrow, but I must say, you would have missed the point of this dish.

DSC_0036

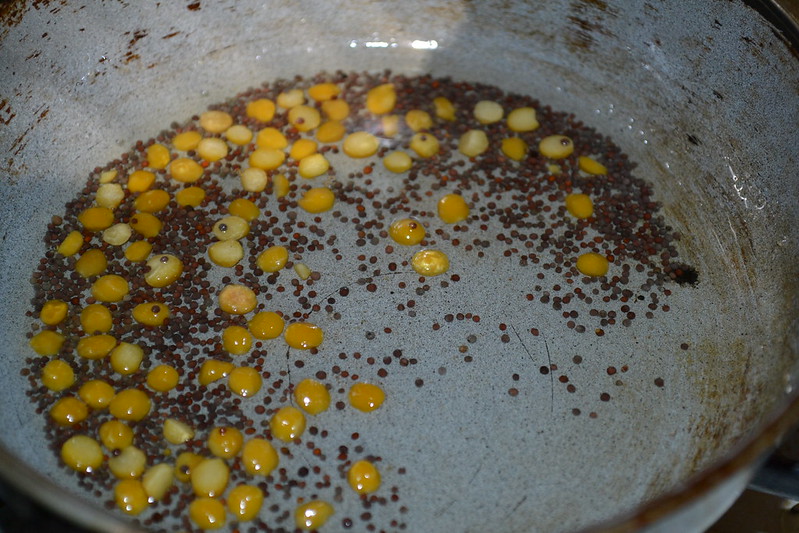
2. In a small kadai or pan, heat the sesame oil and crackle up the mustard seeds. Follow it up with the asafoetida, Chana Dal and curry leaves.

DSC_0037

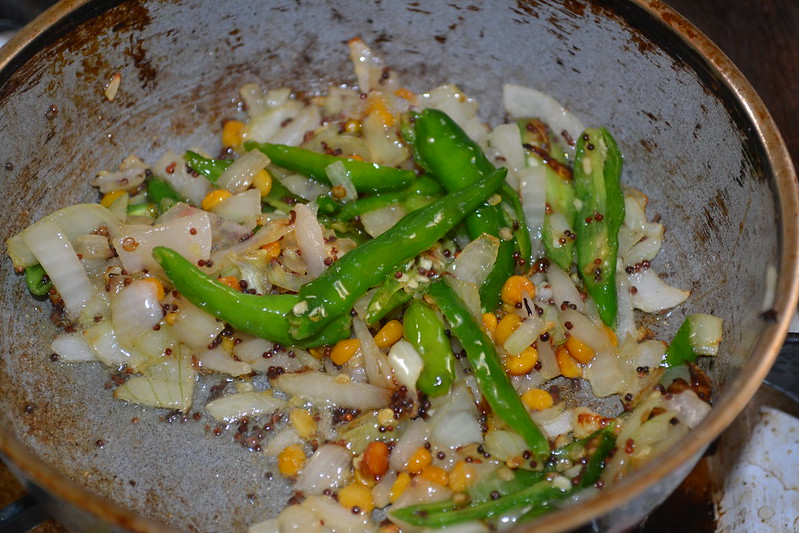
3. When the Dal takes on a shiny golden hue, add the chilies and the onion. Sauté, sauté and sauté until the green chilies shrivel a little and the onions are shiny and translucent.

DSC_0040

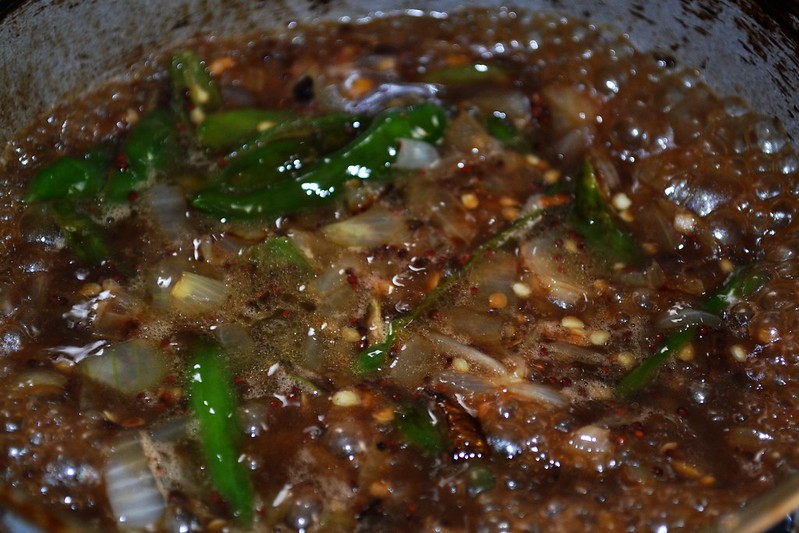
4. Add the tamarind water to the pan along with some salt. From now, it is just a matter of patience. Keep stirring until the liquid evaporates and oil starts oozing out from the sides. Switch off the stove.

DSC_0043

5. Cool it down to room temperature and transfer to a clean glass bottle if you plan to keep it for sometime. With me it lasts no longer than a day.

DSC_0048
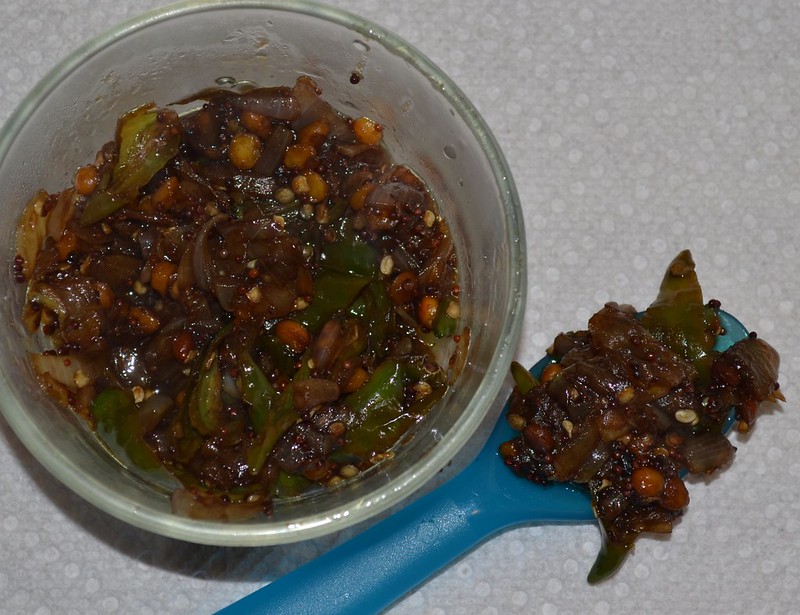
Ready - Gobble at your own risk!
The thokku goes well with dal, sambhar, rasam and most obviously curd rice. The pleasure in rolling up a ball of thacchu mammam, dragging it through the thokku and dropping it in your mouth is indescribable. I sometimes eat it with dosas too and venn-pongal and rava idlies. All delicious. Like I said, it rarely lasts more than a day and I prepare it equally rarely (due to obvious pin-vilaivugal ;) ). But every time I make it, my mind passes through all that Mepco has given me - awesome friends, uncountable memories, a few awards and a great sense of independence. The thokku, in the truest sense, gives pleasure to the both my tongue and mind alike. 

Saturday, January 3, 2015

Arisi Upma - Comfort Breakfast!


There are several ways you come across brilliant new recipes you have not even heard of before. These days, the internet is inherently the best place to stumble across interesting combinations of ingredients accompanied by photographs capable of creating a drool-pool on your keyboard. Televisions come next, with a host of cook-shows starring everyone from incredible seven-star chefs to film-celebrities who have never lit a stove. Then follow the mind-numbing varieties of cookbooks with their glossy covers and hefty price tags, covering every cuisine from everyday Indian to exotic French to Diabetic, Gluten-free, Vegan and what not. And then there are those food items that you hear of when you are least prepared to take notes - at a cousin's wedding with a lavish spread, where the chef is willing enough to share a recipe or two; at a random coffee shop conversation with a friend; at remote, never heard of canteens at government offices or from enthusiastic maamis at Chennai's many sabhas giving their opinion on the ways to make the perfect Keeravadai! This recipe also found its way into my ever-expanding lists of "to-try items" from a friend who was reeling off her amma's and paati's takes on the Arisi Upma, the lesser known southern cousin of the now ubiquitous Rava Upma!

     With her half-baked recipe floating around my head, I had to resort to the above mentioned methods to come up with a good enough source which I could safely mix and match with what I had in mind. Like I always do, after collecting one recipe from a Mallika Badrinath cook book, another from Samaithu Paar, and three more from the internet, I took the best mix of ingredients and proceeded with my own made-up recipe, which is what you are going to be treated to today!

ARISI UPMA (Serves 2-3)
Set-up Time :  10 minutes
Experiment Run-Time : 20 minutes

The Shopping List

          Set 1: Upma Base
          Raw Rice : 1 Cup
          Toor Dal (Red Gram/Split Pigeon Peas) : 1/4 Cup
          Cumin Seeds : 1 Tbsp
          Whole Peppercorns : 3/4 Tbsp
          Grated Coconut : 1/2 Cup (Fresh Preferred)

          Set 2: Seasonings
          Ginger : 1 inch piece, finely minced
          Asafoetida : 1/4 tsp
          Mustard seeds : 1 tsp
          Red Chilies : 4, broken
          Curry Leaves : a strand or two
          Urad Dal (Black Gram) : 1 Tbsp (It is yummy, so I used 2)
          Vegetable Oil : Sufficient to sauté the above
          Coconut Oil : 1 Tbsp
          Ghee : 1 Tbsp
          Salt : Adjust to taste

Methodology

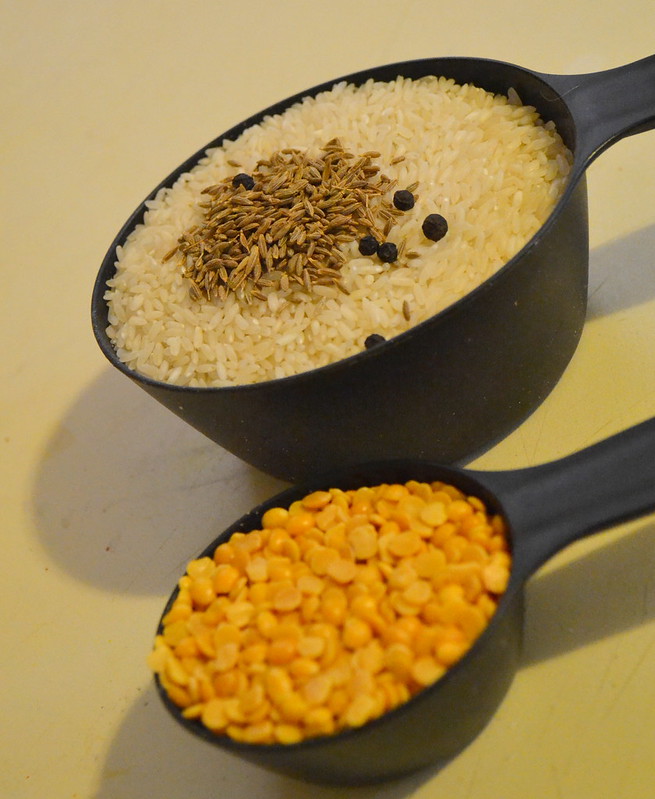
1. Place all the ingredients from Set 1, except the coconut, in a Mixie jar. I used the one which is often dubbed the 'Chutney Jar' back home. It is usually the smallest of the jars and (according to me) is the best way for grinding dry ingredients.


AU3

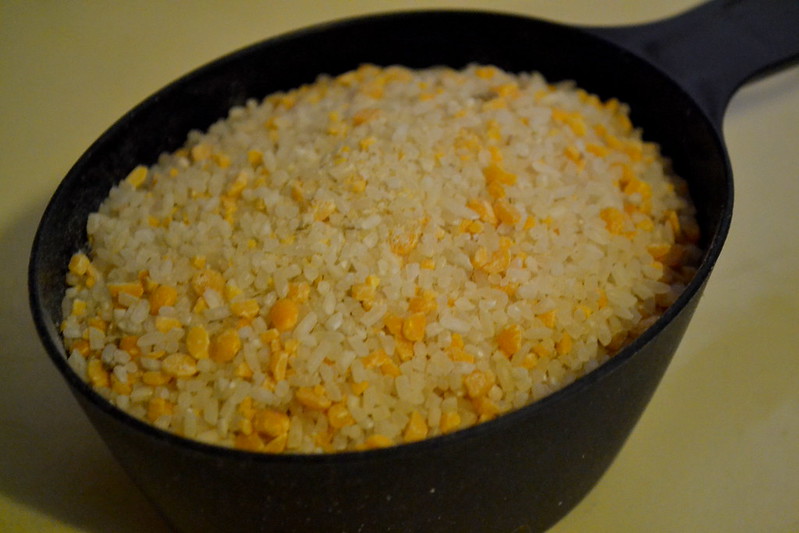
2. Run the Mixie, intermittently on the pulse mode, a couple of times, until you get a coarse powder of dal and rice. If you grind it to a fine powder, then better luck next time. You will not be making any Arisi Upma today.


AU5

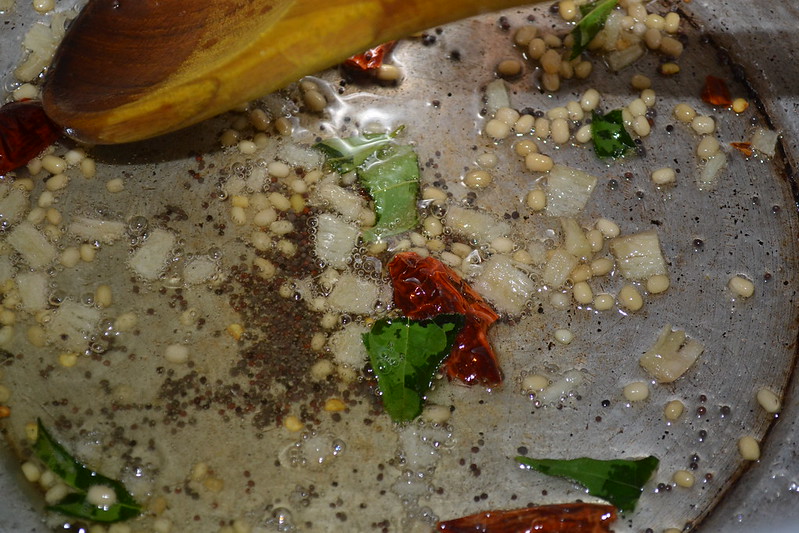
3. Set a pressure cooker on the stove. Heat the Vegetable oil on a medium flame and add the mustard seeds. Once they crackle, add the ginger, red chilies, curry leaves, Urad dal and asafoetida. Stir them around until the Urad dal takes on a reddish-brown hue. 


AU4

4. Immediately add the grated coconut and give a few swift stirring strokes. 


AU6

5. Now is the time to squeeze in the coconut oil (Oh yes! I use good old Parachute) and the generous tablespoon of ghee. They are some healthy fats, so let's not worry much here!
Arisi Upma

6. Finally, add the rice-dal-cumin-pepper powder, 3 cups of water, salt and close the pressure cooker.

AU7

7. Cook on a medium flame until you hear three whistles. Switch off the stove. Patience now! Once the pressure is released, you can dole out individual portions which may optionally be topped with more ghee (yumm!)

AU1

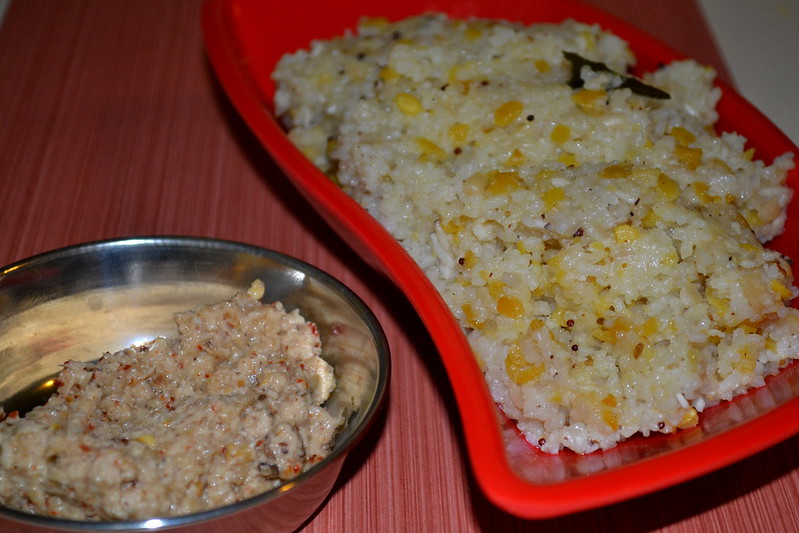
I served the Arisi Upma with my mother's special Urad Dal-Tamarind Chutney. I have also eaten it with Tomato Chutney, Aavakkai Pickle and Kaarakuzhambu. Each combination, I must say, is worthy of it's own poem, story and memory. 

Arisi Upma is a simple, fuss-free, breakfast masterpiece which I love to make during the winter months. After I wrap myself with a nice warm comforter, all it takes is a book and a plate of hot Arisi Upma to knock off a few hours from a gloomy Sunday. Hope you find it just as comforting as I do!

Thursday, May 15, 2014

Vanilla/Mocha Meringues - Some French Miracles!


So, last week, I took up a sort of unofficial decision, that I would bake something new every weekend. It could be anything, from something as simple as a cookie to something as elaborate as a multi-tier cake. Yes, it is going to be a hassle, and yes it is going to take a toll on my diet, but hey! Why are friends there for? One Whatsapp message and you have a clean tray 30 minutes later. So I get the double satisfaction of baking an exciting dish and still keeping to the limits of my latest diet-fad.

Last Saturday, I went to bed at 4:30 in the morning and got up at 9:30. Having no mood to go to the university, I decided that it would be the ideal time to bake, as none of my room-mates were at home either. A quick scroll through some famous and not-so-famous cooking sites, and presto, project for the day - Meringues. They are similar to our Thoothukudi Macaroons without the cashews, with a uniform crispness throughout, and are an integral part of French and Swiss cuisine. For around half an hour, I was carried off by the chemistry behind meringue formation and totally forgot that I was looking to cook a dish and not teach advanced courses on protein denaturing and stabilization. Nevertheless, it did not take me too long to notice that in each of these blogs, the notes/tips following the recipes were larger than the recipes themselves. The list of do's and don't's, common mistakes and suggestions to volumize the egg-whites are long enough to fill separate chapters. But again, what dare discourages an ardent experimenting cook?  None but the self!

At the end of the day, after an hour of egg-beating and piping out pretty patterns and another two hours of baking, I had around 90 meringues on hand, half of them vanilla flavored and the rest mocha flavored. Three hours later, they were gone, equally shared between seven eager tummies! And it was not hard at all!

VANILLA/MOCHA MERINGUES (serves 7-8)
Set-up Time :  45 minutes
Experiment Run-Time : 2 hours

The Shopping List

          Set 1: Meringue Base
          Eggs : 4 large
          Salt : A pinch
          Confectioner's Sugar : 3/4 cup

          Set 2: Flavoring
          Vanilla Essence : 2 tsp
          Cocoa Powder : 3 Tbsp, Dutch Processed
          Nescafé Instant Coffee Powder : 1 Tbsp

Methodology

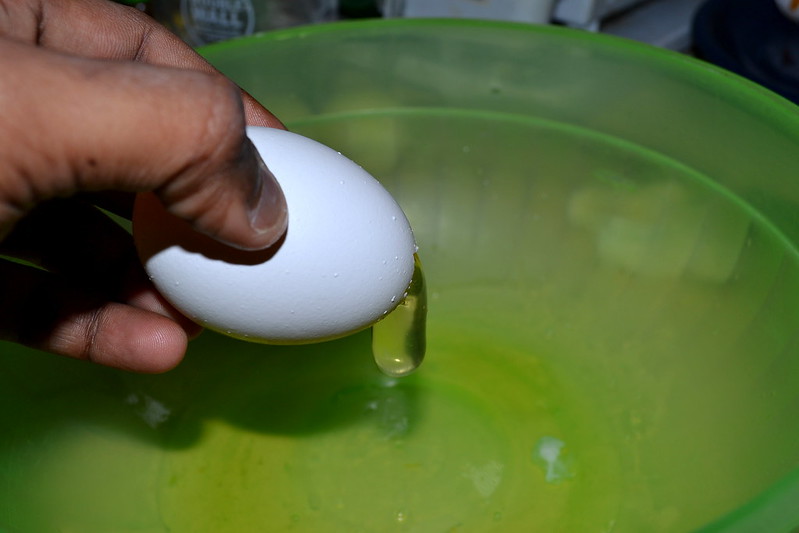
1. The first and the most important step in making Meringues is to get pristine egg-whites. Not a drop of yellow yolk. Chemically, the fats in the yolk hinder the formation of stiff peaks. Therefore, the greatest care is used to obtain the whites. I usually crack a small hole on the top end of the egg and pour out the whites gently, retaining the yolk within the shell. Sometimes, I break the egg onto a plate and use an empty plastic bottle to suction out the yolk. Either way, make sure you get only the whites of the four eggs into a large mixing bowl.

DSC_0643

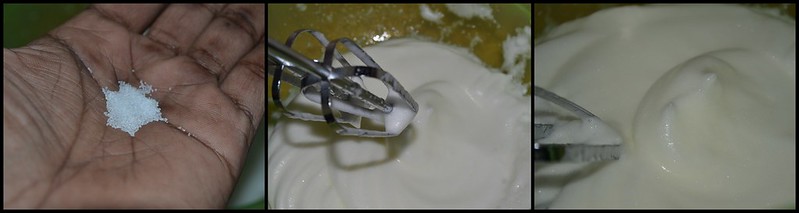
2. Add the salt to the egg whites and start to whisk the whites with an electric beater at medium speed. The salt helps to stabilize the peak formation. Many people use cream of tartar or vinegar for the same purpose but that may give a funny taste to the meringues, so I stuck with salt. Continue to whist the whites until it forms soft foamy peaks. It usually takes about five minutes.

Meringues1

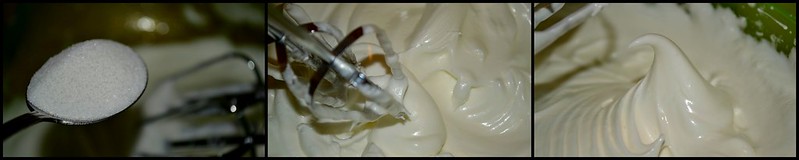
3. This step is a very good test to measure your patience. Once the foamy peaks are formed, start adding the sugar, one teaspoon at a time, whisking for about 10-15 seconds between each addition. You have to make sure every batch of sugar is completely dissolved before the next is added. 

As you proceed you will see the mixture increasing in volume because of the air being incorporated by the whisking process. Continue till the entire 3/4 cup of sugar is done. Beat continuously until stiff peaks are formed when you remove the whisk from the batter.

Meringues3

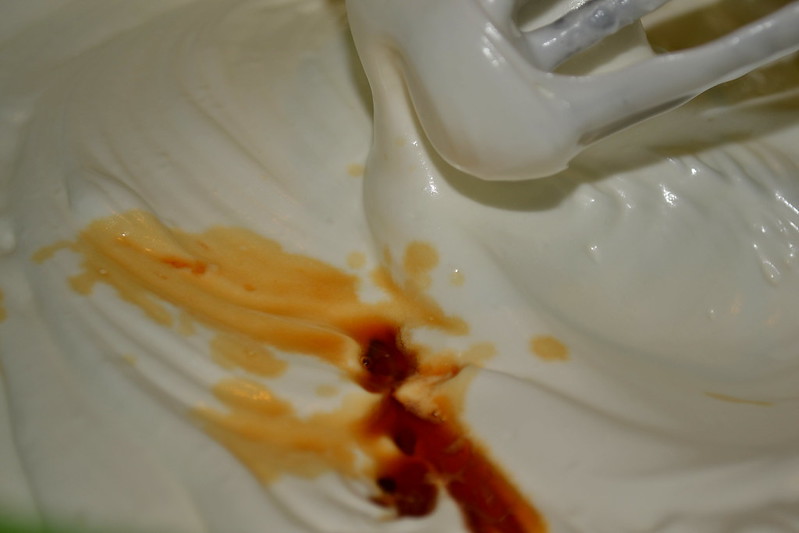
4. Now add the vanilla essence and whisk for an additional 30 seconds. Divide the meringue into two equal portions.

DSC_0655

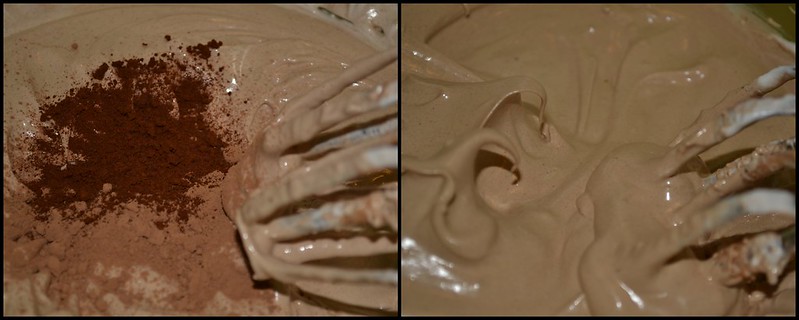
5. To the second portion of the meringue mixture, add the cocoa powder and coffee powder in small increments until they are well incorporated and stiff peaks are formed. At this stage, it is very tempting to take some meringue and taste it. Go ahead and indulge - a little raw egg whites did no one any harm! 

Meringues4

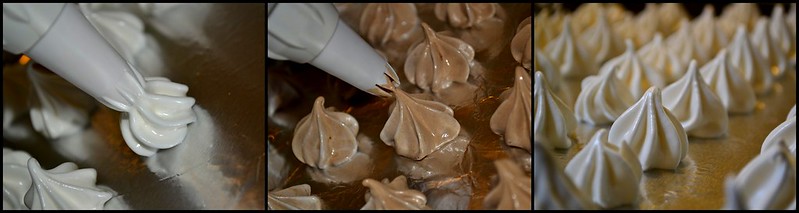
6. Now comes the next testing part. Line two baking trays with aluminum foil and grease it up with very little butter. Fill the meringue mixture into an icing cone or a small ziploc bag with a nipped tip. With the help of a star shaped nozzle, pipe out small meringues directly onto the tray. I used a cupcake decorating set gifted by a friend and reduced the mess substantially. Each tray could accommodate about 45 meringues.

Meringues5

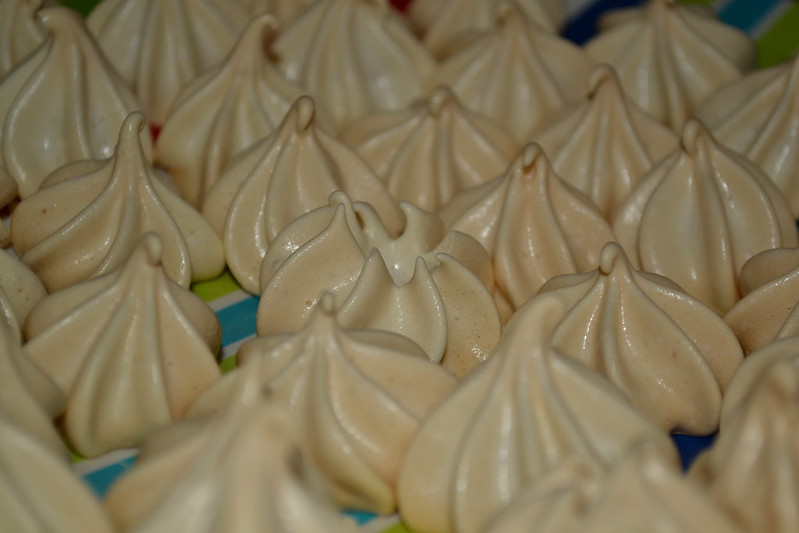
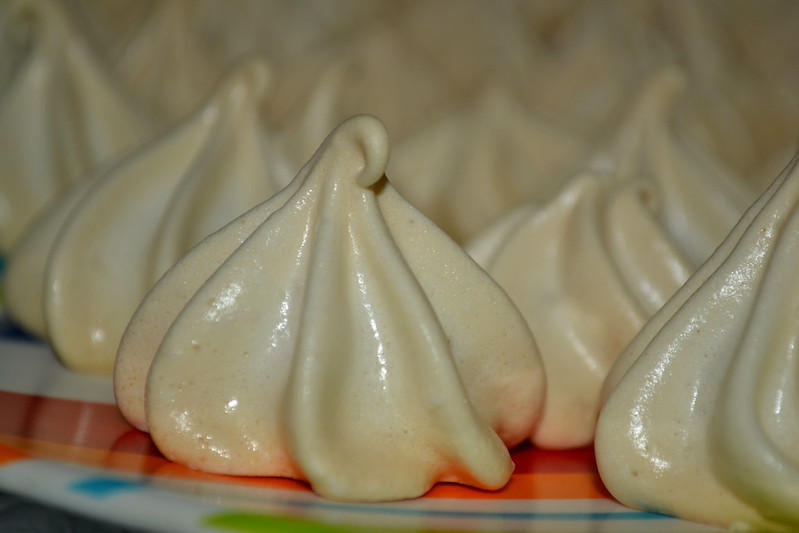
7. Preheat the oven to 200 °F and place the meringue trays into the oven. Bake undisturbed for 1.5 hours or until the meringues are hard to touch. I browned the white macaroons a little but try not to do so. They are supposed to remain as white when they come out as when they went into the oven.

8. Cool the muffins on a wire rack for fifteen minutes and carefully pick them off the tray. They are sticky little monsters and refuse to come off the baking trays without a little fight, but never give in.

DSC_0673

9. Store them in airtight containers and serve with some hot chocolate for some evening fun! 

DSC_0675

Airy, crunchy, and super yummy, the meringues were undoubtedly a success. So much so that I have already done sufficient research into other possible flavorings that may be incorporated. Care has to be taken so as to not use too much of oil-infused flavorings as they would impede the stiff peak formation. Right now, I have strawberry, pistachio, mango, dark chocolate and several other ideas in my little head. Research is also on to find the best recipe to duplicate the perfect Thoothukudi Macaroon. After all, it is just one step further than these meringues. But for now, you can try this super simple recipe and bask in the meringue's crunchiness, without going anywhere near Paris.

Wednesday, May 7, 2014

Muttaikos Paruppu Usili - Fresh from the Agrahaaram!


There are certain connections that you are bound to make between food items and ethnic groups, within every state in India. With cuisines varying from one sub-community to the other, you get a medley of recipes for a simple dish such as sambhar and a quick Sunday of house-hopping, visiting friends and relatives is sufficient to make your head (and probably your digestive tract too) spin with the inherent variety of food. However, each community has some signature dishes that are virtually impossible to be replicated by another community, however much they may try to beg-borrow-or-steal. My mother calls it கை பக்குவம் (Kai-Pakkuvam) , or roughly translated - "Prowess of the Hand". That is why she laments that she can never replicate the Iyer-Morekuzhambu, the Chettiar Chicken Biriyani, or the Tamil-Muslim Bread Halwa. Probably that's why "To each his own", is a well accepted saying among the home-chefs of India.

The dish that we are going to (attempt to) prepare today is a specialty of the Iyer-Iyengar Maamis of TamilNadu, particularly those who derive their ancestry from the Thanjavur area of the erstwhile fertile Kaveri Delta. Being typical vegetarians, the Iyer-Iyengar cooks of yore devised several recipes to make up for the lack of protein in their regular diet. They encouraged the extensive use of different varieties of pulses and legumes, and made sure that milk and milk products were incorporated at every meal in the form of curds, ghee, buttermilk etc. They made the boring dals interesting by combining them with a variety of vegetables, resulting in brilliantly refreshing kootus and poriyals. One such ingenious marriage is what resulted in the Paruppu Usili - a made-in-the-heaven match of a particular vegetable and crumbled-steamed-lentil-cakes. You will be hard-pressed to leave a typical Tamil-Brahmin wedding without having tasted some of this signature dish.

Ironically, I first fell in love with this dish after I moved to the US. Suganthi Aunty, a friend of my mother, who now knows every possible event in my life at Cincinnati, had served it with her minimalist-rasam. And I was totally mind-blown. To top it all, she had made it with broccoli, while I was used to the cabbage, beans and cauliflower versions of the dish. Maybe that was the whole selling-point. For the next several months broccoli became my favorite vegetable! The recipe that I am sharing today is sourced from Suganthi Aunty, though I have replaced the broccoli with cabbage, and have significantly increased the lentil-to-vegetable-ratio. I feel that it makes the Paruppu Usili all the more yummier, if possible!

MUTTAIKOS PARUPPU USILI (Serves 3)
Set-up Time : 3 hours
Experiment Run-Time : 30 minutes

The Shopping List

          Set 1: At the Chopping Board
          Cabbage : 1 medium, cored and leaves finely chopped
          
          Set 2: The Actual Yumm Stuff
          Channa Dal / Bengal Gram Dal : 1 Cup
          Red Chilies : 4-5
          Asafoetida : a generous pinch
          Salt : As required

          Set 3: Seasoning
          Mustard Seeds : 1 tsp
          Red Chilies : 2, broken
          Curry Leaves : 2 strands, torn roughly
          Asafotida : a generous pinch
          Vegetable Oil : 1 Tbsp
          Turmeric Powder : 1 tsp
          Salt : As required

Methodology

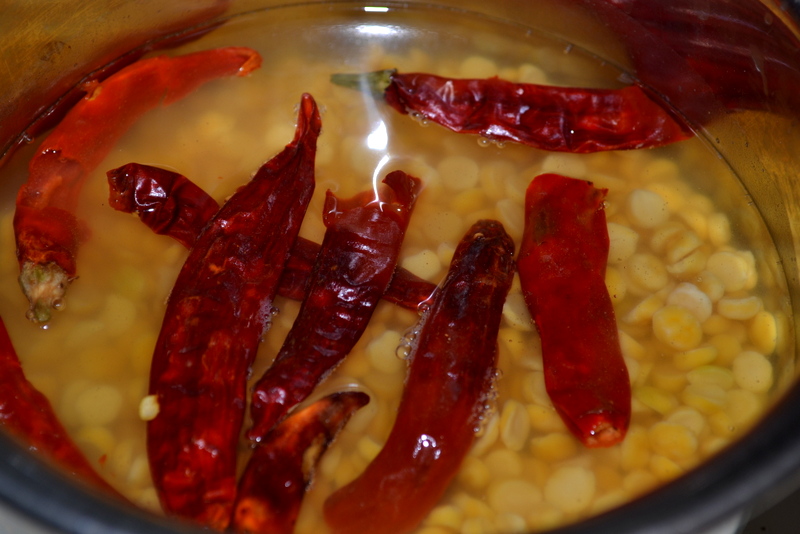
1. In a large enough bowl, place the Channa Dal and red chilies and pour enough cold water to cover the dal by over an inch. Allow them to soak together for a minimum of two hours.


DSC_0073

2. Drain the soaked dal and chilies and grind them together with salt and asafoetida to a coarse consistency. Take care to not grind it to a fine paste. Sometimes, mixies/blenders available in the US find it an uphill task to grind the dal. In such cases sprinkle water sparingly as and when the blender struggles with the load.


DSC_0078

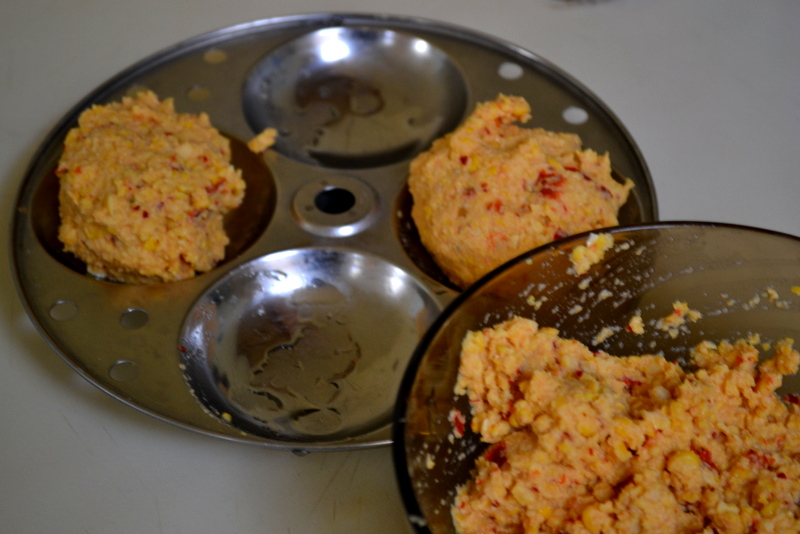
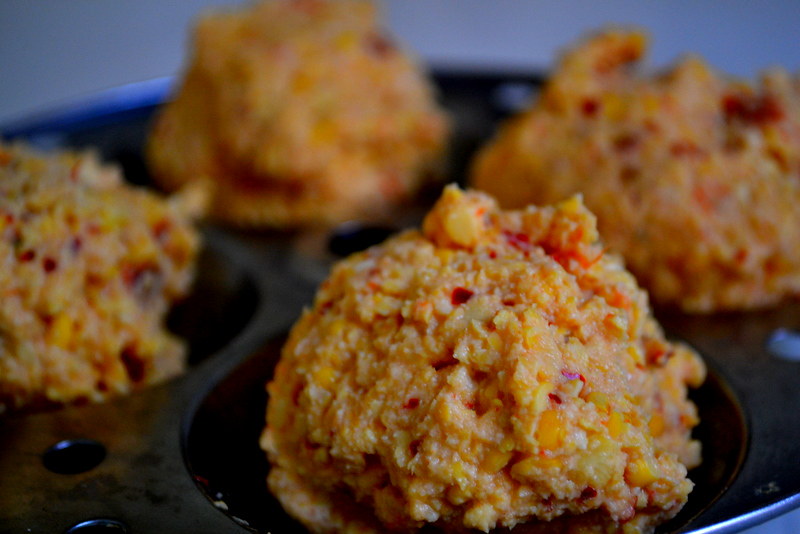
3. Grease an idli-plate and steam balls of the freshly ground paste for up to fifteen minutes or until they feel firm to touch. Carefully remove them from the idli-plate and allow them to cool completely. I usually throw the steamed balls into the freezer for a good ten minutes.


DSC_0080

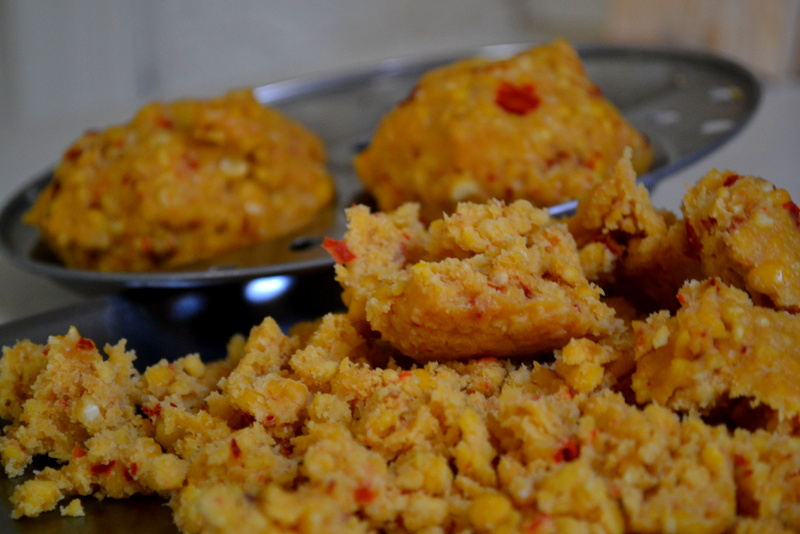
4. Using a greased hand, coarsely crumble the steamed dal balls to obtain the usili. If the balls have cooled completely, the usili will be less sticky (and more crumbly) and your hands would be burn-free (Trust me. Been there, done that).  


DSC_0102

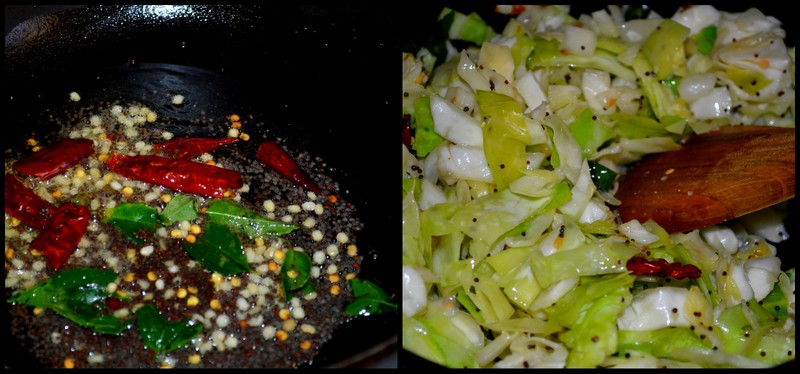
5. In a deep pan, heat the oil and throw in the seasoning items one by one. Once the mustard sizzles, add the shredded cabbage, some salt and the turmeric powder. Sauté the cabbage on medium heat, until it starts to give out its inherent water and cooks completely.


Cabbage Paruppu Usilli

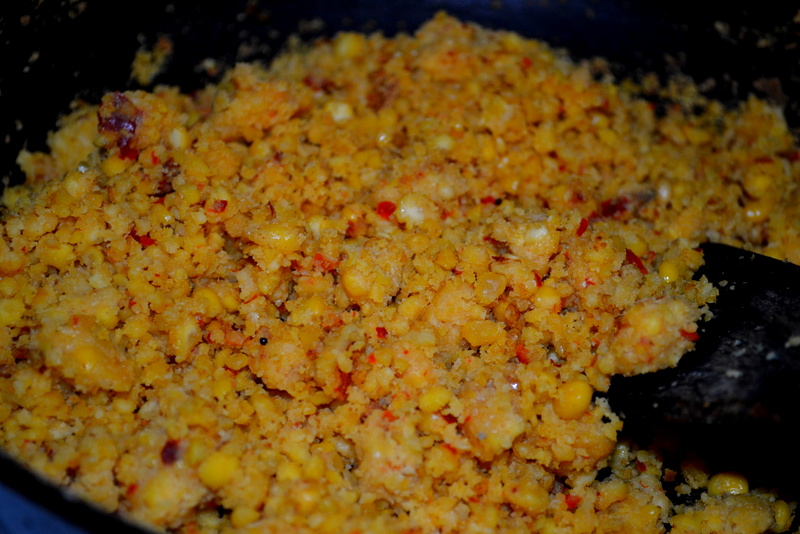
6. In a separate pan, add about a teaspoon of oil and once it is heated, transfer the crumbled usili into the pan. On a low heat fry the usili until it reaches the desired level of crispness. I usually fry it until I see some of the dal-bits taking on a reddish-brown hue.


DSC_0108

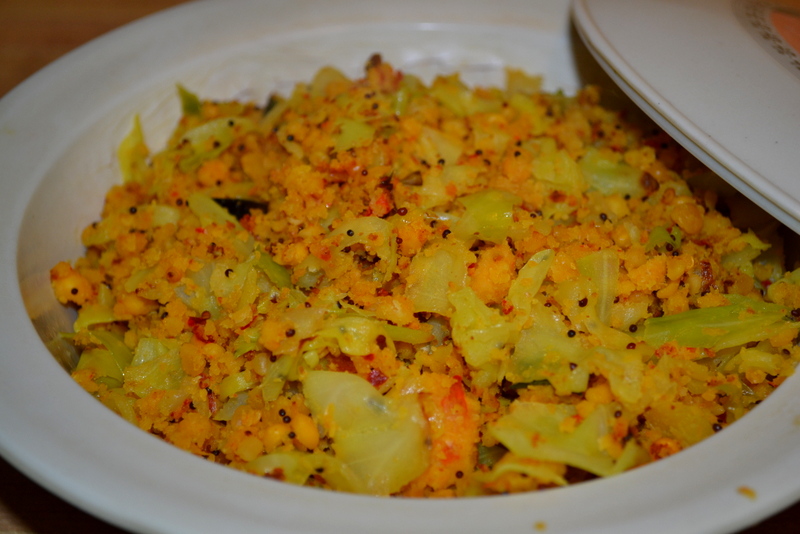
7. Transfer the cooked cabbage into the fried usili and mix them together to bring them to a uniform temperature. Serve hot with rice and ghee!   


DSC_0113
    
Paruppu Usili is the typical comfort food for me. I make it whenever I feel like eating something that reminds me of the huge banana-leaf lunches back home. To keep my interest in the dish at a constant-high, I usually experiment with the vegetables that go into the usili. Broccoli, like I said before, is an all-time favorite. I have also tried it with cauliflower, beans and, more recently, even asparagus. I think I would leave the beans version to the experts. To me, the two don't create sufficient magic when I make it at home, but eating it at a wedding lunch is a totally different experience. 

I love eating the usili with Paruppu Rasam, but like I had mentioned in a previous post, the gold-standard combination for the Paruppu Usili is undoubtedly the MoreKuzhambu. The very image of the two together puts to shame some of the best Kollywood-Couples, both on-screen and off-screen. Such Salivation! Much Finger-Licking!

Monday, April 28, 2014

Gobhi Achaari - Cauliflower in Pickled Goodness!


It has been quite a hiatus. Some even thought that the blog was dead. Even I was close to believing that this page would not see daylight again. With PhD coursework, different groups of friends, research, exams, papers, frustratingly-refusing-to-work experiments and scheduled cooking times, little time trickles down for leisure activities, and that time too goes away in gossips, mind-numbing TV series marathons and unconscious internet browsing. But, no! Today, I decided that I should give this another try. A few things CAN be put on the back-burner for sometime, literally and otherwise. So when I found that the gym was closed for the evening, I came running back to this baby of mine.

This dish that we are going to deal with today was born when I was frantically looking for vegetarian replacements for my chicken-demanding stomach during a period of Vratha. Achaari Murgh is a specialty of Uttar Pradesh, with bite sized chicken pieces cooked in a gravy flavored with spices that usually go into the making of many pickles (Achaar). Hence the name. Being Murgh-restricted for the time-being, I decided to substitute it with cauliflower florets and Tadaaaa... Out came this dish. I must say that I have made it only once, not because it was not great tasting, which it was. It has more to do with the fact that I have never let myself to the level of being this murgh-restricted ever since. But if the right conditions present themselves again, I would not hesitate to whip out this recipe, which is why it goes on this blog of mine. Now, onto the dish.

GOBHI ACHAARI (Serves 3-4) 
Set-up Time : 15 minutes
Experiment Run-Time : 30 minutes

The Shopping List

          Set 1: At the Chopping Board
          Onion : 1 medium, finely chopped
          Cauliflower : I medium-large, separated into florets
          Ginger : 1 1/2 inch, finely chopped
          Garlic : 5-6 pods, minced
          Green Chilies : 2, cut


          Set 2: For the Special Touch
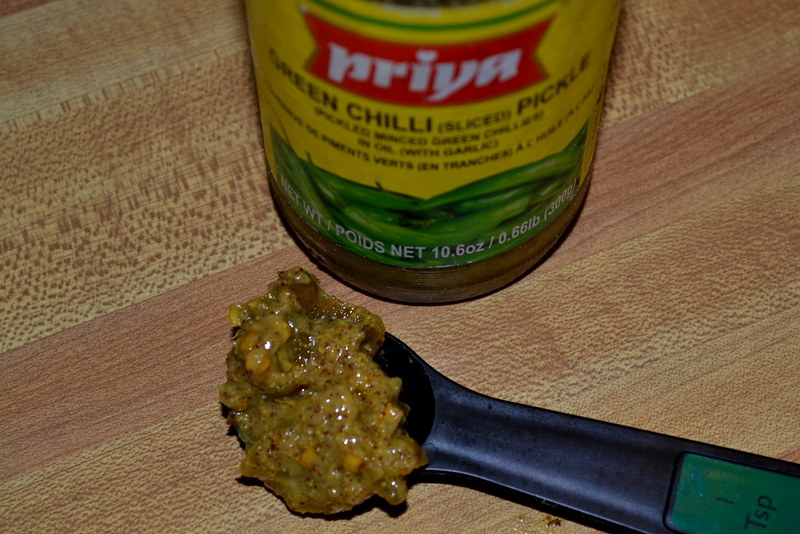
          Priya Green Chili Pickle : 1 Tbsp (Any brand for that fact)
          Thick Yogurt : 1/2 Cup
          Fresh Coriander Leaves : For Garnishing

DSC_0617
Priya Chili Pickle
          Set 3: Seasoning
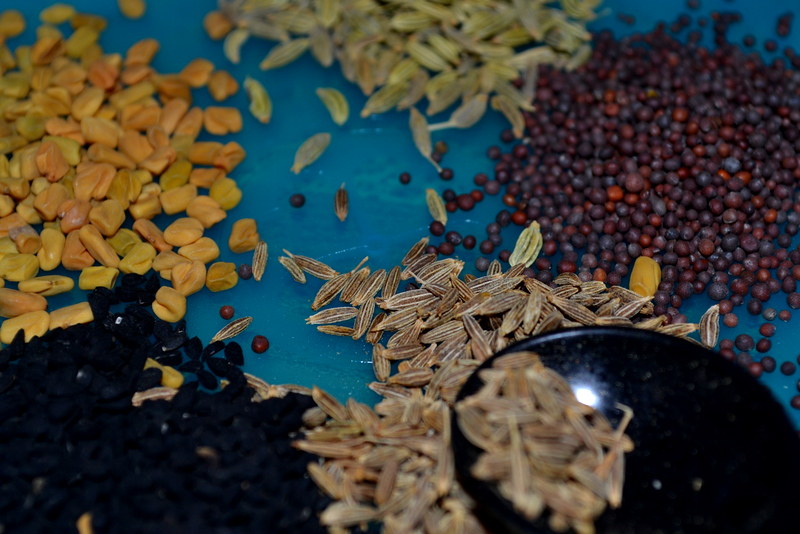
          Mustard Seeds : 1 tsp
          Cumin Seeds : 1 tsp
          Fenugreek Seeds : 1/2 tsp
          Nigella (onion) seeds : 1 tsp
          Fennel Seeds : 1 tsp
          Asafoetida : a generous pinch
          Mustard Oil : 1 Tbsp
          Salt : As required

          Set 4: Powders Galore
          Chili Powder : 1 tsp
          Coriander Powder : 1 1/2 tsp
          Turmeric Powder : 1/4 tsp

Methodology

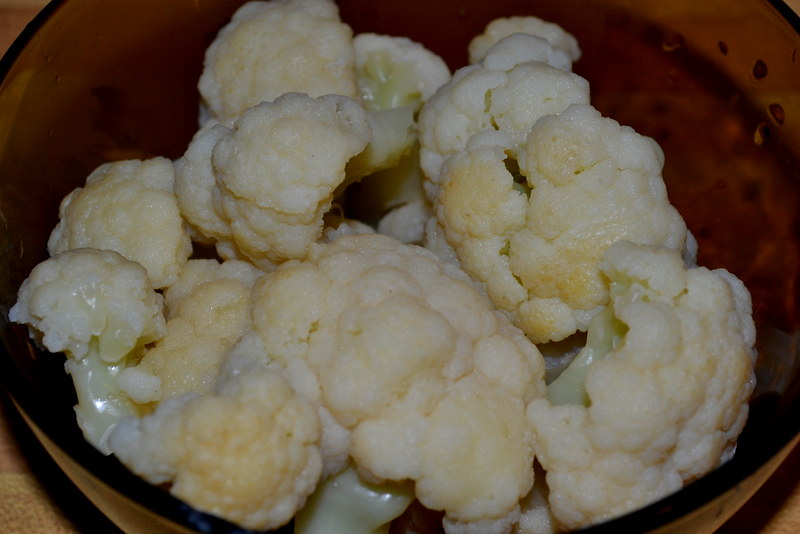
1. Once the Cauliflower is separated into pieces, place the florets into a pot of water with a little turmeric powder and salt. Bring the water to a gentle boil and continue until the florets are slightly cooked (about a quarter done). This kills any worms that cauliflowers are notorious for. Rinse the florets under cold water and keep aside.

You may obviously skip this step if using frozen florets.  Just make sure to thaw them in advance.

DSC_0607

2. In a frying pan, heat the mustard oil and tip in all the ingredients given in Set 3, saving the salt. These are the spices that make an Achaar what it is. Let the mustard start crackling and soon the other seeds will follow suit.

DSC_0604

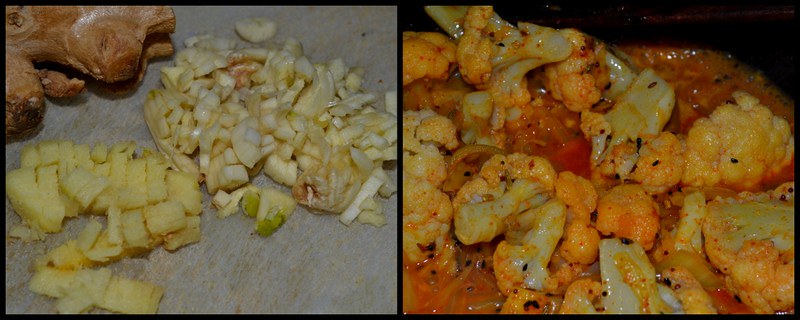
3. Throw in the onions and continue to sauté them until they become translucent. Follow them up with the garlic, ginger and green chilies. Once you get a whiff of the heady aroma, add the chili powder, coriander powder, salt and the cauliflower florets. You may pour in a little water to help with the cooking of the cauliflower. Cover and let the veggies cook on a low flame.


Aachari Gobhi1

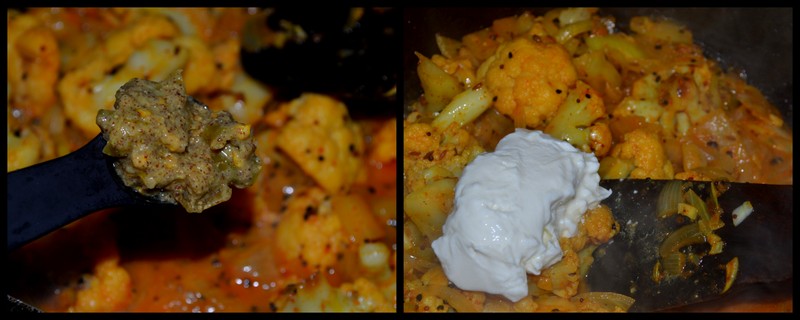
4. After about five minutes, the florets must be nearly done. It is time to add the yogurt and the tablespoon of chili pickle. Toss well to incorporate the ingredients. Once again cover the vessel and cook until the florets are tender when pierced with a fork. 


Aachari Gobhi

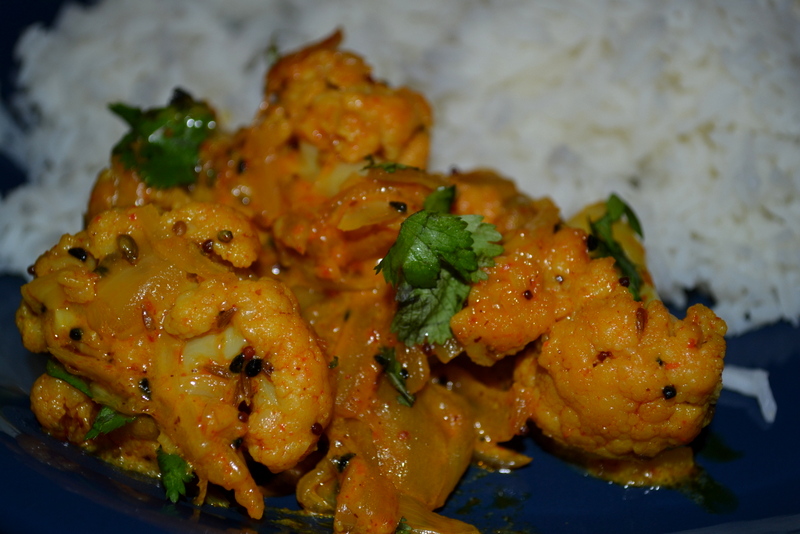
5. Transfer into a serving bowl and garnish with fresh coriander leaves. Serve it with some hot steamed rice and you will not regret the hard-work (or was it not that hard?)


DSC_0648
     
The Gobhi Achaari makes an excellent stuffing for rotis and tortilla wraps with some lettuce and tomatoes. The tart flavor imparted by the pickle is just what makes this dish stand out as a wrap condiment. The idea of adding the pickle really came out of nowhere - "Why not add some Achaar, we are making Achaari anyways?". And like always, I never have regretted listening to my otherwise-crazy-mind in the kitchen. A little twist here and a little fleck there, that's what makes cooking interesting and exciting. As for the crazy idea of caramelizing chicken in jaggery, I will keep it for some other time!