
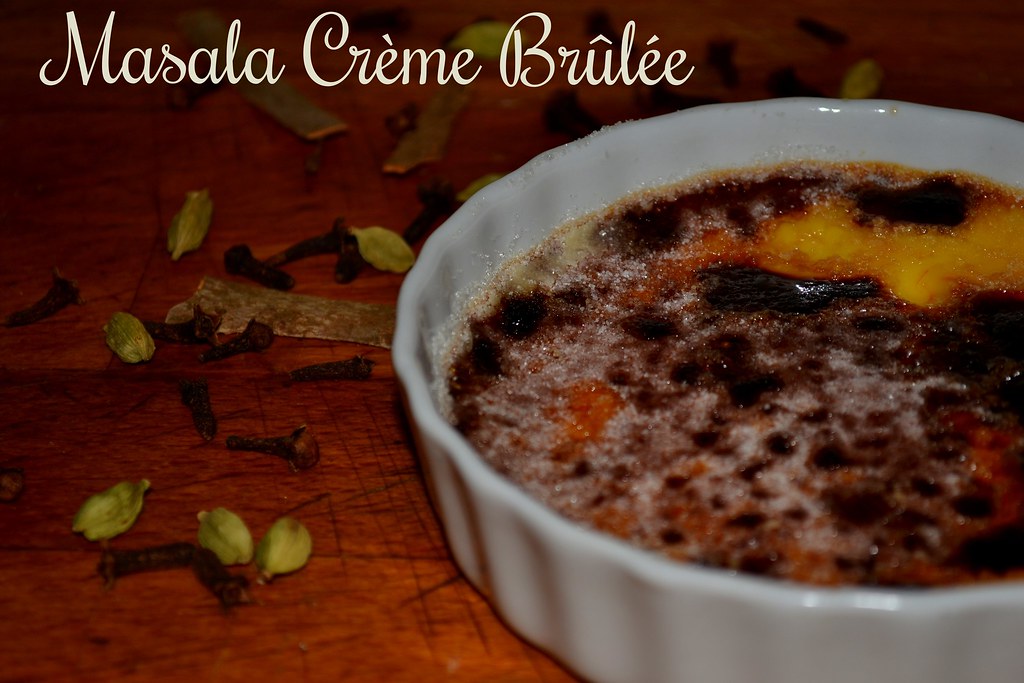
Have you ever tasted a Crème Brûlée? If you did, you would perfectly understand if I said that it tastes like a dream layered in sugar! Literally translating to 'Burnt Cream' in French, it is one of the several hallmarks of French Cuisine, known for its Crepes and Soufflés. This renowned French dessert may be simple in its appearance - looking like some over-burnt cheese pie, but serving it is an art, practiced to the tee in any French restaurant worthy of its name and origin.
I had my first proper Crème Brûlée experience at Le Petit Cochon Dingue, a cosy French Cafe located in the Lower-Town of Old Quebec. A dear friend, his wife and I were visiting Quebec City, Canada, and we decided to try this restaurant after a long tiring walk along the narrow streets of Quebec. Seeing it to be an authentic French place, I excitedly ordered the dessert without even bothering about the entrée. After some good ten minutes, the waitress brought a small ramekin full of something that looked like thick-set-yogurt strewn with sugar. She then whipped out a small gun-like device and in front of my eyes spewed fire on the dainty custard. Then with a smile, she said "Enjoy your dessert Monsieur!", and walked away as briskly as she had come.
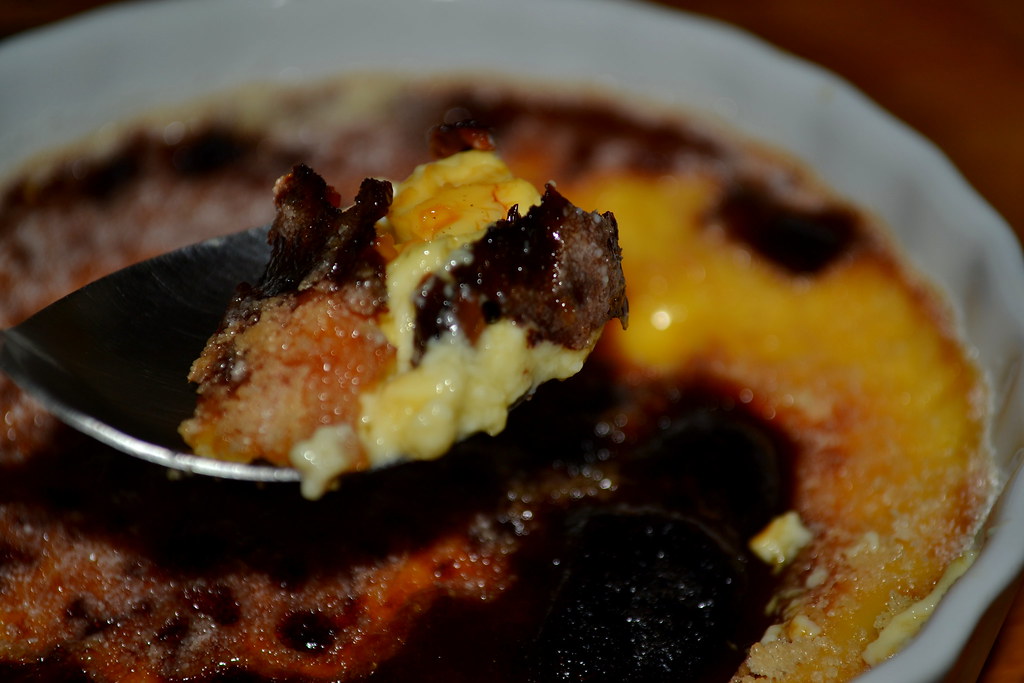
When I turned my eyes back to the ramekin, I saw that the sugar had been uniformly burnt and caramelized into a thin, shiny layer. With the tears of joy blurring my sight, I picked up my spoon, ready for attack. CRUNCH! My friend's spoon had somehow found its way into the ramekin, and the first piece was already on its way into his mouth! "Mmmmmmm..." He said. "Mmmmmm..." Not wanting to waste a second longer, I quickly followed, and dug my spoon into the hardened caramel crust, cracking it open, and just gulped up some of the underlying custard with the shattered crust! "Mon Dieu! Magique!" Like I had said before - it tasted like a dream!
But today's post is not just about this French dream of mine, experienced in one of the most 'Frenched-up' regions outside France! It is also about the Indian in me, and the inborn Desi love for Payasams and Halwas, delicately spiced with the finest ingredients from the Malabar Coast. I figured that we whip up some Masala Crème Brûlée to celebrate both. French in its origins but Indian at its soul, the Masala Crème Brûlée was ironically inspired by the Chai Tea Latte from the Starbuck's franchise on my College Campus!
MASALA CRÈME BRÛLÉE (Serves 2)
Set-up Time : 10 minutes
Set-up Time : 10 minutes
Experiment Run-Time : 40 minutes
The Shopping List
Set 1: For the Custard
Heavy Cream : 1 Cup
Egg Yolks : 2 Large
Sugar : 4 Tbsp
Vanilla Essence : 1 Tbsp
Set 2: Spice Rack
Cardamom : 2
Cinnamon : 1 inch stick
Cloves : 2-3
Set 3: Caramel Crust
Sugar : 1.5 tbsp
Methodology

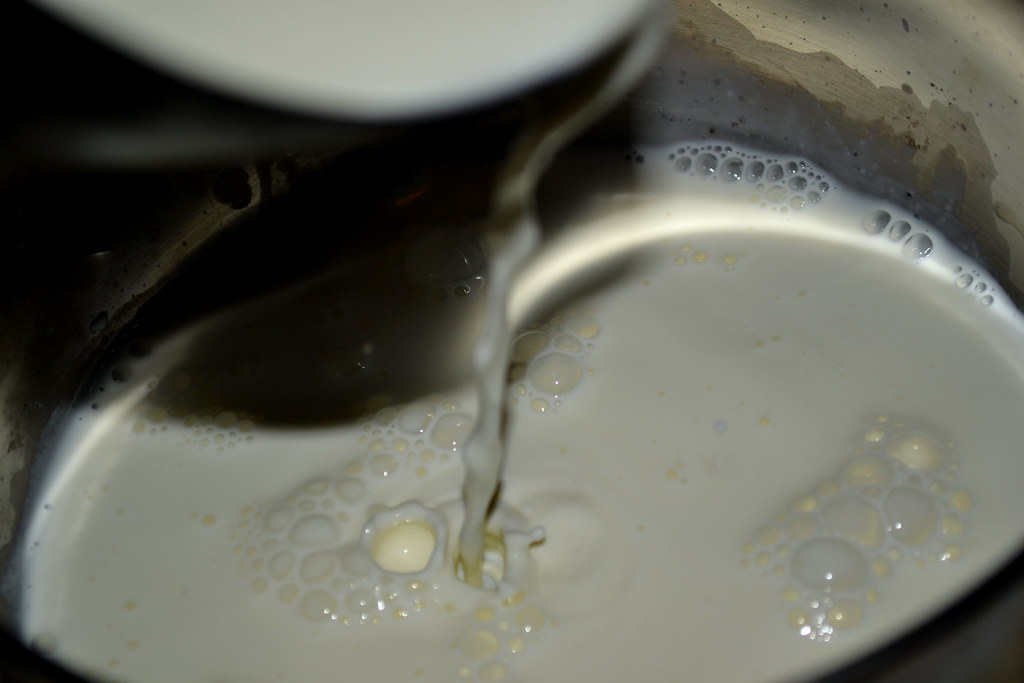
3. In a thick-bottomed pan, add the cream and heat it up.


5. Add the tempered yolk-mixture back into the hot cream and mix them well. Add the Vanilla and divide the mixture between two ramekins. (I had picked up these dainty ramekins at Kroger, at very reasonable prices that too.)
6. Place the ramekins in a baking pan and fill the pan with hot water until it reaches half-way up the sides of the ramekins. This arrangement is called a Bain-Marie, and it ensures moist texture and even cooking within the oven.
11. Allow the Crème Brûlée to come to room temperature before the final attack with a good friend, spouse, parent or sibling.

Heavy Cream : 1 Cup
Egg Yolks : 2 Large
Sugar : 4 Tbsp
Vanilla Essence : 1 Tbsp
Set 2: Spice Rack
Cardamom : 2
Cinnamon : 1 inch stick
Cloves : 2-3
Set 3: Caramel Crust
Sugar : 1.5 tbsp
Methodology
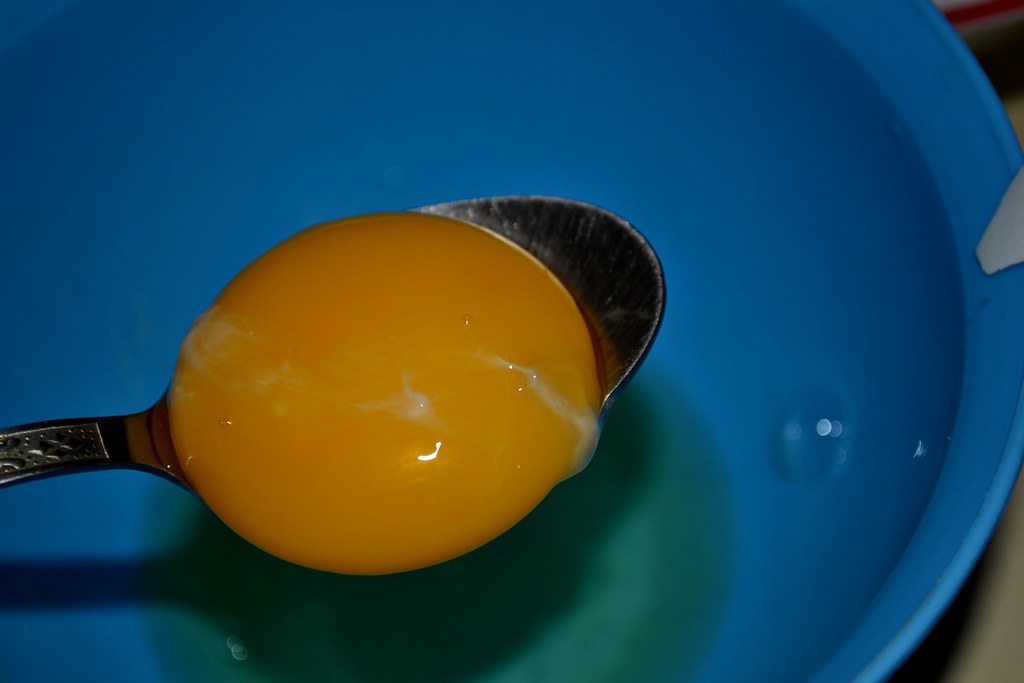
1. Carefully break the two eggs into a bowl and separate the yolks into a dry mixing bowl. There are several easy methods to separate the yolk, depending on the final product. Meringues and Macarons require pure egg whites, with not even a speck of the yolk, so the separation has to be super meticulous. Custards, Cakes, Ice-Creams, and Crème Brûlée are not as stringent in their yolk requirements, and a little white here and there does not spell disaster.This time, I simply used a spoon to lift out the thick yolks away from the whites, with considerable ease and success.
A little practice goes a long way here. I am now an expert at separating eggs using spoons and sometimes with just the palsm of my hands, using the gaps between the fingers as a sieve to let the more fluid white flow out.
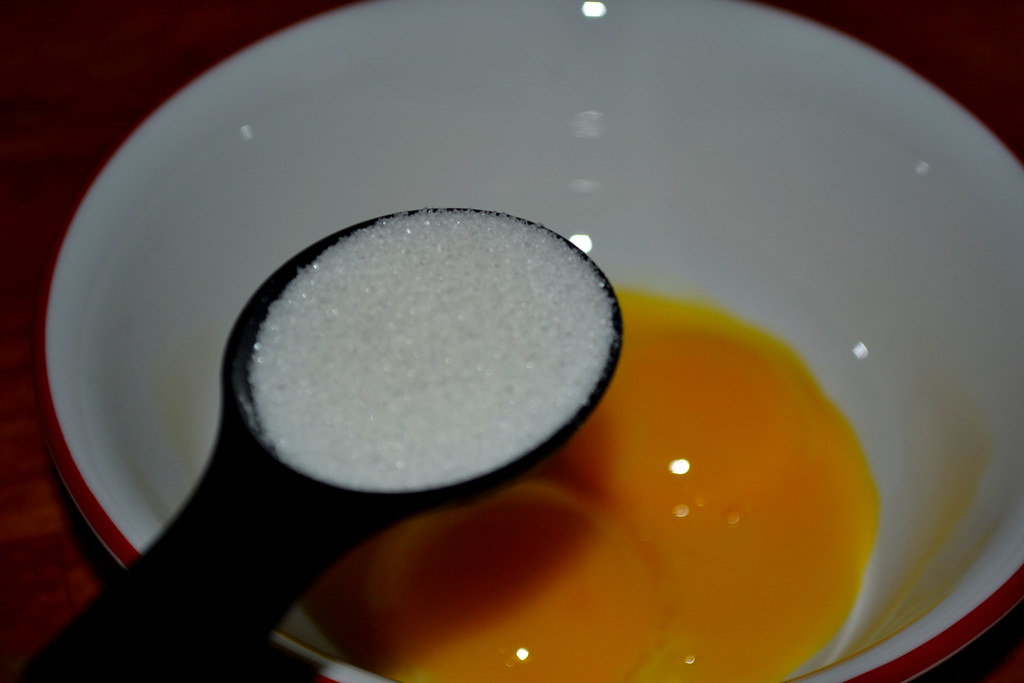
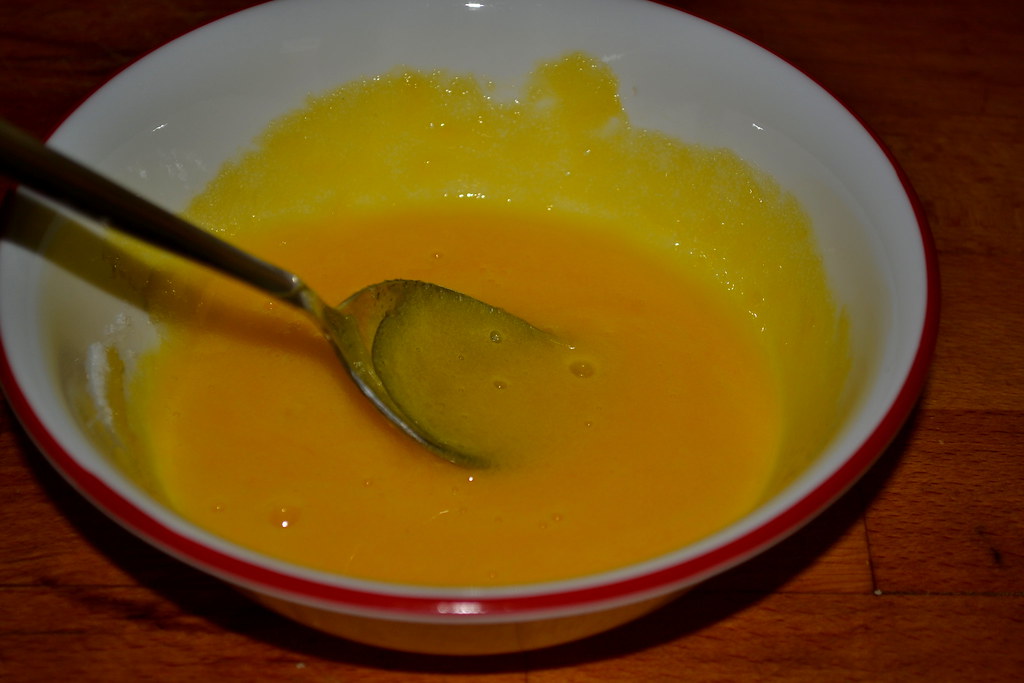
2. Add sugar to the egg yolks and whip them at medium speed until the sugar is completely dissolved in the yolks, resulting in a smooth pale yellow mixture.
I skipped using a whisk of any sort and instead, used a fork to whip them together.
3. In a thick-bottomed pan, add the cream and heat it up.
Throw in the spices from Set 2, and bring the cream to a simmer.
Keep an eye on the cream at all times and take it off the heat once it starts simmering. Else, all hell breaks lose and you might rather start again.
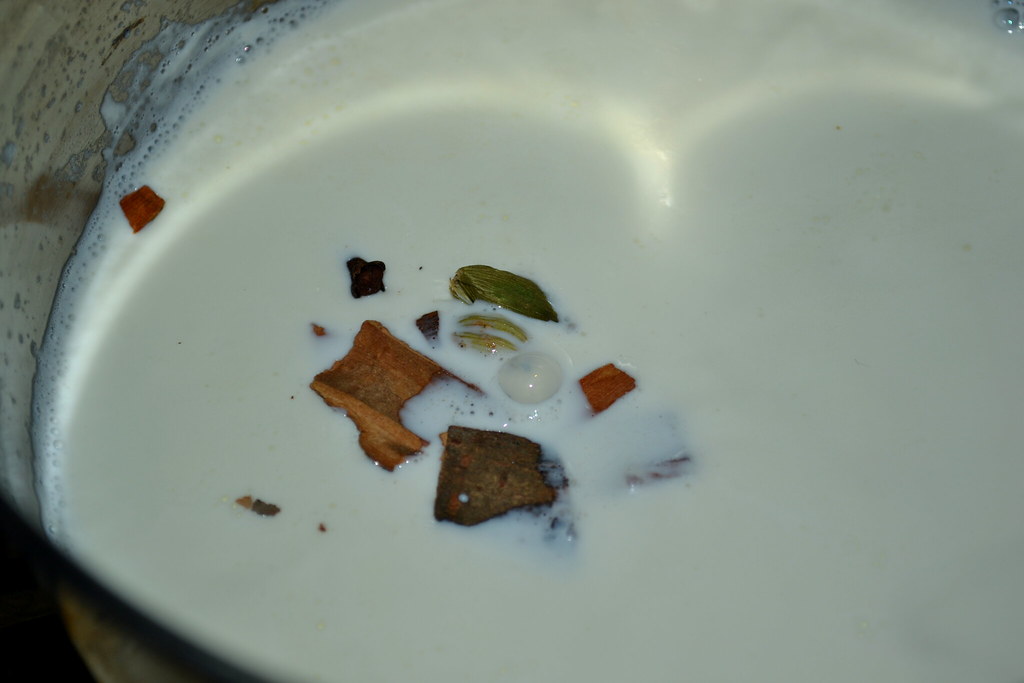
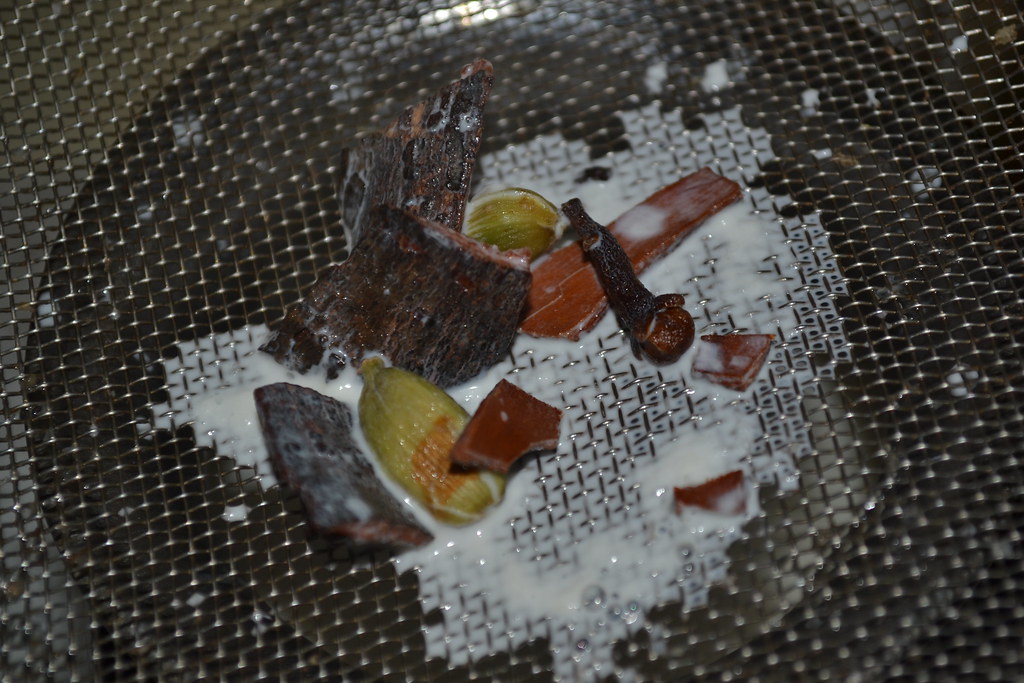
4. Discard the whole spices using a sieve. (It is so sad to throw away these beauties, but their duties have all been done!)
Use some of the hot cream to temper the yolks by pouring in a few tablespoons of the cream into the yolk-mixture while constantly beating it. This prevents the yolks from instantly curdling when adding them into the hot cream.
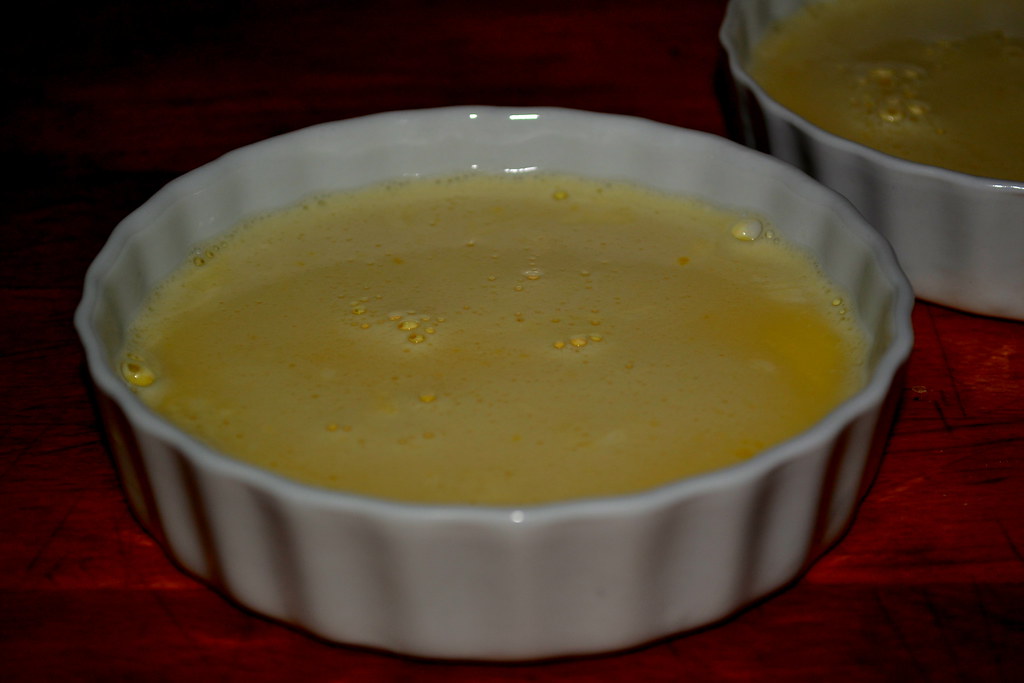
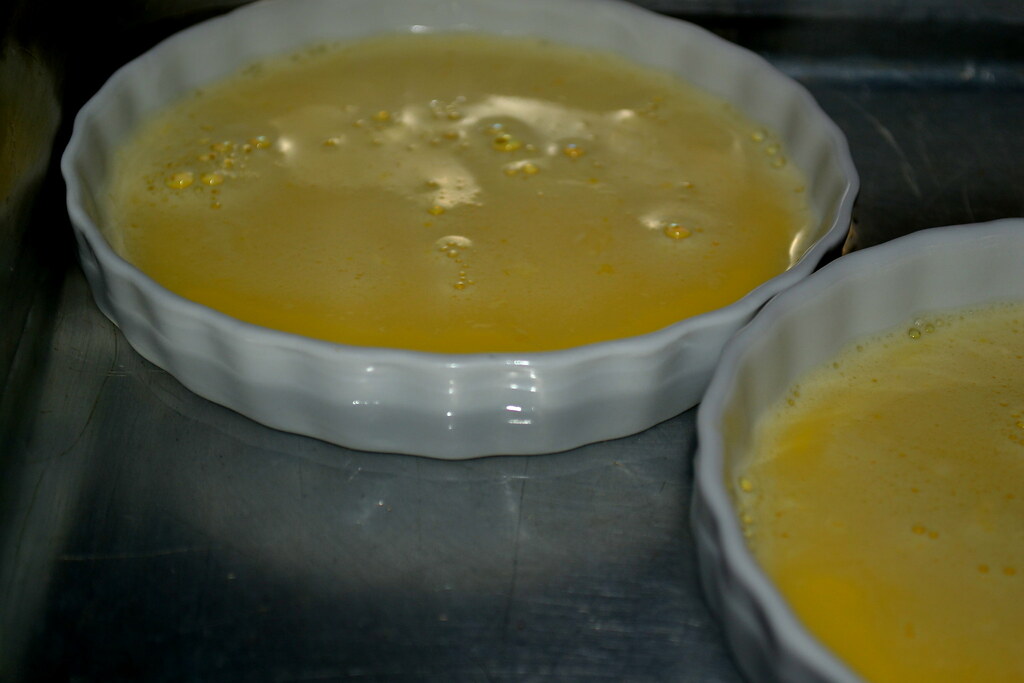
5. Add the tempered yolk-mixture back into the hot cream and mix them well. Add the Vanilla and divide the mixture between two ramekins. (I had picked up these dainty ramekins at Kroger, at very reasonable prices that too.)
6. Place the ramekins in a baking pan and fill the pan with hot water until it reaches half-way up the sides of the ramekins. This arrangement is called a Bain-Marie, and it ensures moist texture and even cooking within the oven.
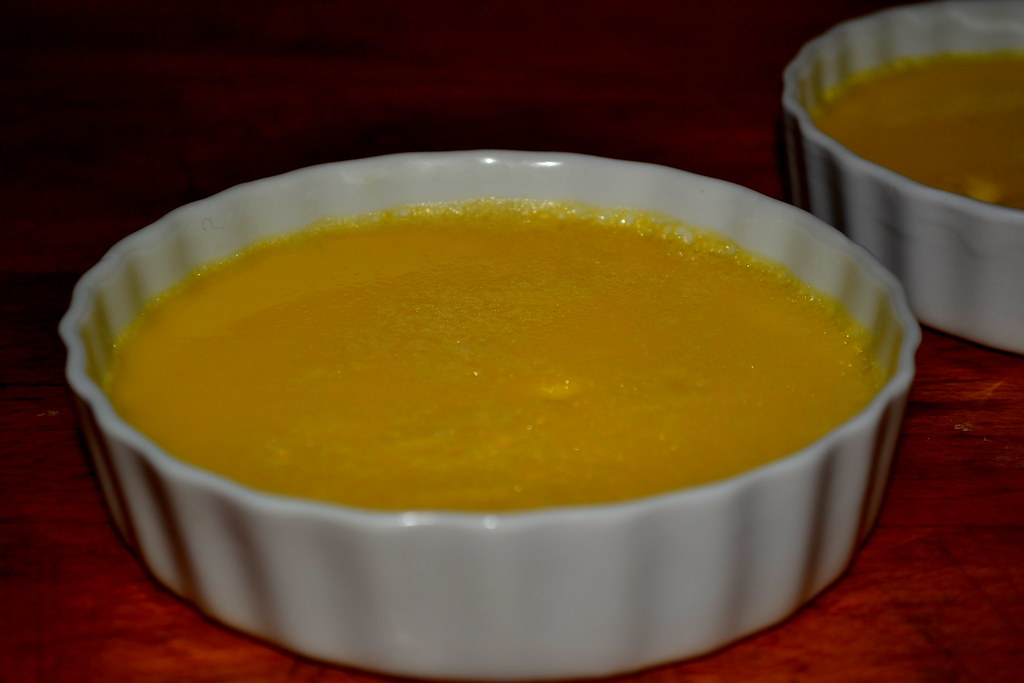
7. Pre-heat the oven to 320 °F and place the Bain-Marie with the custard ramekins into the oven for 30 minutes. The custard is done when the mixture is firm at the sides but a teeny-weeny bit wobbly at the center. Carefully, remove the ramekins from the Bain-Marie.
The custard, at this stage, is good enough to eat by iteslf!
The custard, at this stage, is good enough to eat by iteslf!
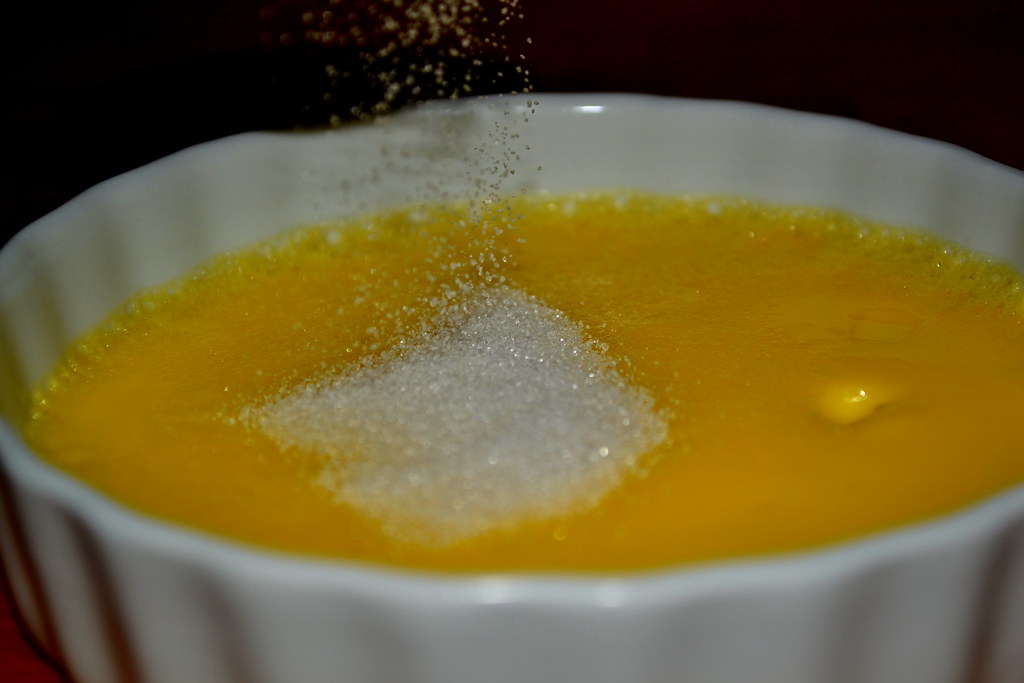
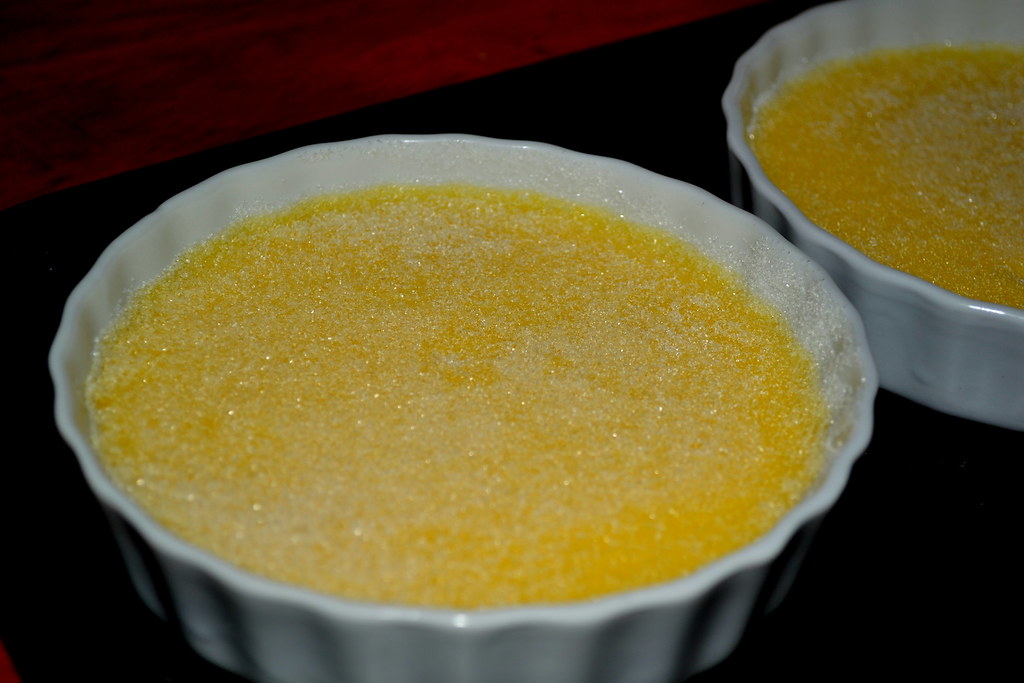
8. Sprinkle the sugar from Set 3 evenly over the two ramekins.
First tap the sugar around the ramekins as you hold it tilted slightly towards you. Turn the ramekins while tapping to ensure a thin even layer of sugar all over the custard's surface.
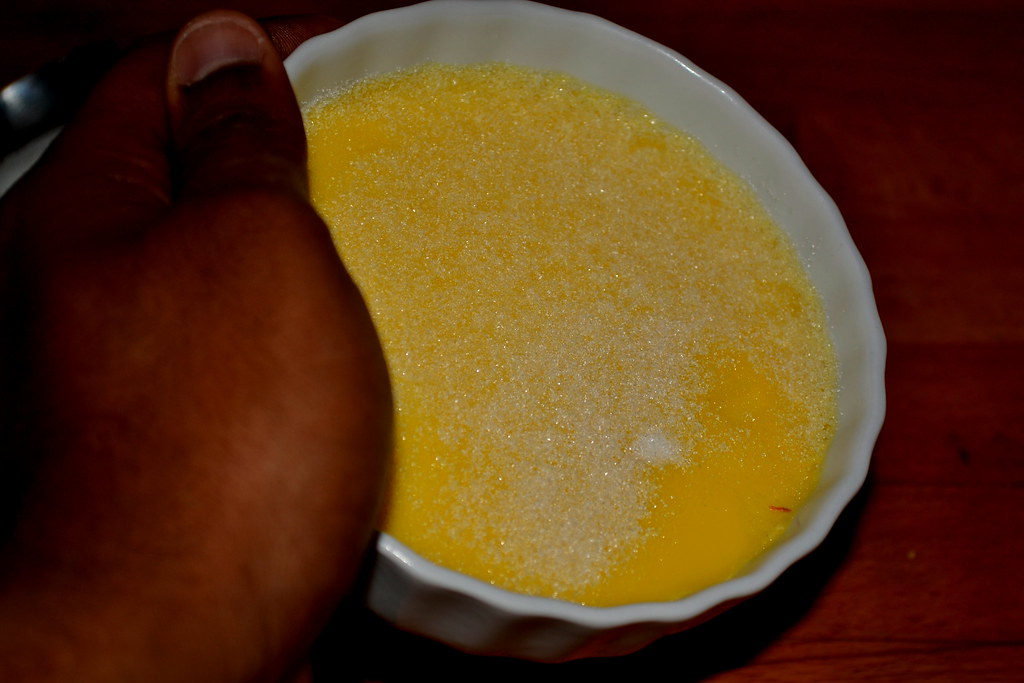
Now, tap off the excess sugar and return the ramekins to the baking pan without the water.
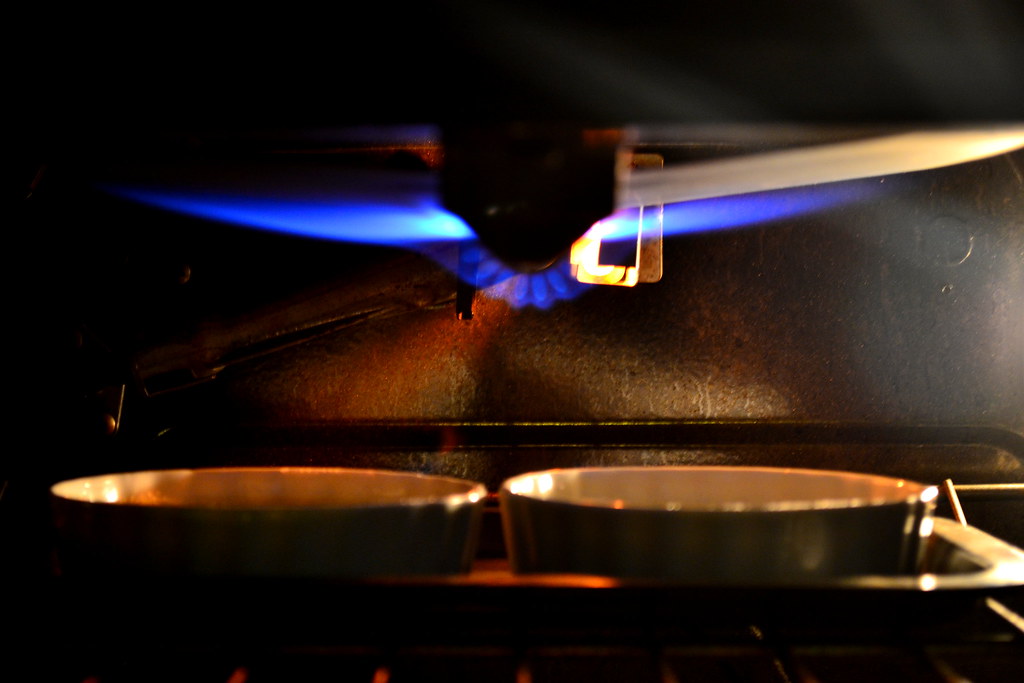
9. I did tell you that the waitress used a gun-like device to caramelize the sugar, but since not all of us happen to have a kitchen torch (which is the name that the device actually went by) at our reach, I resorted to a different method.
10 Place an oven rack as close to the top of the oven as possible and turn on the 'Broil' mode. Place the ramekins under the broiler and keep the oven door cracked open with the help of a wooden ladle. About 3-5 minutes should do the trick. Carefully, and I mean very carefully, take out the ramekins and you should see that the sugar has been beautifully caramelized.
The Masala Crème Brûlée was gone in two eye-blinks. Actually, one eye-blink, if you count just the first one and me! Each mouthful was an experience and each swallow, an un-quenching desire for more, until I had clean-wiped out one entire ramekin. I am sure going to try making some other fusion versions of this classic French dessert, but whether its soul will be as Desi as this, is to be seen! Until then, Au Revoir!
 |
| Come, take a bite! |
