
So, last week, I took up a sort of unofficial decision, that I would bake something new every weekend. It could be anything, from something as simple as a cookie to something as elaborate as a multi-tier cake. Yes, it is going to be a hassle, and yes it is going to take a toll on my diet, but hey! Why are friends there for? One Whatsapp message and you have a clean tray 30 minutes later. So I get the double satisfaction of baking an exciting dish and still keeping to the limits of my latest diet-fad.
Last Saturday, I went to bed at 4:30 in the morning and got up at 9:30. Having no mood to go to the university, I decided that it would be the ideal time to bake, as none of my room-mates were at home either. A quick scroll through some famous and not-so-famous cooking sites, and presto, project for the day - Meringues. They are similar to our Thoothukudi Macaroons without the cashews, with a uniform crispness throughout, and are an integral part of French and Swiss cuisine. For around half an hour, I was carried off by the chemistry behind meringue formation and totally forgot that I was looking to cook a dish and not teach advanced courses on protein denaturing and stabilization. Nevertheless, it did not take me too long to notice that in each of these blogs, the notes/tips following the recipes were larger than the recipes themselves. The list of do's and don't's, common mistakes and suggestions to volumize the egg-whites are long enough to fill separate chapters. But again, what dare discourages an ardent experimenting cook? None but the self!
At the end of the day, after an hour of egg-beating and piping out pretty patterns and another two hours of baking, I had around 90 meringues on hand, half of them vanilla flavored and the rest mocha flavored. Three hours later, they were gone, equally shared between seven eager tummies! And it was not hard at all!
VANILLA/MOCHA MERINGUES (serves 7-8)
Set-up Time : 45 minutes
Methodology
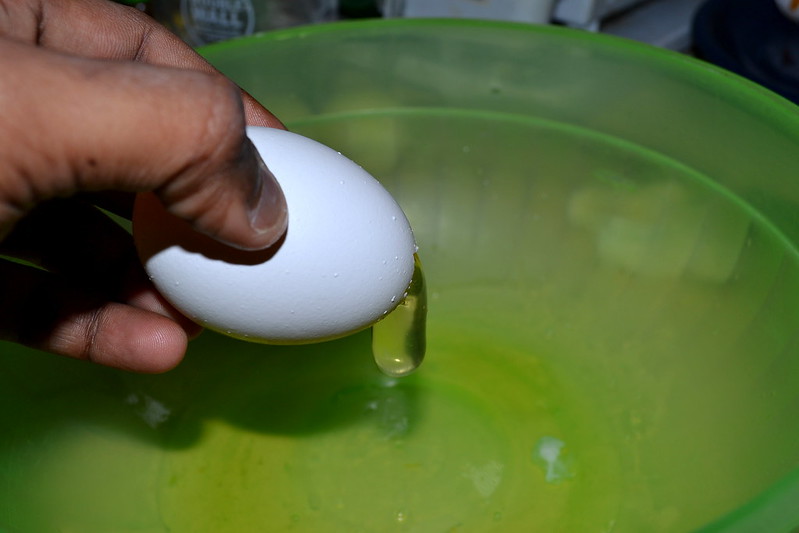
1. The first and the most important step in making Meringues is to get pristine egg-whites. Not a drop of yellow yolk. Chemically, the fats in the yolk hinder the formation of stiff peaks. Therefore, the greatest care is used to obtain the whites. I usually crack a small hole on the top end of the egg and pour out the whites gently, retaining the yolk within the shell. Sometimes, I break the egg onto a plate and use an empty plastic bottle to suction out the yolk. Either way, make sure you get only the whites of the four eggs into a large mixing bowl.
2. Add the salt to the egg whites and start to whisk the whites with an electric beater at medium speed. The salt helps to stabilize the peak formation. Many people use cream of tartar or vinegar for the same purpose but that may give a funny taste to the meringues, so I stuck with salt. Continue to whist the whites until it forms soft foamy peaks. It usually takes about five minutes.
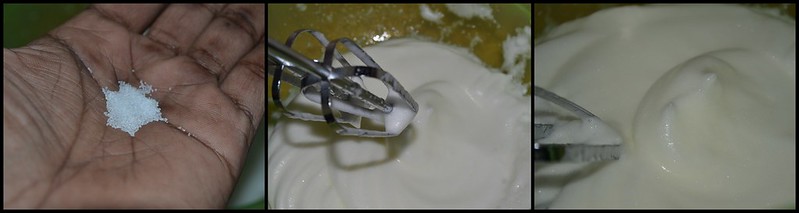
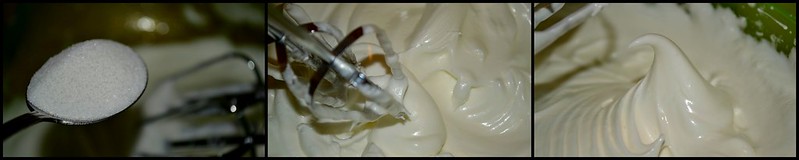
3. This step is a very good test to measure your patience. Once the foamy peaks are formed, start adding the sugar, one teaspoon at a time, whisking for about 10-15 seconds between each addition. You have to make sure every batch of sugar is completely dissolved before the next is added.
As you proceed you will see the mixture increasing in volume because of the air being incorporated by the whisking process. Continue till the entire 3/4 cup of sugar is done. Beat continuously until stiff peaks are formed when you remove the whisk from the batter.
4. Now add the vanilla essence and whisk for an additional 30 seconds. Divide the meringue into two equal portions.
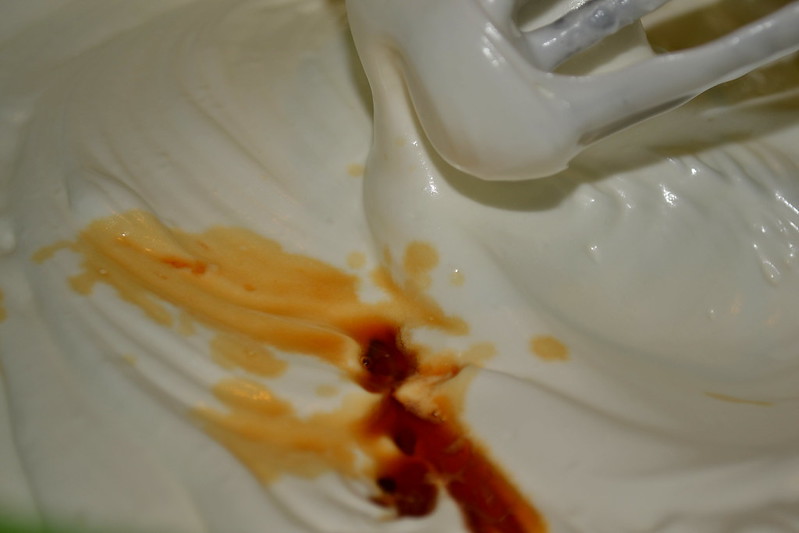
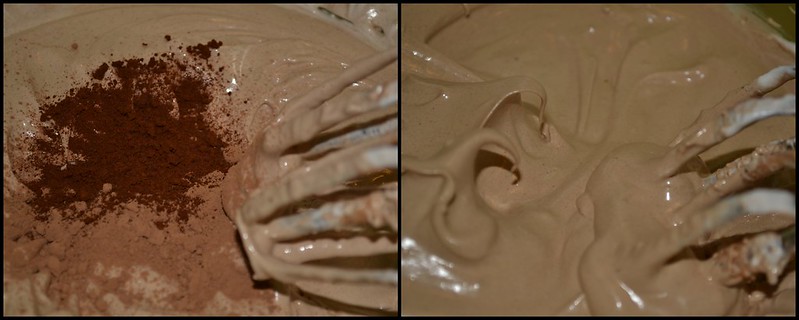
5. To the second portion of the meringue mixture, add the cocoa powder and coffee powder in small increments until they are well incorporated and stiff peaks are formed. At this stage, it is very tempting to take some meringue and taste it. Go ahead and indulge - a little raw egg whites did no one any harm!
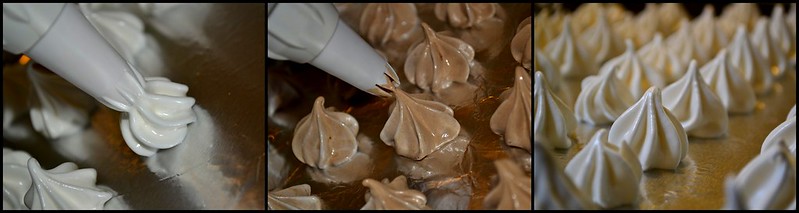
6. Now comes the next testing part. Line two baking trays with aluminum foil and grease it up with very little butter. Fill the meringue mixture into an icing cone or a small ziploc bag with a nipped tip. With the help of a star shaped nozzle, pipe out small meringues directly onto the tray. I used a cupcake decorating set gifted by a friend and reduced the mess substantially. Each tray could accommodate about 45 meringues.
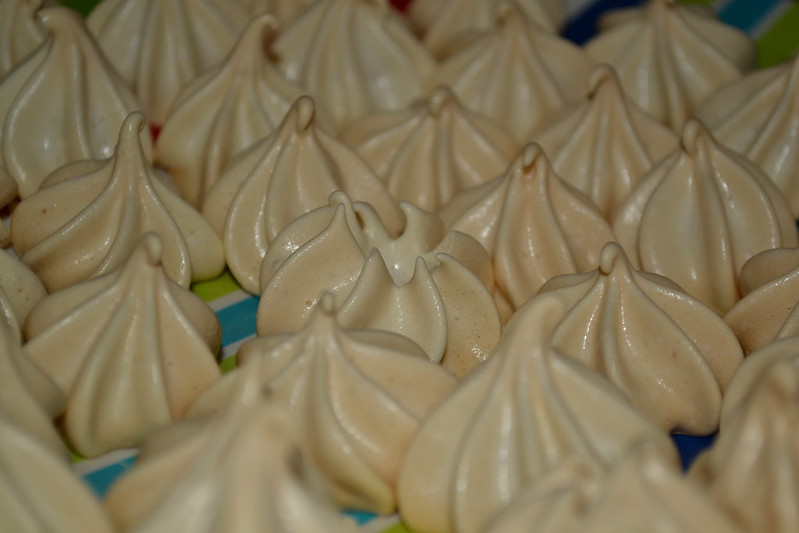
7. Preheat the oven to 200 °F and place the meringue trays into the oven. Bake undisturbed for 1.5 hours or until the meringues are hard to touch. I browned the white macaroons a little but try not to do so. They are supposed to remain as white when they come out as when they went into the oven.
8. Cool the muffins on a wire rack for fifteen minutes and carefully pick them off the tray. They are sticky little monsters and refuse to come off the baking trays without a little fight, but never give in.
9. Store them in airtight containers and serve with some hot chocolate for some evening fun!
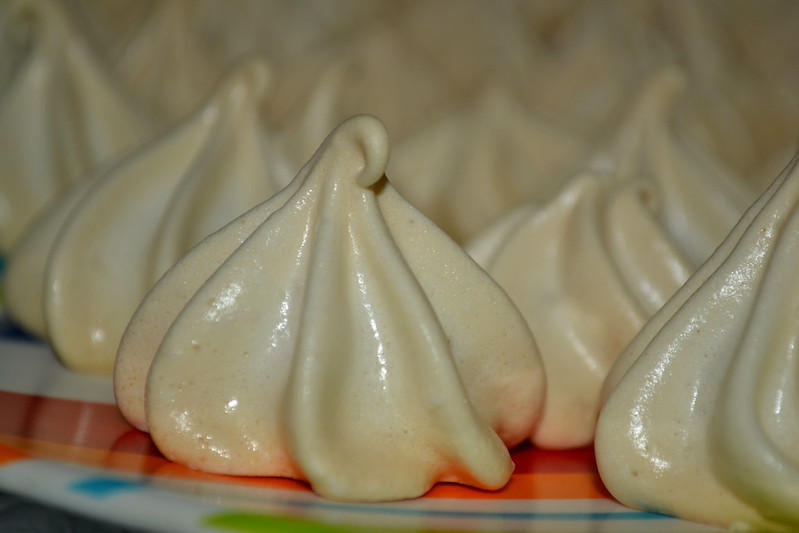
Airy, crunchy, and super yummy, the meringues were undoubtedly a success. So much so that I have already done sufficient research into other possible flavorings that may be incorporated. Care has to be taken so as to not use too much of oil-infused flavorings as they would impede the stiff peak formation. Right now, I have strawberry, pistachio, mango, dark chocolate and several other ideas in my little head. Research is also on to find the best recipe to duplicate the perfect Thoothukudi Macaroon. After all, it is just one step further than these meringues. But for now, you can try this super simple recipe and bask in the meringue's crunchiness, without going anywhere near Paris.
At the end of the day, after an hour of egg-beating and piping out pretty patterns and another two hours of baking, I had around 90 meringues on hand, half of them vanilla flavored and the rest mocha flavored. Three hours later, they were gone, equally shared between seven eager tummies! And it was not hard at all!
VANILLA/MOCHA MERINGUES (serves 7-8)
Set-up Time : 45 minutes
Experiment Run-Time : 2 hours
The Shopping List
Set 1: Meringue Base
Eggs : 4 large
Salt : A pinch
Confectioner's Sugar : 3/4 cup
Eggs : 4 large
Salt : A pinch
Confectioner's Sugar : 3/4 cup
Set 2: Flavoring
Vanilla Essence : 2 tsp
Cocoa Powder : 3 Tbsp, Dutch Processed
Nescafé Instant Coffee Powder : 1 Tbsp
Cocoa Powder : 3 Tbsp, Dutch Processed
Nescafé Instant Coffee Powder : 1 Tbsp
Methodology
1. The first and the most important step in making Meringues is to get pristine egg-whites. Not a drop of yellow yolk. Chemically, the fats in the yolk hinder the formation of stiff peaks. Therefore, the greatest care is used to obtain the whites. I usually crack a small hole on the top end of the egg and pour out the whites gently, retaining the yolk within the shell. Sometimes, I break the egg onto a plate and use an empty plastic bottle to suction out the yolk. Either way, make sure you get only the whites of the four eggs into a large mixing bowl.
As you proceed you will see the mixture increasing in volume because of the air being incorporated by the whisking process. Continue till the entire 3/4 cup of sugar is done. Beat continuously until stiff peaks are formed when you remove the whisk from the batter.
4. Now add the vanilla essence and whisk for an additional 30 seconds. Divide the meringue into two equal portions.
5. To the second portion of the meringue mixture, add the cocoa powder and coffee powder in small increments until they are well incorporated and stiff peaks are formed. At this stage, it is very tempting to take some meringue and taste it. Go ahead and indulge - a little raw egg whites did no one any harm!
6. Now comes the next testing part. Line two baking trays with aluminum foil and grease it up with very little butter. Fill the meringue mixture into an icing cone or a small ziploc bag with a nipped tip. With the help of a star shaped nozzle, pipe out small meringues directly onto the tray. I used a cupcake decorating set gifted by a friend and reduced the mess substantially. Each tray could accommodate about 45 meringues.
7. Preheat the oven to 200 °F and place the meringue trays into the oven. Bake undisturbed for 1.5 hours or until the meringues are hard to touch. I browned the white macaroons a little but try not to do so. They are supposed to remain as white when they come out as when they went into the oven.
8. Cool the muffins on a wire rack for fifteen minutes and carefully pick them off the tray. They are sticky little monsters and refuse to come off the baking trays without a little fight, but never give in.
9. Store them in airtight containers and serve with some hot chocolate for some evening fun!
Airy, crunchy, and super yummy, the meringues were undoubtedly a success. So much so that I have already done sufficient research into other possible flavorings that may be incorporated. Care has to be taken so as to not use too much of oil-infused flavorings as they would impede the stiff peak formation. Right now, I have strawberry, pistachio, mango, dark chocolate and several other ideas in my little head. Research is also on to find the best recipe to duplicate the perfect Thoothukudi Macaroon. After all, it is just one step further than these meringues. But for now, you can try this super simple recipe and bask in the meringue's crunchiness, without going anywhere near Paris.